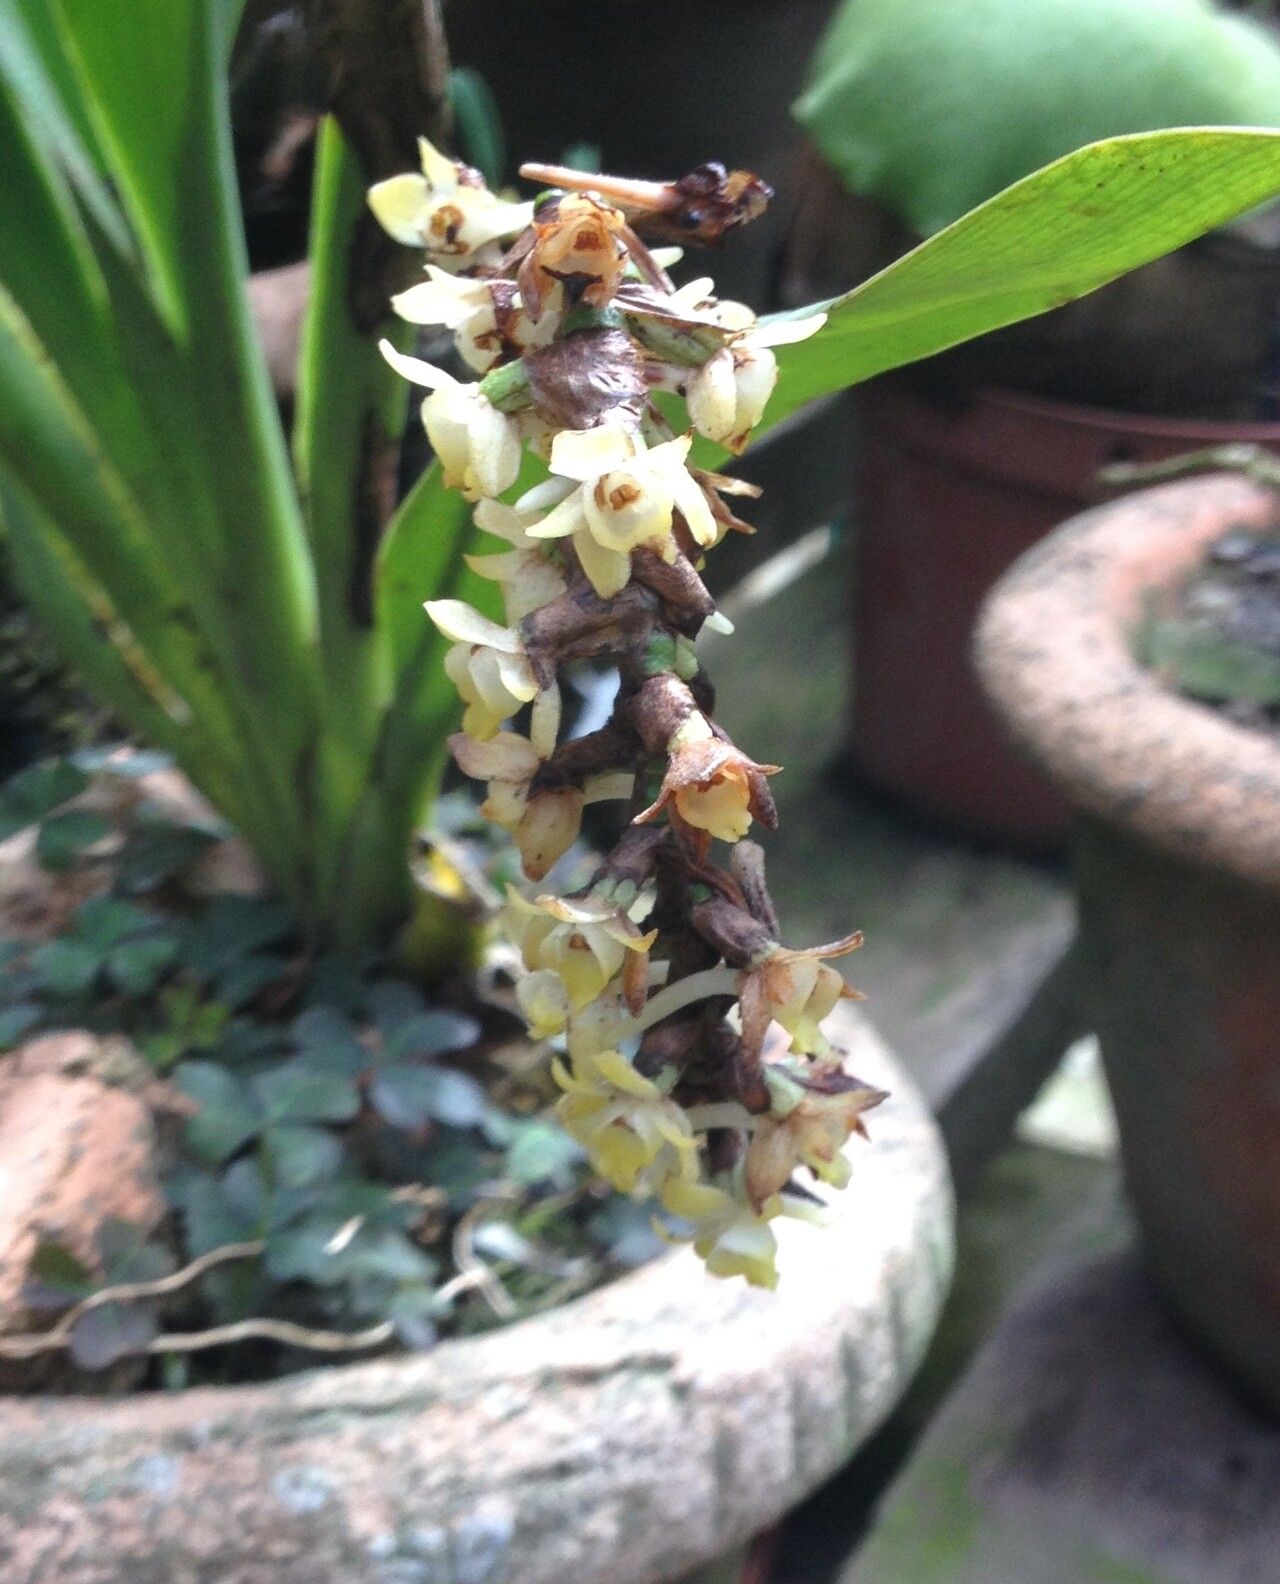
Hey there, fellow plant enthusiasts! It’s so lovely to have you join me today. We’re going to dive into the wonderfully satisfying world of propagating Lemurorchis madagascariensis. If you’ve ever seen one of these beauties, you know exactly what I mean by “appeal.” With their striking foliage and, if you’re lucky, delightful blooms, they bring a little bit of the exotic right into our homes. And the joy of watching a new life sprout from a piece of an existing plant? It’s truly something special.
Now, about difficulty. To be upfront, Lemurorchis madagascariensis can be a bit of a diva when it comes to propagation. It’s not impossible, mind you, but it’s definitely not a “chuck it in water and forget about it” kind of plant. Think of it as a rewarding challenge, something that requires a little extra care and attention. But trust me, when that first tiny root appears, you’ll feel like a garden wizard!
The Best Time to Start
For Lemurorchis madagascariensis, the sweet spot for starting new plants is typically late spring to early summer. This is when the plant is in its most vigorous growth phase. The days are getting longer, the temperatures are warming up, and there’s just an overall abundance of energy flowing through the plant. You’ll want to select a healthy, actively growing stem or leaf (depending on the method you choose) – no sad, wilting bits allowed!
Supplies You’ll Need
Gathering your tools beforehand makes the whole process smoother. Here’s what I like to have on hand:
- Sharp, sterile pruning shears or a clean craft knife: Precision is key to avoid damaging the parent plant and to get clean cuts.
- Rooting hormone (optional, but recommended): A good quality rooting powder or gel can significantly boost your success rates.
- Well-draining potting mix: A standard orchid mix or a blend of coco coir, perlite, and a bit of orchid bark works wonders. You want something airy.
- Small pots or propagation trays: Clean, small containers are best so the substrate doesn’t stay too wet.
- Clear plastic bags or a propagation dome: These create a humid microclimate, which is crucial for many tropical plants.
- Spray bottle: For misting.
- Small labels and a marker: So you don’t forget what you’ve propagated and when!
Propagation Methods
Lemurorchis madagascariensis can be propagated through a couple of reliable methods. I’ve had the most success with stem cuttings and, if you have a mature plant, division.
Stem Cuttings
This is my go-to method for new plant babies.
- Select your cutting: Look for a healthy shoot that has at least two or three nodes (the little bumps where leaves attach). Make a clean cut just below a node, using your sharp shears or knife.
- Prepare the cutting: Gently remove the lowest leaf or two. This exposes the nodes, which is where roots will form. If the leaves are quite large, you can even cut them in half to reduce water loss.
- Apply rooting hormone (if using): Dip the cut end into your rooting hormone, tapping off any excess.
- Plant your cutting: Fill your small pot with your pre-moistened potting mix. Make a hole in the center with your finger or a dibber, and gently insert the cutting, ensuring at least one node is buried beneath the surface. Firm the substrate gently around the stem.
- Create humidity: Water the pot lightly until you see some drainage. Then, cover the pot with a clear plastic bag (supported by stakes so it doesn’t touch the leaves) or place it in a propagation dome.
Division
If your Lemurorchis has grown into a nice clump with multiple pseudobulbs (those swollen stem bases), division is a fantastic way to get more plants.
- Gently remove from pot: Carefully tip your plant out of its container.
- Inspect the root ball: Gently tease away as much of the old potting mix as you can, without damaging the roots.
- Locate division points: Look for natural breaks between the pseudobulbs. You want each new section to have at least two or three healthy pseudobulbs and some good roots.
- Make the cut: Use a clean, sharp knife or pruners to carefully separate the sections. If there are very thick roots, you might need to cut through them, but try to minimize this.
- Pot up the divisions: Pot each division into its own small pot with fresh, well-draining mix. Treat them much like you would a fresh cutting, ensuring good moisture and humidity.
The “Secret Sauce” (Pro Tips)
Over the years, I’ve picked up a few tricks that really seem to make a difference. Here are a couple I swear by:
- Bottom heat is your friend: Lemurorchis love warmth, especially for root development. Placing your pots on a gentle seedling heat mat can dramatically speed up root formation. Just a few degrees warmer than room temperature is perfect.
- Don’t let those leaves touch the water (if you’re exploring water propagation): While some plants root easily in water, Lemurorchis can be prone to rot. If you do try water propagation (which I generally avoid for this one), ensure only the cut stem is submerged, not the leaves. A bit of slime or rot on the leaves is a bad sign.
Aftercare & Troubleshooting
Once your cutting or division is planted, the real patience game begins!
- Maintain humidity: Keep that plastic bag or dome on, and mist the inside lightly every few days if it seems dry. You’re aiming for consistently moist, but not soggy, conditions.
- Indirect light: Place your new propagations in a bright spot, but out of direct sunlight. They won’t have many roots, so direct sun can scorch them too easily.
- Check for roots: This is the exciting part! After a few weeks, you can gently tug on your cutting. If you feel resistance, roots are forming. You can also look for tiny roots peeking out of the drainage holes. Once roots are substantial, you can gradually wean it off the humidity dome, exposing it to normal room humidity over a week or two.
Now, what if things aren’t going as planned? The most common culprit is rot. You’ll see the stem or base turn mushy and brown, often with a foul odor. This usually means the substrate is too wet and there’s not enough air circulation.
- If you see rot: Act fast! Remove the affected cutting immediately and discard it. If it’s early stages and only a small part is affected, you can try to cut away the rotten bit with a sterile knife and re-pot in fresh, dry substrate. Ensure good airflow around the pot.
A Little Encouragement
Growing new plants is a journey, and sometimes it feels like it takes forever. Don’t get discouraged if your first attempt doesn’t yield a forest of new Lemurorchis. Be patient, observe your plant closely, and celebrate every tiny sign of progress. The reward of nurturing a new life and expanding your plant family is truly immense. Happy propagating!
Resource:
https://identify.plantnet.org/k-world-flora/species/Lemurorchis%20madagascariensis%20Kraenzl./data