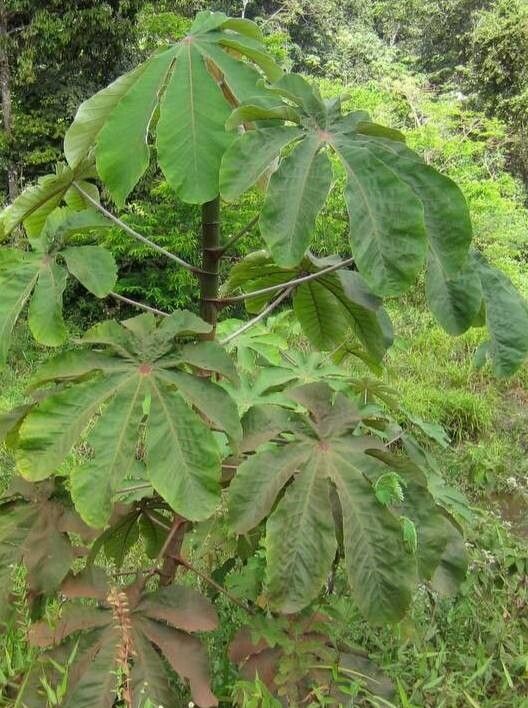
Well hello there! So, you’ve fallen for the Cecropia obtusifolia, haven’t you? I understand the pull. Those gorgeous, large, palmate leaves are simply stunning, and the way their branches reach out, creating such a tropical vibe, is just chef’s kiss. If you’re looking to bring that lushness into more corners of your garden or share the magic with friends, propagating Cecropia is a wonderfully rewarding endeavor. Now, for the big question: is it easy? I’d say Cecropia is moderately easy, especially for those who have dabbled in plant propagation before. There are a few tricks, but nothing a bit of observation and care can’t handle.
The Best Time to Start
For the most vigorous growth and the highest chance of success, spring and early summer are your best friends. This is when the plant is naturally ramping up its energy, pushing out new shoots and leaves. You want to take cuttings from actively growing stems, the ones that feel firm and not at all woody or brittle. Think of it as tapping into the plant’s prime energy reserves.
Supplies You’ll Need
To get your Cecropia propagation off to a flying start, gather these essentials:
- Sharp, clean pruning shears or a sterile knife: Crucial for making clean cuts.
- Rooting hormone (optional but recommended): Willow bark extract or commercial rooting powders can give cuttings a helpful boost.
- Well-draining potting mix: A mix of perlite, coco coir, and a bit of compost works wonders. You want it to hold some moisture but drain freely.
- Small pots or seed trays: Clean ones are key to preventing any nasties from taking hold.
- Plastic bags or a propagator lid: To create a humid environment for your cuttings.
- Watering can with a fine rose: For gentle watering.
- A warm spot with bright, indirect light: Sunlight that’s too harsh can scorch young cuttings.
- Bottom heat (optional but highly beneficial): A seedling heat mat can significantly speed up root development.
Propagation Methods
Cecropia obtusifolia is most commonly and successfully propagated from stem cuttings. It’s straightforward and yields great results.
Here’s how I do it:
- Select Your Cutting: Look for a healthy stem that has at least two to three sets of leaves. It should be about 6-10 inches long. Make your cut just below a leaf node (where a leaf attaches to the stem). This is where the magic happens for root development.
- Prepare the Cutting: Gently remove the lower leaves from the cutting, leaving only the top two or three exposed. If the remaining leaves are very large, I like to cut them in half horizontally. This reduces water loss from the leaves while still allowing for photosynthesis.
- Apply Rooting Hormone (Optional): Dip the cut end of the stem into your rooting hormone, tapping off any excess. This gives your cutting a little extra encouragement to get those roots going.
- Plant Your Cutting: Fill your small pot with your well-draining potting mix. Make a small hole in the center with your finger or a pencil. Insert the cut end of the Cecropia cutting into the hole, ensuring the leaf nodes are buried. Gently firm the soil around the stem.
- Water Gently: Water the soil thoroughly but gently, allowing excess water to drain away.
- Create Humidity: Cover the pot with a clear plastic bag, ensuring it doesn’t touch the leaves, or place it inside a propagator. This creates a humid microclimate essential for cuttings that haven’t yet developed roots.
- Provide the Right Environment: Place your pot in a warm location that receives bright, indirect light. If you have a seedling heat mat, now’s the time to use it. Aim for a consistent temperature around 70-75°F (21-24°C).
The “Secret Sauce” (Pro Tips)
These little bits of wisdom come from seeing what works (and what sometimes doesn’t!) over the years.
- Don’t let the leaves touch the water: If you’re using water propagation (which I find less reliable for Cecropia than soil, but it’s an option!), make sure the remaining leaves are well above the water line. Any submerged leaves will quickly rot, taking your cutting with them.
- Use bottom heat diligently: I cannot stress this enough for Cecropia. It mimics the warmth of the soil that encourages roots to form. Without it, the process can be significantly slower and more prone to failure. Think of it as a warm little bed for your cutting to get comfortable in.
- Be patient with callous formation: Sometimes, the cut end of a Cecropia cutting can look a little “mushy” or form a slight callous before roots appear. This is normal! It’s the plant preparing itself for root growth, not necessarily a sign of rot. Just keep an eye on it and ensure the soil isn’t waterlogged.
Aftercare & Troubleshooting
Once you see new growth appearing, that’s your cue that roots are forming! You can gently tug on the cutting; if there’s resistance, you’ve got roots.
- Acclimatize: Gradually remove the plastic bag or propagator lid over a few days. You want to slowly introduce your new baby plant to the drier ambient air.
- Transplanting: Once the roots have filled the pot (you’ll see them peeking out from the drainage holes), or when the plant has several new leaves, it’s time to pot it up into a slightly larger container with fresh potting mix.
- Common Issues:
- Rot: This is the most common enemy. It usually happens from overwatering or poor drainage. The stem will turn black and mushy. If you catch it early, you might be able to salvage a healthy section if you act fast.
- Wilting: If your cutting wilts significantly, it might be a sign of not enough humidity, not enough light, or simply that it hasn’t rooted yet. Make sure the humidity is good and it has adequate indirect light. Sometimes they just need time!
- No Growth: This can be frustrating, but it’s often a matter of patience. Ensure it’s warm enough and has sufficient light. If after several weeks with no sign of life, it’s probably time to try again.
Happy Propagating!
So there you have it! Propagating your beautiful Cecropia obtusifolia is a journey worth taking. Don’t be discouraged if your first few attempts aren’t perfect. Every gardener has had their share of cuttings that just didn’t make it. The key is to observe, learn, and keep trying. Enjoy the process of nurturing these new little plants – there’s a special kind of joy in watching them take root and grow. Happy gardening!
Resource:
https://identify.plantnet.org/k-world-flora/species/Cecropia%20obtusifolia%20Bertol./data