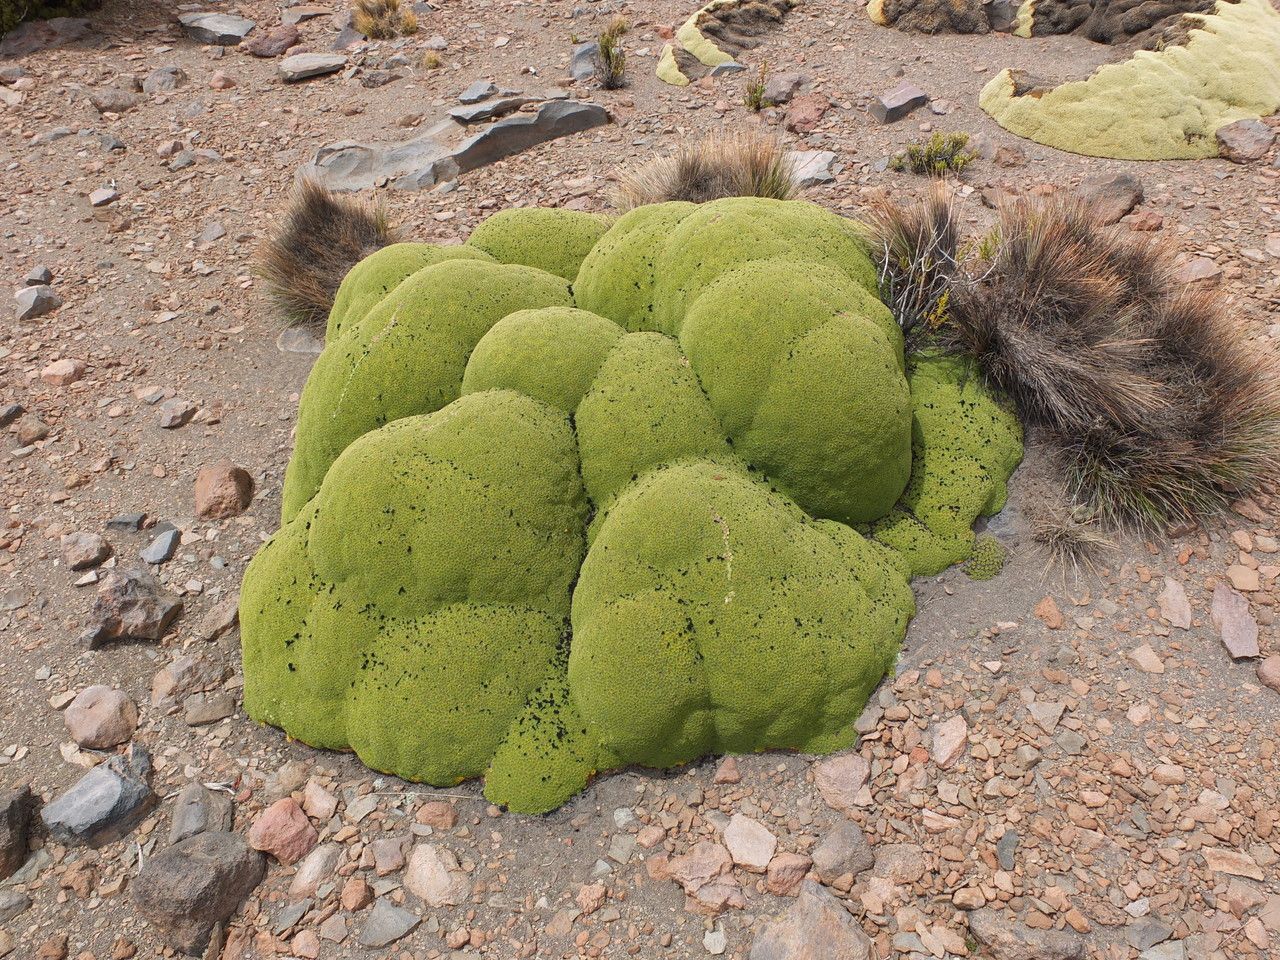
Oh, Azorella compacta! Also known as “creeping button grass” or the charming “Andean cushion plant,” this little beauty is a marvel. Its dense, cushion-like mounds, often dotted with tiny white flowers, bring such unique texture and form to a garden. If you’ve ever admired one and wished you had more to sprinkle around your landscape, you’re in luck! Propagating these tenacious plants is incredibly satisfying, though I’ll tell you right now, it’s not always a walk in the park for the absolute beginner. But don’t let that deter you – with a little patience and the right approach, you can absolutely succeed!
When to Get Your Hands Dirty
For Azorella compacta, spring is your best bet. Think about when the plant is really starting to wake up after its winter dormancy. New growth should be evident, but before it gets too hot and dry. Early to mid-spring, when the soil is moist and temperatures are mild, gives your cuttings the best chance to establish themselves without facing the stress of extreme heat or cold.
Your Little Propagation Toolkit
Here’s what you’ll want to have on hand:
- Sharp Pruning Shears or a Craft Knife: Cleanliness is key to prevent disease.
- Potting Mix: A well-draining mix is crucial. I like to use a blend of peat moss, perlite, and a little coarse sand. You can also find specialized succulent or cactus mixes that work wonderfully.
- Small Pots or Trays: Whatever you have available that provides good drainage.
- Rooting Hormone (Optional but Recommended): This can give your cuttings a significant boost. Look for a powder or gel.
- Watering Can with a Fine Rose: For gentle watering.
- Plastic Bags or a Clear Cover: To create a humid microclimate.
- A Small Spade or Dibber: For making holes in the soil.
Bringing New Life: Propagation Methods
Azorella compacta is most successfully propagated through stem cuttings and division.
Stem Cuttings: Taking a Piece of the Cushion
- Choose Your Cuttings: Look for healthy, vigorous stems that are about 3-4 inches long. You want them to be somewhat firm but not woody. Snip them from the parent plant using your sharp shears.
- Prepare the Cuttings: Gently remove any leaves from the bottom two-thirds of the stem. This prevents them from rotting in the soil.
- Dip in Rooting Hormone (Optional): If you’re using rooting hormone, dip the cut end of the stem into it, tapping off any excess.
- Planting: Fill your pots with your well-draining potting mix. Make a small hole with your dibber or finger, and insert the cut end of the stem. Gently firm the soil around it.
- Water and Cover: Water thoroughly but gently. Then, cover the pot with a clear plastic bag or place it inside a propagation tray with a lid. This creates that lovely humid environment your cuttings will crave.
- Placement: Keep the pots in a bright, indirect light location. Avoid direct sun, which can scorch the tender cuttings.
Division: Splitting the Established Mound
This method is best for larger, well-established plants.
- The Excavation: Carefully dig up the entire plant from its pot or the garden bed. Try to loosen the soil around the root ball.
- The Gentle Divide: Once out of the soil, you can often gently pull the root ball apart with your hands. If it’s particularly dense, you might need to use a clean, sharp knife or trowel to make a clean cut through the roots. Aim for sections that have a good amount of roots and some healthy foliage.
- Replant Your Divisions: Pot each division into its own container filled with your well-draining mix, or replant them directly into suitable garden spots.
- Water Well: Give all your newly divided plants a good drink of water.
The “Secret Sauce”: Insider Tips
Here are a few things I’ve learned over the years that make a real difference:
- Bottom Heat is Your Friend: For stem cuttings, I swear by placing my trays on a gentle heating mat. It encourages root development much faster and more reliably. Just a little warmth from below makes a world of difference.
- Don’t Pack the Soil Tightly: When planting cuttings, I tend to keep the soil a bit looser than you might think. It allows air to circulate and makes it easier for those new roots to push through.
- Patience with Hydroponics (or lack thereof): While some plants root beautifully in water, Azorella compacta generally doesn’t do as well with water propagation. I’ve found it tends to rot rather than root in plain water. Stick to soil for the best results!
Aftercare and Facing Hiccups
Once you see signs of new growth on your cuttings (a tiny leaf, a bit of elongation), that’s a good indicator that roots are forming.
- Gradually Acclimate: As the new growth appears, slowly begin to air out your covered cuttings. Vent the plastic bag for a few hours a day, gradually increasing the time until you can remove the cover entirely.
- Watering: Continue to water them lightly and allow the soil to dry out slightly between waterings. You’ll get a feel for this.
- Transplanting: Once the rooted cuttings are sturdy enough to handle (you can give them a gentle tug and feel resistance), it’s time to transplant them into slightly larger pots or their permanent garden homes.
Now, what if things go wrong? The most common issue is rot. If your cuttings turn mushy or black, it’s usually a sign of too much moisture and not enough air circulation. If you see this, try pulling out the affected cutting, improving drainage and air flow, and maybe even trying again with a fresh cutting. Don’t be discouraged if a few don’t make it; it’s all part of the learning curve.
Happy Growing!
Propagating Azorella compacta is a rewarding journey. It takes a bit of observation and a willingness to experiment. Remember to be patient, celebrate every little bit of progress, and enjoy the process of bringing more of these delightful cushion plants into your world. Happy gardening!
Resource:
https://identify.plantnet.org/k-world-flora/species/Azorella%20compacta%20Phil./data