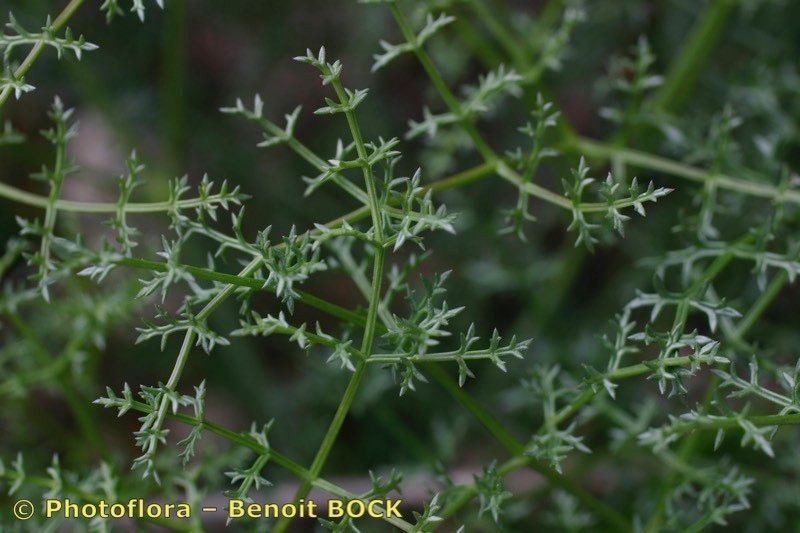
Hey there, fellow plant lovers! Have you ever spotted Thapsia tenuifolia and fallen head over heels for its unique, airy foliage and delicate, umbrella-like flower clusters? I know I have. This Mediterranean native, often called “slender-leaved thapsia” or even “false carrot” (though it’s far too elegant for such a humble comparison!), brings such a graceful, almost wispy quality to the garden. And the best part? It’s wonderfully rewarding to increase your collection of this beauty.
As for beginners, well, Thapsia tenuifolia can be a bit of a curious character. It’s not the absolute easiest plant to get going from scratch, but with a little attention and understanding of its needs, you’ll find yourself with plenty of new plants to share (or keep all to yourself, no judgment here!).
The Best Time to Start
For the highest chance of success with Thapsia tenuifolia, you’ll want to get your hands dirty in late spring or early summer. This is when the plant is actively growing and has the energy reserves to bounce back and root efficiently. Waiting until you see new growth emerging after the cooler months is a good sign the plant is ready.
Supplies You’ll Need
Here’s a quick rundown of what you’ll want to have on hand:
- Sharp pruning shears or a clean, sharp knife: For making clean cuts.
- A well-draining potting mix: I like a blend of peat moss, perlite, and coarse sand (about a 1:1:1 ratio). You can also find good quality cactus or succulent mixes that work wonderfully.
- Rooting hormone (optional but helpful): A powdered or liquid hormone can give your cuttings a good start.
- Small pots or seed trays: Clean ones are key!
- Labels and a waterproof marker: So you don’t forget what you planted where.
- A watering can with a fine rose or a spray bottle: For gentle watering.
- A propagation mat or a warm, bright spot: To provide a little extra encouragement.
Propagation Methods
Thapsia tenuifolia is best propagated through division or stem cuttings. Let’s dive into how to do each.
Division
This is often the most straightforward method for Thapsia tenuifolia if you already have a mature plant.
- Gently excavate: Carefully dig up your existing Thapsia tenuifolia clump. Try to disturb the roots as little as possible.
- Inspect and separate: Gently shake off excess soil to reveal the root structure. You’re looking for distinct crowns or sections that have their own root system.
- Divide with care: Using your hands or a clean trowel, carefully separate the clump into smaller sections. Each section should have a good portion of roots and at least one healthy shoot or growing point. If the roots are stubborn, a sharp knife or spade can be used, but always aim for clean cuts.
- Pot them up: Plant each divided section into its own pot filled with your well-draining mix. Water thoroughly and place them in a location with bright, indirect light.
Stem Cuttings
This method requires a bit more patience, but it’s incredibly satisfying when you see those roots form.
- Select healthy stems: From a healthy, actively growing plant, choose non-flowering stems that are about 4-6 inches long. Remove any lower leaves that would fall below the soil line.
- Make the cut: Use your sharp, clean shears or knife to make a clean cut just below a leaf node. This is where new roots are most likely to emerge.
- Apply rooting hormone (optional): Dip the cut end of the stem into rooting hormone, tapping off any excess.
- Plant the cuttings: Fill small pots with your prepared potting mix. Make a small hole with a pencil or your finger and insert the cutting, ensuring the leaf nodes are in contact with the soil. Gently firm the soil around the base of the cutting.
- Water and cover: Water the potting mix thoroughly. You can then place the pots in a shallow tray of water to keep the soil consistently moist, or simply mist them regularly. To increase humidity, you can cover the pots with a clear plastic bag or dome, making sure it doesn’t touch the leaves.
The “Secret Sauce” (Pro Tips)
Here are a couple of things I’ve learned over the years that make a real difference:
- Don’t overwater the cuttings! This is probably the most common mistake. Thapsia tenuifolia hates sitting in soggy soil. It’s much better to err on the side of slightly too dry than too wet. When watering, let the top inch of soil dry out between waterings.
- Bottom heat is your friend. For stem cuttings, placing them on a heated propagation mat set to a gentle warmth (around 70-75°F or 21-24°C) can significantly speed up root development. It mimics the warmth of the soil in summer.
Aftercare & Troubleshooting
Once you see signs of new growth – tiny leaves unfurling or the plant resisting a gentle tug – you know roots are forming!
- Gradually acclimate: If you used a plastic cover, start removing it for increasing periods each day over a week to get the new plant used to normal humidity.
- Move to brighter light: Once established, you can move your new Thapsia tenuifolia to a location with bright, indirect sunlight.
- Water sparingly: Continue to allow the soil to dry out between waterings.
- Watch for rot: The biggest culprit for failure is root rot. If your cuttings yellow, become limp, and the base looks mushy or black, it’s a sign of too much moisture. Sadly, if this happens, the cutting is unlikely to recover. If you catch it early, you might be able to salvage a healthy section by repotting with fresh, dry soil.
A Encouraging Closing
Growing plants is such a joy, isn’t it? Remember to be patient with your Thapsia tenuifolia cuttings or divisions. Nature has its own timeline, and sometimes things take a little longer than we expect. Don’t get discouraged if your first attempt isn’t a runaway success. Each plant you try to propagate teaches you something new. So, grab your tools, find a sunny spot, and enjoy the rewarding process of nurturing new life! Happy gardening!
Resource:
https://identify.plantnet.org/k-world-flora/species/Thapsia%20tenuifolia%20Lag./data