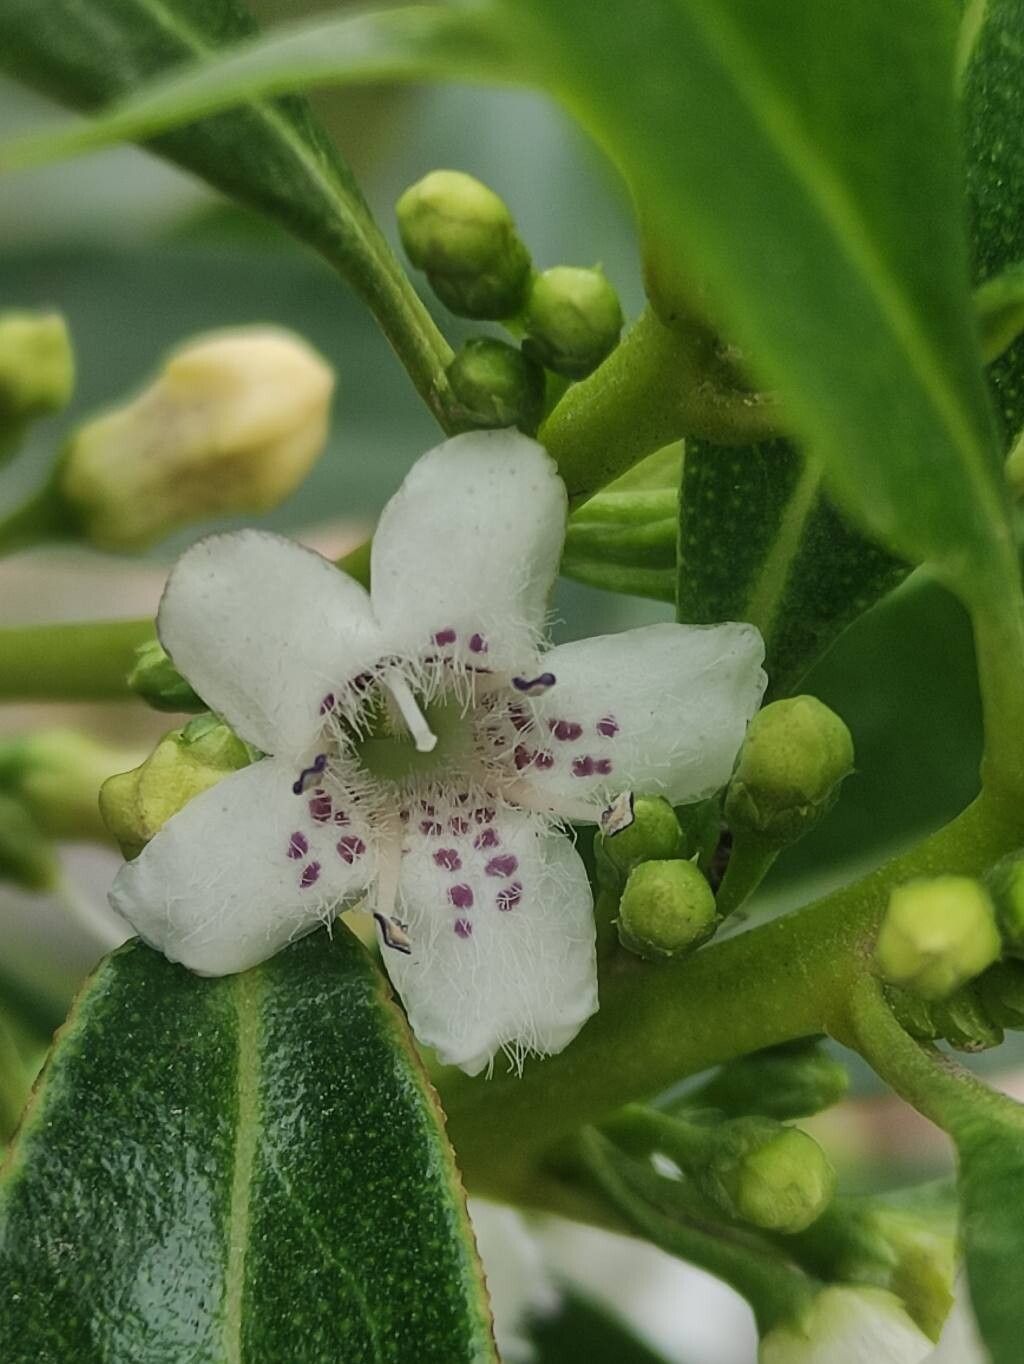
Oh, Myoporum laetum! What a fantastic plant to have in your garden. Its glossy, leathery leaves and delicate white flowers are such a lovely, understated beauty. I’ve always found it to be a wonderfully rewarding plant to grow, and propagating it yourself is even better. You get the joy of sharing these beauties with friends, or simply expanding your own green oasis. For beginners? I’d say it’s quite forgiving, which is always a plus when you’re just starting out.
The Best Time to Start
The sweet spot for propagating Myoporum laetum is undoubtedly late spring to early summer. This is when the plant is in a vigorous growth phase, meaning your cuttings will have the best chance of taking root. You’re looking for semi-hardwood cuttings, those little shoots that are starting to firm up but are still quite flexible. Think of it as the plant saying, “Yes, I’m ready to grow!”
Supplies You’ll Need
To get your Myoporum propagation journey off to a great start, here’s what I always have on hand:
- Sharp Pruning Shears or a Knife: Clean cuts are key to good healing.
- Rooting Hormone (Optional but Recommended): This gives your cuttings a nice little boost. I prefer a powder or gel.
- Potting Mix: A light, well-draining mix is essential. I like to use a blend of perlite and peat moss or coir, roughly 50/50. Some sterile seed-starting mix works wonders too.
- Small Pots or Trays: Clean containers are a must to prevent disease.
- Plastic Bags or a Propagator: To help maintain humidity around your cuttings.
- Water: For a quick dip before planting and for misting.
- Labels: To remind yourself what you’ve planted and when!
Propagation Methods
Let’s get our hands dirty! Stem cuttings are the most reliable and straightforward way to propagate Myoporum laetum.
-
Take the Cuttings: Head out to your Myoporum plant with your clean shears. Look for those pliable, semi-hardwood stems mentioned earlier. Cut a piece about 4-6 inches long, just below a leaf node (where a leaf joins the stem). Remove any leaves from the bottom half of the cutting. This prevents them from rotting once planted. You can take several cuttings at once; it’s nice to have a few to experiment with.
-
Prepare the Cuttings: If you’re using rooting hormone, dip the cut end of each cutting into the hormone, tapping off any excess. This is super simple but makes a difference!
-
Pot Up Your Cuttings: Fill your small pots with your prepared potting mix. Make a small hole in the center of the mix with your finger or a pencil. Gently insert the prepared cutting into the hole, ensuring the bottom leaf nodes are buried in the soil. Firm the soil gently around the base of the cutting.
-
Water and Cover: Give the soil a gentle watering to settle it around the cutting. Then, cover the pots with a clear plastic bag or place them in a propagator. This creates a mini-greenhouse effect, keeping the humidity high, which is critical for cuttings that don’t yet have roots to absorb water. Poke a few holes in the bag for a bit of air circulation.
The “Secret Sauce” (Pro Tips)
Over the years, I’ve learned a few tricks that make a world of difference.
- Bottom Heat is Your Friend: If you have a seedling heat mat, popping your pots on it can really speed up root development. It mimics the warmth of the soil that a mother plant experiences. Just make sure the heat isn’t too intense – a gentle warmth is all you need.
- Don’t Over-Water the Soil: While humidity is key, you don’t want the soil to be waterlogged. It’s a delicate balance. The mix should feel damp, not soggy. Overwatering is a fast track to rot, and nobody wants that!
- Mist Regularly (Especially Without a Bag): If you opt not to use a plastic bag, misting the leaves of your cuttings a few times a day is crucial to prevent them from drying out before roots can form.
Aftercare & Troubleshooting
Once your cuttings have started to sprout! Hooray! You’ll know you’ve succeeded when you see new growth emerging from the top of the cutting. This often takes anywhere from 4 to 8 weeks, sometimes a bit longer, so patience is your best virtue here.
When you see those tiny new leaves, it’s a good sign that roots have formed. At this point, you can gradually acclimate them to lower humidity by opening the plastic bag a bit more each day, or removing the propagator lid for longer periods. Once they seem sturdy, you can transplant them into slightly larger pots with a good quality potting mix. Keep them in a bright spot, but out of direct, scorching sun for the first few weeks.
The most common sign things aren’t going well is if your cutting turns yellow, wilts, and eventually goes black and mushy. This is almost always a sign of rot, usually caused by too much moisture and poor air circulation. If you see this, sadly, it’s best to discard the affected cutting and clean your pots thoroughly before trying again.
A Encouraging Closing
Don’t be discouraged if your first few attempts aren’t perfect. Gardening, and propagating especially, is a learning curve. Each time you try, you learn something new. Be patient with your little Myoporum babies, enjoy the process of nurturing them, and soon you’ll be surrounded by even more of these delightful plants. Happy propagating!
Resource:
https://identify.plantnet.org/k-world-flora/species/Myoporum%20laetum%20G.Forst./data