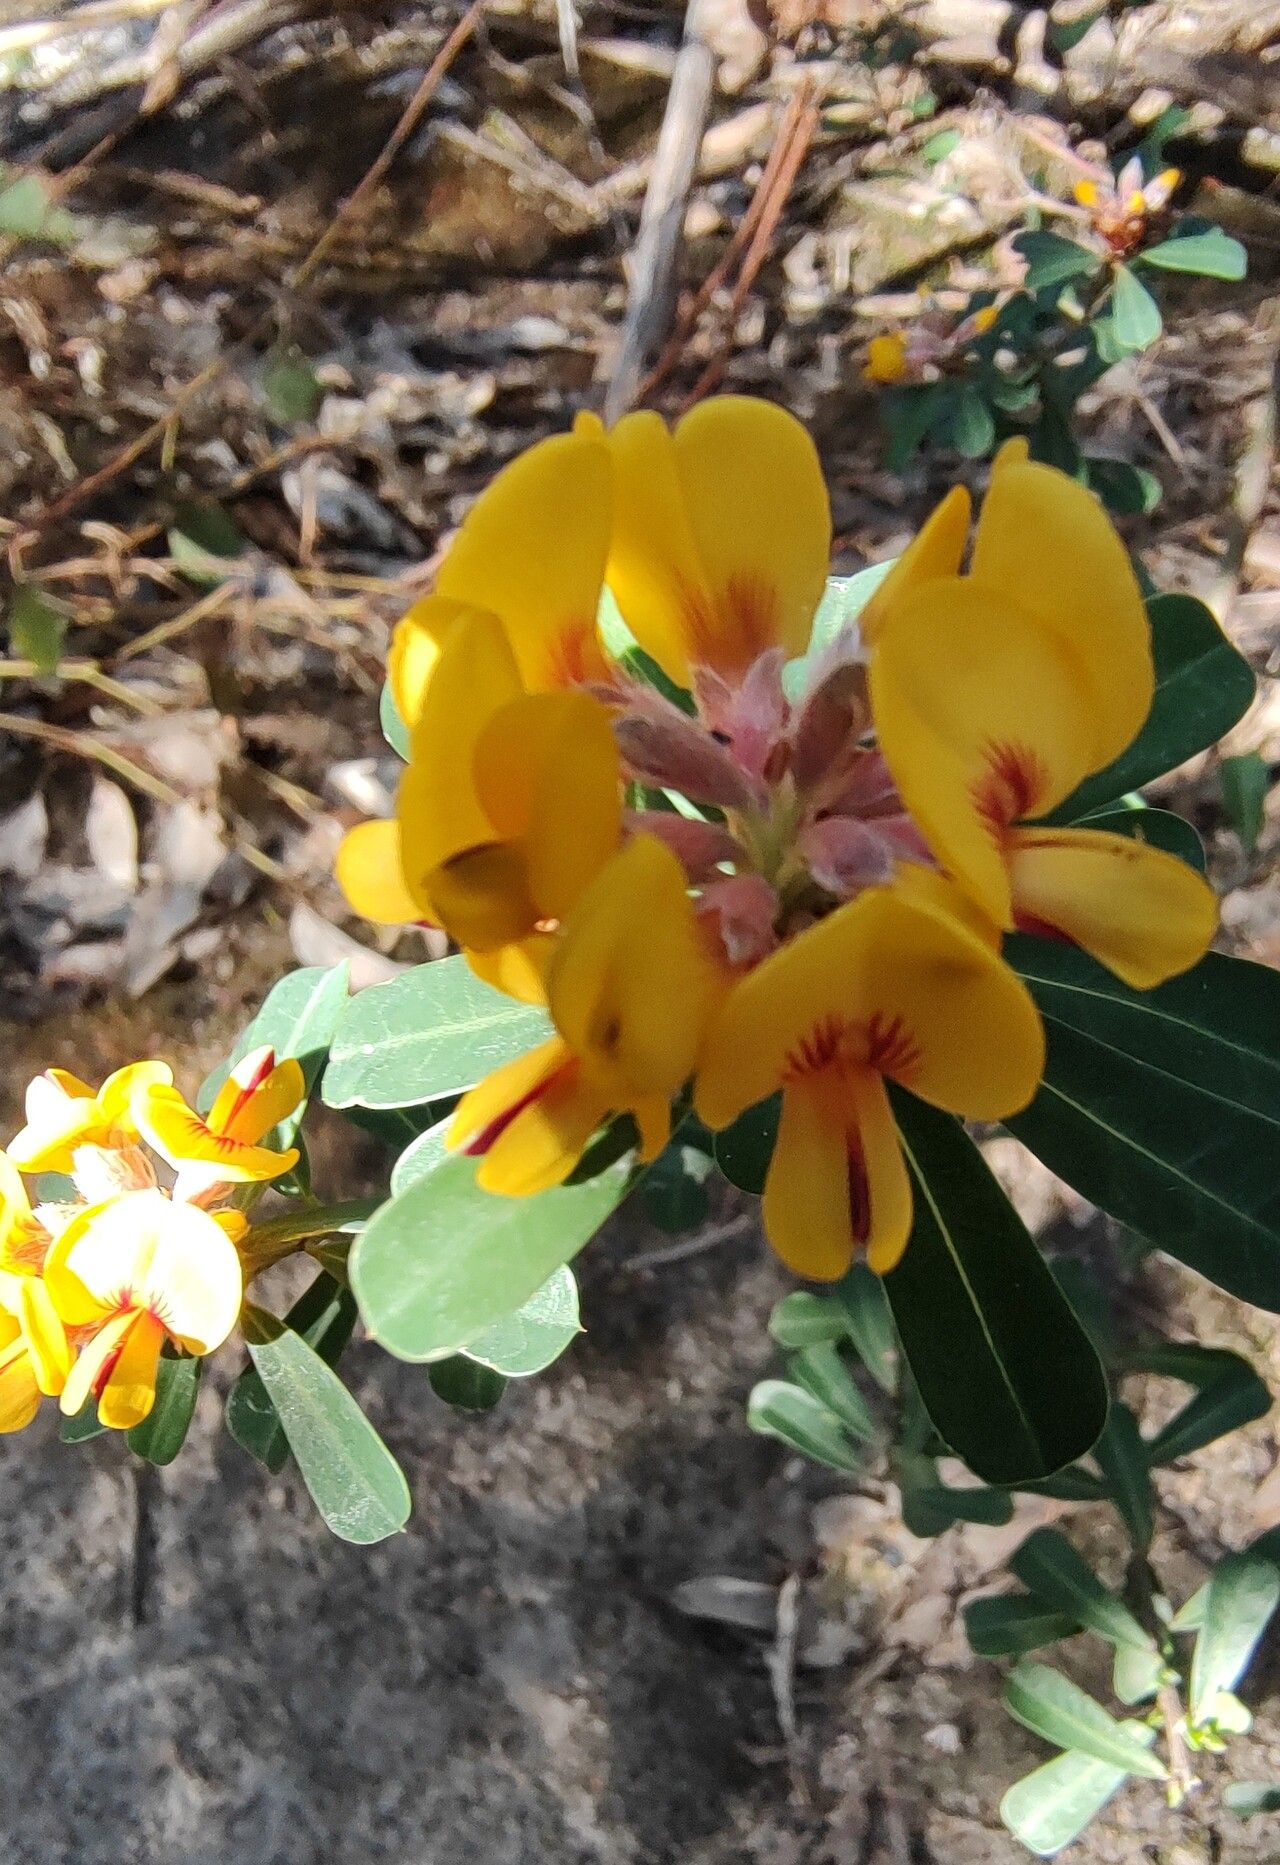
Oh, Daviesia arborea! What a gem. If you’re looking for a tough, beautiful Australian native that brings a wonderful splash of color and structure to the garden, you’ve found it. I’ve got a few of these beauties thriving in my own patch, and they really do steal the show with their delicate, starry flowers and attractive foliage. Propagating them yourself? That’s incredibly rewarding. You get to share this wonder with friends, or just expand your own collection without breaking the bank.
Now, about this being easy or challenging. If I’m being honest, Daviesia arborea can be a wee bit fussy for absolute beginners. It’s not impossible by any means, but it requires a bit of attention to detail. Think of it as a plant that teaches you patience and observation – skills every good gardener needs!
The Best Time to Start
For Daviesia arborea, I’ve found the sweet spot for propagation is late spring to early summer. This is when the plant is actively growing and has plenty of energy to put into developing new roots. You’re looking for stems that are new and semi-hardwood, meaning they’re not super floppy and green but haven’t yet become woody and stiff. Think of a pencil – that’s about the right stage.
Supplies You’ll Need
Here’s what you’ll want to gather before you get started. Having everything at the ready makes the whole process smoother:
- Sharp, clean pruning shears or secateurs: For making clean cuts.
- Rooting hormone (powder or gel): This is a lifesaver for encouraging root development.
- Well-draining potting mix: I recommend a mix of coarse sand, perlite, and a good quality compost. About 50/50 sand and compost works well for me.
- Small pots or trays: Clean pots are essential to prevent disease.
- Plastic bags or a propagator lid/dome: To create a humid environment.
- Spray bottle: For misting the cuttings.
- Gravel or perlite (optional): For the bottom of pots if drainage is a concern.
Propagation Methods
I find stem cuttings to be the most reliable method for Daviesia arborea. Here’s how I do it, step-by-step:
- Take Cuttings: On a mild morning, select a few healthy, semi-hardwood stems from your established plant. Using your clean secateurs, take cuttings that are about 10-15 cm (4-6 inches) long. Make a clean, angled cut just below a leaf node (where a leaf attaches to the stem). This is where roots are most likely to form.
- Prepare the Cuttings: Gently remove the lower leaves from the cutting, leaving just two or three at the top. This prevents them from rotting in the soil. If the leaves are very large, you can cut them in half horizontally to reduce water loss.
- Apply Rooting Hormone: Dip the cut end of each stem into your rooting hormone, ensuring it’s coated evenly. Tap off any excess.
- Pot Them Up: Fill your clean pots with the well-draining potting mix. Make a small hole with your finger or a pencil. Insert the cutting into the hole, pressing the soil gently around the stem to ensure good contact.
- Create Humidity: Water the soil gently to settle it around the cuttings. Then, cover the pot with a clear plastic bag, securing it around the rim with a rubber band, or place a propagator lid over it. The goal is to keep the humidity high around the leaves. If you’re using individual pots, you can place them all into a tray and cover the whole tray.
- Find a Spot: Place the pots in a bright spot, but out of direct sunlight. A greenhouse, a bright windowsill, or even a sheltered spot on a patio can work.
The “Secret Sauce” (Pro Tips)
Over the years, I’ve learned a few little tricks that really boost my success rates:
- Don’t let the leaves touch the water! This is crucial, especially if you’re misting regularly. Anything in contact with standing water is a prime target for rot. Ensure your cuttings are trimmed well and that condensation drips away from the leaves.
- Bottom heat is a game-changer. If you can manage it, placing your pots on a heated propagator mat or near a gently warming spot can significantly speed up root formation. A stable, warm soil temperature is like a cozy bed for those developing roots.
- Be patient with the misting. While you want to keep the humidity high, don’t overdo the watering. A light misting of the leaves every couple of days is usually enough, especially under cover. You want the soil to be moist, not soggy.
Aftercare & Troubleshooting
Once your cuttings have started to develop roots – this can take anywhere from 6 weeks to a few months – you can begin to introduce them to drier air gradually. You’ll know roots are forming when you see new leaf growth, or when you gently tug on the cutting and feel resistance.
When they’re well-rooted, you can pot them up into larger individual pots. Keep them in a sheltered spot and continue to water them regularly but allow the soil to dry out slightly between waterings.
The most common issue you’ll encounter is rot. If a cutting turns black and mushy, it’s the rot talking. This usually means it’s too wet or not draining well. Sadly, once rot takes hold, there’s not much you can do. Prevention is key – clean pots, good drainage, and not overwatering. Another sign of failure is if the cutting just looks sad and withered and shows no signs of life after a long time. This could be due to lack of humidity, not enough light, or simply the cutting not being viable.
A Encouraging Closing
Propagating plants is a journey, and Daviesia arborea is one that will teach you so much about its needs. Don’t be discouraged if your first attempt isn’t a runaway success. Keep trying, learn from each experience, and most importantly, enjoy the process of nurturing these beautiful natives from tiny cuttings to thriving plants. Happy gardening!
Resource:
https://identify.plantnet.org/k-world-flora/species/Daviesia%20arborea%20W.Hill/data