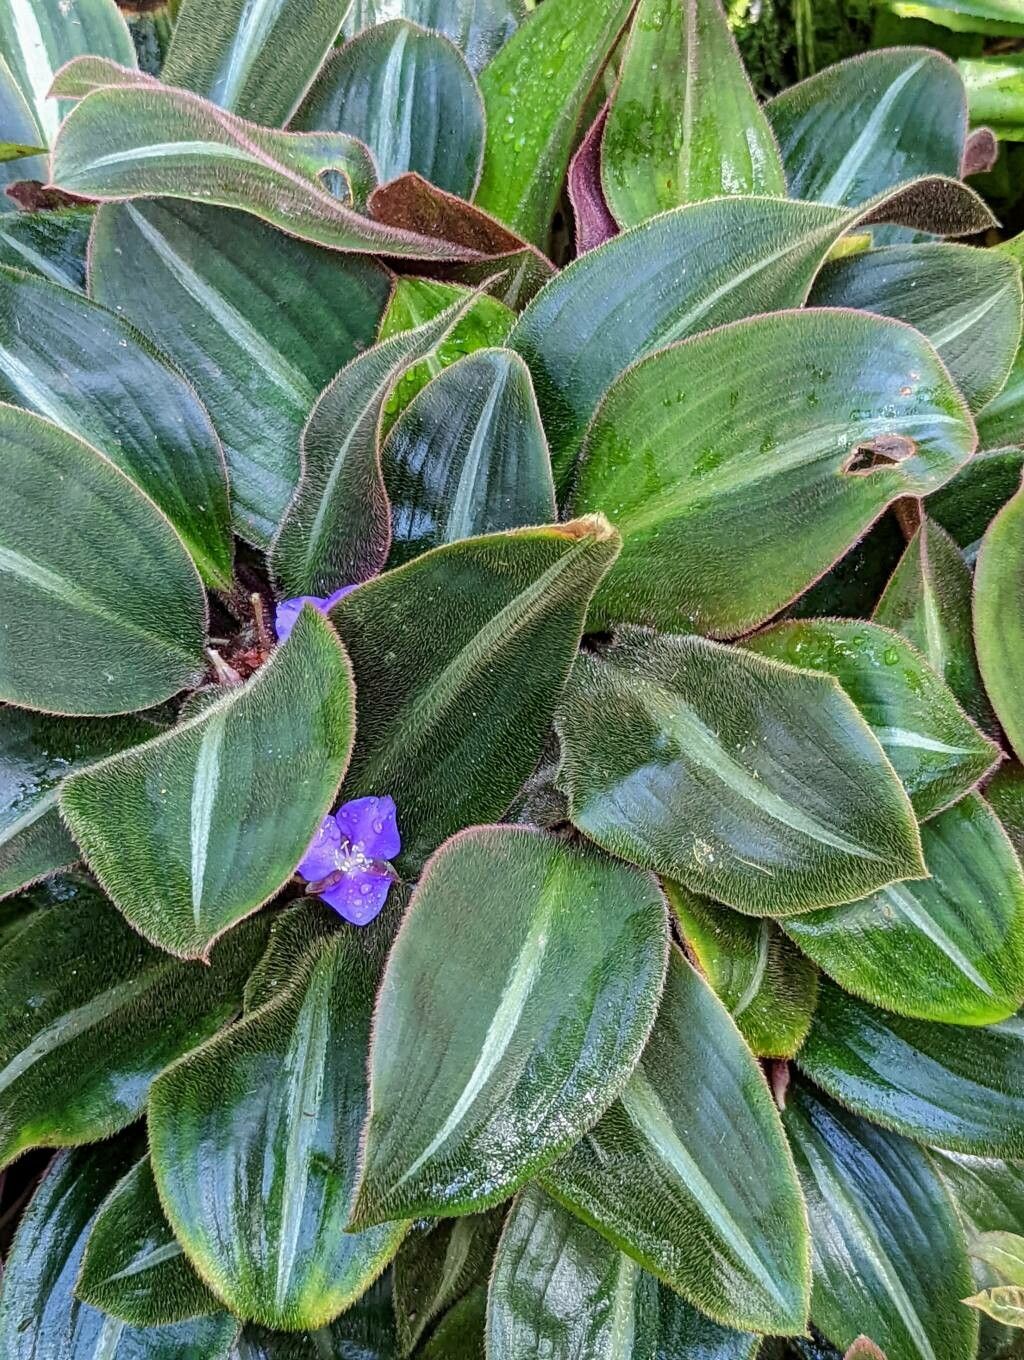
Hello fellow plant lovers! Today, we’re diving into the wonderful world of Siderasis fuscata, often called the Rusty Siderasis. If you’ve ever admired its velvety, chocolate-edged leaves and feathery, silvery undersides, you’re not alone. It’s truly a stunner, a real statement plant that brings a touch of the exotic indoors. And the best part? Propagating it is a joy! You get to witness new life emerge from your existing beauties, and honestly, sharing little Siderasis babies with friends is one of the greatest garden pleasures.
Now, is it a breeze for absolute beginners? I’d say it’s moderately easy. It’s not quite as forgiving as a pothos, but with a little attention, you’ll be successful. Don’t let that daunt you; it’s a truly rewarding experience. Plus, you get more of those gorgeous leaves!
The Best Time to Start
For Siderasis fuscata, I find spring and early summer are your absolute best bets. This is when the plant is ramping up its growth after a rest period and has the most energy to put into making new roots. You can certainly try at other times, but you’ll likely see quicker and more robust results when the days are longer and warmer. Look for healthy, actively growing shoots on your established plant.
Supplies You’ll Need
Here’s what you’ll want to gather before you get started:
- Sharp pruning shears or a clean knife: For making clean cuts.
- Small pots or containers: Yogurt cups with drainage holes poked in work just fine!
- Well-draining potting mix: I like a mix of good quality potting soil with perlite and a bit of orchid bark. It keeps things airy.
- Rooting hormone (optional but helpful): A powder or gel can give your cuttings a little boost.
- Plastic bag or clear dome: To create a humid environment.
- Watering can or spray bottle: For gentle watering.
- A sunny, warm spot: Away from direct, harsh sunlight.
Propagation Methods
The most reliable way I’ve found to propagate Siderasis fuscata is through stem cuttings and division.
Stem Cuttings
- Select your cutting: Look for a healthy, non-flowering stem that’s at least 4-6 inches long. You want a piece that has several leaves.
- Make the cut: Using your clean shears or knife, make a clean cut just below a leaf node. This is the bump on the stem where a leaf grows out. That node is where roots will emerge.
- Prepare the cutting: Gently remove the lower leaves from the bottom inch or two of the stem. This prevents them from rotting when buried. You can leave the top leaves.
- Apply rooting hormone (optional): Dip the cut end into your rooting hormone, tapping off any excess.
- Plant your cutting: Fill your small pot with your prepared potting mix. Make a hole in the center with your finger or a pencil. Gently insert the cut end of your stem into the hole and firm the soil around it.
- Water gently: Water thoroughly until you see water drain from the bottom of the pot.
- Create humidity: Cover the pot with a clear plastic bag or a clear dome. Make sure the leaves aren’t touching the plastic. You can prop up the bag with a few sticks if needed.
- Place and wait: Put the pot in a warm spot with bright, indirect light. Keep the soil consistently moist, but not soggy.
Division
This method is great when your Siderasis is getting a bit crowded in its pot.
- Gently remove the plant: Carefully take your Siderasis out of its pot.
- Inspect the roots: You’ll often see that the plant naturally forms clumps or has separate shoots emerging from the base.
- Separate the divisions: Using your fingers or a clean knife, gently pull or cut apart the clumps. Try to keep as much of the root system intact on each division as possible. Each division should have some leaves and roots.
- Pot up: Pot each division into its own small pot filled with your well-draining potting mix. Treat them as you would a newly potted plant.
- Water and settle: Water them in well and place them in their new, bright, indirect light location.
The “Secret Sauce” (Pro Tips)
Here are a few things I’ve learned over the years that can really make a difference:
- Don’t let the leaves touch the water (if using water propagation): While Siderasis is pretty forgiving, if you decide to try rooting stem cuttings in water, avoid submerging the leaves. Only the stem node should be in the water, or else they’ll likely rot before they root!
- Bottom heat is your friend: If you have a seedling mat or can place your pots on top of a warm appliance (like a router, but not one that gets too hot!), the gentle warmth from below can dramatically speed up root formation. It mimics the warmth of spring soil.
- Keep it humid, but allow for airflow: That plastic bag or dome is crucial for creating humidity, which Siderasis loves. However, open the bag for a few minutes each day to allow for fresh air circulation. This helps prevent fungal issues.
Aftercare & Troubleshooting
Once you see new growth, especially tiny leaves emerging from the base or the stem tip, that’s a good sign roots are forming! You can gently tug on the cutting to feel for resistance. If it feels secure, it’s likely rooted.
Continue to keep the soil consistently moist and the humidity high. As the new plant gets stronger, you can gradually remove the plastic bag or dome, letting it acclimate to your home’s humidity levels over a week or two. You can then treat it like a mature Siderasis.
The most common issue you might encounter is rot. This usually happens if the soil stays too wet or if there isn’t enough airflow. If you see a stem cutting turning mushy or black, unfortunately, it’s likely a lost cause. Don’t be discouraged! Just discard the failed cutting and try again, perhaps with a slightly drier soil mix or more frequent air circulation.
A Encouraging Closing
Propagating Siderasis fuscata is a beautiful journey of patient observation and nurturing. Don’t get too hung up on perfection; nature has its way! Celebrate every little sign of progress, and before you know it, you’ll have a collection of these stunning plants to admire and share. Happy propagating!
Resource:
https://identify.plantnet.org/k-world-flora/species/Siderasis%20fuscata%20(Lodd.)%20H.E.Moore/data