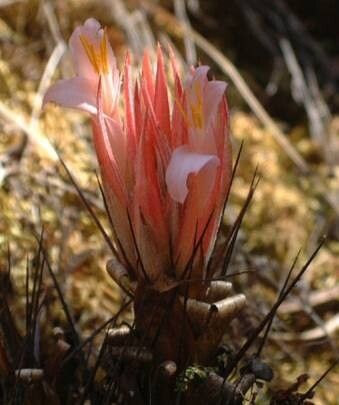
Oh, Pitcairnia recurvata! What a treasure trove of vibrant color and architectural form for our gardens. If you’ve ever admired its striking foliage and those beautiful, often crimson, flower spikes, you’re not alone. Propagating this bromeliad beauty isn’t just about getting more plants; it’s about understanding its unique rhythm and nurturing new life from established specimens. You might think it’s a daunting task, but with a little know-how, it’s quite achievable, even if you’re just dipping your toes into the world of plant propagation.
The Best Time to Start
For Pitcairnia recurvata, the magic happens when the plant is actively growing. Spring and early summer are your prime windows. You’ll see the most vigor and the best chances of success if you propagate when the plant is putting on new growth, especially after it has finished flowering. Don’t rush it; a happy, healthy mother plant is the best starting point.
Supplies You’ll Need
- Sharp Pruning Shears or a Clean Knife: For making clean cuts.
- Well-Draining Potting Mix: A blend of peat moss, perlite, and coarse sand works wonders. Think chunky and airy! You can also use a dedicated bromeliad mix.
- Small Pots or Seedling Trays: With drainage holes, of course.
- Optional: Rooting Hormone: While not always strictly necessary for bromeliads, it can give an extra boost, especially for cuttings.
- Optional: Clear Plastic Bag or Humidity Dome: To create a humid environment for cuttings.
- Watering Can with a Fine Rose: For gentle watering.
Propagation Methods
Pitcairnia recurvata most readily propagates through division. Think of this as gently separating its offspring.
- Assess Your Mother Plant: Look for new shoots or “pups” emerging from the base of the main plant. These are typically smaller versions that are already developing their own roots.
- Gently Remove from Pot: Carefully ease the entire Pitcairnia out of its pot. If it’s been in the same pot for a while, you might need to gently loosen the soil away from the edges.
- Identify and Separate Pups: Examine the base of the plant. You’ll see where the pups are attached to the mother. Using your clean shears or knife, carefully cut the pup away from the mother plant, ensuring you get as many of its own roots as possible. If the pup is quite small and not yet rooted, don’t despair; we can still give it a fighting chance.
- Potting Up: Plant each separated pup into its own small pot filled with your well-draining mix. Plant it at the same depth it was growing with the mother plant.
- Water Gently: Give the newly potted pups a light watering.
While stem cuttings are less common for Pitcairnia recurvata, you can try propagating a healthy leaf or a small stem section if you’re feeling adventurous.
- Take a Cutting: Select a healthy, mature leaf or a short stem section with at least a couple of leaves. Make a clean cut at the base.
- Prepare the Cutting: If using rooting hormone, dip the cut end into it according to the product’s instructions.
- Plant the Cutting: Insert the cut end about an inch deep into your well-draining potting mix.
- Create Humidity: Cover the pot with a clear plastic bag or a humidity dome. This is crucial for cuttings.
The “Secret Sauce” (Pro Tips)
- Don’t Overwater, Especially Initially: Bromeliads are epiphytic by nature and abhor soggy feet. For divisions, water them in and then let the soil dry out slightly between waterings. For cuttings, a light misting is often enough until roots form.
- Bottom Heat is Your Friend for Cuttings: If you’re trying cuttings, placing the pot on a gentle heating mat significantly speeds up root development. It mimics the warmth of the soil where these plants naturally grow.
- Patience with Roots: Bromeliads can be slow to show visible roots, especially if they’re still establishing themselves. Don’t be tempted to tug on them constantly! Give them at least 4-6 weeks to settle in before checking.
Aftercare & Troubleshooting
Once your divisions or cuttings have started to show signs of new growth (a little leaf unfurling or a slight increase in firmness), you know they’re happy! Continue to water them as the soil dries out, and keep them in bright, indirect light. Avoid direct, harsh sun which can scorch young plants.
The most common issue you might encounter is rot. This usually stems from overwatering or soil that doesn’t drain well. If you see a cutting or pup turning mushy and dark at the base, it’s likely succumbed to rot. Sadly, there’s usually no coming back from this. The best defense is a good offense: ensure excellent drainage and a watering routine that allows the soil to dry slightly between drinks.
A Warm Farewell to a New Beginning
See? Not so intimidating after all! Propagating Pitcairnia recurvata is a beautiful way to share the joy this plant brings. Remember to be patient, observe your new plants, and celebrate those tiny victories – a new leaf, a firmer stem. Happy propagating, and may your garden continue to flourish!
Resource: