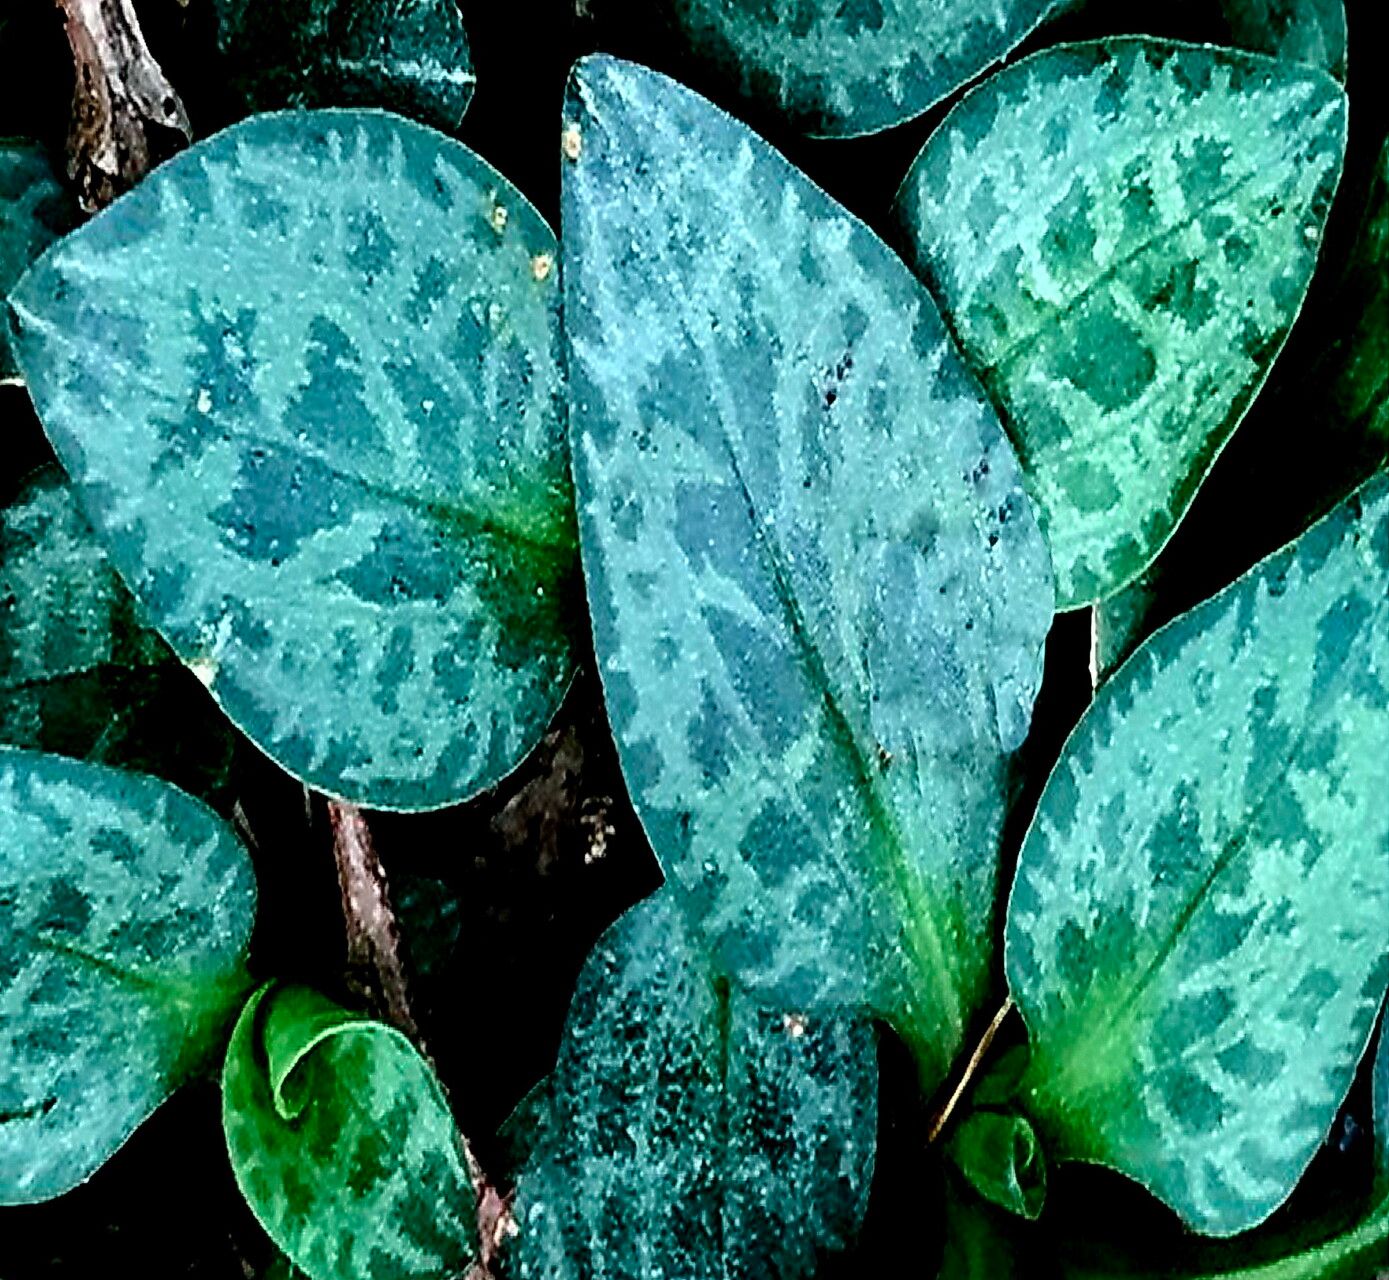
Oh, hello there! Come on in, grab a mug. I’m so glad you’re interested in Goodyera tesselata, also known as the Diamond-leaved Rattlesnake Plant. Isn’t it just a gem? The intricate, reticulated patterns on its leaves – they look like tiny, precious jewels laid out on the forest floor. It’s a truly captivating addition to any shady woodland garden or terrarium. And the best part? Propagating it, while it has its quirks, can be incredibly rewarding. It’s not exactly a beginner’s first plant to take cuttings from, but with a little patience and the right approach, you’ll be creating your own little patches of this beauty in no time.
The Best Time to Start
When it comes to Goodyera tesselata, I find the late spring to early summer is your golden window. This is when the plant is actively growing, pushing out new shoots and energy. You’re essentially working with its natural momentum. Attempting it too early in spring, before it’s really woken up, or too late in the season, when it’s preparing for dormancy, can lead to lower success rates. Look for those fresh, vigorous new growths – they have the most vitality.
Supplies You’ll Need
Here’s what you’ll want to have on hand before you get started. It’s always good to have everything ready so you can move quickly once you begin.
- Sharp Pruning Shears or a Clean Knife: For making clean cuts.
- Well-Draining Potting Mix: I love a mix of peat moss, perlite, and a little orchid bark. This is crucial for avoiding waterlogged roots.
- Small Pots or Seed Starting Trays: Clean and with drainage holes, of course.
- Plastic Bags or a Clear Lid (for humidity): To keep things cozy for your new cuttings.
- Rooting Hormone (optional, but helpful): A powder or gel can give your cuttings a boost.
- Water: For misting and keeping things moist but not soggy.
- Labels: To remember what you’ve propagated and when!
Propagation Methods
Goodyera tesselata is most successfully propagated through division. While you can try stem cuttings, they can be a bit fussy with this particular plant. Division is like giving your existing plant a haircut and getting new plants out of the process.
Division Method:
- Gently excavate: The best time to divide is during that late spring/early summer window I mentioned. Carefully dig up your Goodyera tesselata, trying to disturb the roots as little as possible.
- Inspect the root ball: You’ll see new shoots emerging from the base, often with their own little root systems starting. That’s exactly what you’re looking for.
- Separate gently: Use your fingers or a clean, sharp knife to carefully separate portions of the plant. Each division should have at least one growth point (a shoot) and a good bit of healthy root attached. Don’t be afraid if you lose a few tiny roots – it’s a natural part of the process.
- Pot them up: Plant each division in its own small pot filled with your well-draining mix. Plant them at the same depth they were growing before.
- Water gently: Give them a good, but not soaking, watering to settle the soil.
The “Secret Sauce” (Pro Tips)
There are a few little tricks I’ve learned over the years that can really make a difference with these delightful little woodlanders.
- Humidity is King (and Queen!): These plants love humidity. Once you’ve potted up your divisions, I like to place the pots inside clear plastic bags or cover them with a clear plastic lid, creating a mini-greenhouse effect. Make sure the foliage isn’t touching the plastic if possible, as that can encourage rot.
- Don’t Drench, Just Dampen: When watering, aim for consistently moist, but never soggy, soil. Stick your finger into the soil; if the top inch feels dry, it’s time for a drink. Overwatering is the quickest way to say goodbye to your new propagations. I often find misting the foliage lightly a couple of times a day really helps too, especially in drier indoor environments.
- Patience is a Virtue (Especially with Foliage Plants): Unlike some plants that root in a blink, Goodyera tesselata can take its sweet time. Don’t be discouraged if you don’t see rapid growth immediately. Focus on keeping them happily moist and in good indirect light. Root development is happening beneath the surface!
Aftercare & Troubleshooting
Once you see new growth emerging from your divisions, that’s a fantastic sign! It means they’ve established themselves and are happy.
- Acclimatize: Slowly begin to introduce your new plants to less humid conditions over a week or two. Gradually open the plastic bags or lift the lids for longer periods.
- Light: Continue to provide bright, indirect light. Direct sun will scorch those beautiful leaves.
- Watering: Resume a regular watering schedule, always checking the soil moisture.
- Common Signs of Failure: The most common enemy is rot. If you see mushy stems or leaves turning yellow and limp, it’s usually a sign of too much moisture. If this happens, you may need to take the cutting/division out, trim away any affected parts, and replant in fresh, drier mix. Sometimes, a propagation just doesn’t take, and that’s okay. We learn from every attempt, right?
And Finally…
Growing plants is such a journey, and propagating them is like unlocking a whole new level of gardening magic. Be patient with your Goodyera tesselata. It might take a little longer than you expect, but when you see those new shoots emerge, you’ll feel a real sense of accomplishment. Enjoy the process, celebrate the successes, and don’t be discouraged by the occasional learning experience. Happy propagating!
Resource:
https://identify.plantnet.org/k-world-flora/species/Goodyera%20tesselata%20G.Lodd./data