Hello fellow plant lovers! It’s so wonderful to connect with you all again. Today, we’re going to delve into a truly special plant that has captured my heart over the years: Arnica! Specifically, we’ll be talking about Arnica spathulata.
Bringing More Arnica Beauty to Your Garden
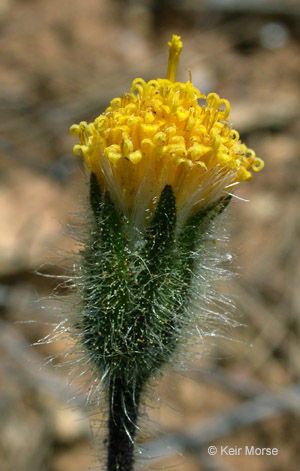
For those of you who might not be familiar, Arnica plants are a joy. They often sport these lovely daisy-like flowers in vibrant shades of yellow or orange, and many varieties have a wonderful earthy fragrance. They’re often associated with medicinal uses, which adds another layer of fascinating history to their story. Propagating them yourself? That’s incredibly rewarding. It’s a way to share this beauty, save a little money, and feel that deep connection to nurturing life. Now, is Arnica spathulata an absolute breeze for a complete beginner? Honestly, it can be a touch more specific than, say, a wandering Jew, but with a little guidance, it’s absolutely achievable and well worth the effort. Don’t let that deter you!
When to Get Your Hands Dirty
Timing is everything in gardening, and with Arnica spathulata, the sweetest spot for propagation is generally in the late spring or early summer. This is when the plant is actively growing after its initial spring burst. You’re looking for new, soft growth that hasn’t yet become woody. Think of it as capturing that fresh, vital energy of the season. Established plants will often send up new shoots, and that’s prime material for us.
Your Arnica Propagation Toolkit
Gathering your supplies beforehand makes the whole process much smoother. Here’s what I recommend:
- Sharp Pruning Shears or a Craft Knife: Clean cuts are crucial for preventing disease.
- Potting Mix: A well-draining mix is paramount. I often use a blend of peat moss, perlite, and a little bit of compost. Sometimes, I even add a bit of sharp sand.
- Small Pots or Seed Trays: Clean containers are a must.
- Rooting Hormone (Optional, but helpful): Especially for cuttings, this can give them an extra boost. Look for a product with IBA (indole-3-butyric acid).
- Watering Can with a Fine Rose: Gentle watering is key.
- Plastic Bags or a Propagation Dome: To create a humid environment.
- Labels and a Pen: Because it’s easy to forget what you planted where!
- Bottom Heat Source (Optional, but highly effective): A heat mat designed for seedlings can speed up root development significantly.
The Dance of New Beginnings: Propagation Methods
Arnica spathulata is most commonly and successfully propagated through stem cuttings and division. Let’s walk through them.
Method 1: Stem Cuttings – Capturing New Growth
This is my go-to for increasing my Arnica collection.
- Select Your Cuttings: As I mentioned, look for new, non-woody shoots in late spring or early summer. You want pieces that are about 3-4 inches long.
- Take the Cutting: Using your clean shears or knife, make a clean cut just below a leaf node. A leaf node is where a leaf attaches to the stem.
- Prepare the Cutting: Gently remove the lower leaves from the cutting, leaving just a couple at the tip. You can also carefully trim the remaining leaves in half to reduce water loss through transpiration.
- Apply Rooting Hormone (If Using): Dip the cut end of the stem into the rooting hormone powder or gel. Tap off any excess.
- Plant Your Cuttings: Fill your small pots with your well-draining potting mix. Make a small hole in the center with your finger or a pencil. Insert the prepared cutting into the hole, ensuring the leaf nodes where you removed the leaves are buried in the soil. Gently firm the soil around the stem.
- Water Gently: Water your cuttings thoroughly but gently, so as not to dislodge them.
- Create Humidity: Place a plastic bag over the pot, securing it gently, or place the pots under a propagation dome. This keeps the moisture in and helps prevent the cuttings from drying out. If you have a heat mat, place the pots on it now.
- Provide Light: Place the pots in a bright location out of direct sunlight. A north-facing windowsill or a spot under grow lights works well.
Method 2: Division – Sharing Established Clumps
If you have an established Arnica plant that’s looking a bit crowded, division is a fantastic way to give it a refresh and get new plants.
- Timing is Key: The best time for division is usually in early spring, just as new growth is starting, or in the fall after flowering.
- Gently Unearth: Carefully dig up the entire plant, trying to disturb the root ball as little as possible. You want to get as much of the root system intact as you can.
- Inspect and Separate: Gently shake away excess soil to see the root structure. You’ll usually see distinct sections or crowns. Using your hands, or if necessary, a clean, sharp knife, gently pull or cut the clump apart into smaller sections. Each division should have a healthy root system and at least one or two shoots.
- Replant Immediately: It’s best to replant your divisions as soon as possible. Plant them in well-prepared soil in your garden or in pots, just as you would a mature plant. Water them in well.
The “Secret Sauce”: My Insider Tips
- The Water Trick: If you’re opting to try water propagation with a few cuttings (though I generally find soil is better for Arnica), ensure no leaves are touching the water. This is a fast track to rot. Use a clear container so you can monitor root development and water quality.
- Bottom Heat is Your Friend: Seriously, if you’re propagating from cuttings, even just a few degrees of consistent warmth from below can make a world of difference in how quickly roots form. It mimics nature’s warmth and encourages that crucial root development.
- Don’t Rush the Move: When you’re propagating from cuttings, don’t be tempted to repot them too soon. Wait until you see good root growth, perhaps even peeking out of the drainage holes, before you consider moving them to slightly larger pots. Patience here pays off.
Nurturing Your New Seedlings and Troubleshooting
Once you see signs of new growth on your cuttings or your divisions are established, it’s time for continued care.
- Gradual Acclimation: If your cuttings were under a plastic bag or dome, slowly introduce them to normal humidity over a few days by opening the bag or dome a little more each day.
- Consistent Moisture: Keep the soil consistently moist but not waterlogged. Feel the top inch of soil; if it’s dry, it’s time to water.
- Light: Continue to provide bright, indirect light. As they grow stronger, you can gradually introduce them to more direct sun, but always watch for signs of stress.
- Troubleshooting – The Dreaded Rot: The most common sign of failure with cuttings is rot. If your cuttings turn black and mushy, it’s usually due to too much moisture and poor air circulation. This is why that well-draining soil and humidity control are so vital. If you see wilting that doesn’t improve with watering, it could also be a sign of root rot. If it’s a division, a plant that fails to establish might have had a poor root system to begin with or is facing excessively wet conditions.
Go Forth and Propagate!
Nurturing new life from a cutting or a division is one of the most fulfilling aspects of gardening. It takes a little observation, a touch of patience, and a whole lot of love. Don’t be discouraged if your first few attempts aren’t perfect; every plant and every season is a learning experience. Enjoy the process, celebrate every tiny root that forms, and soon you’ll have more of these beautiful Arnica plants to grace your garden and share with friends. Happy propagating!
Resource:
https://identify.plantnet.org/k-world-flora/species/Arnica%20spathulata%20Greene/data