Growing More of That Starry Magic: Propagating Angraecum filicornu
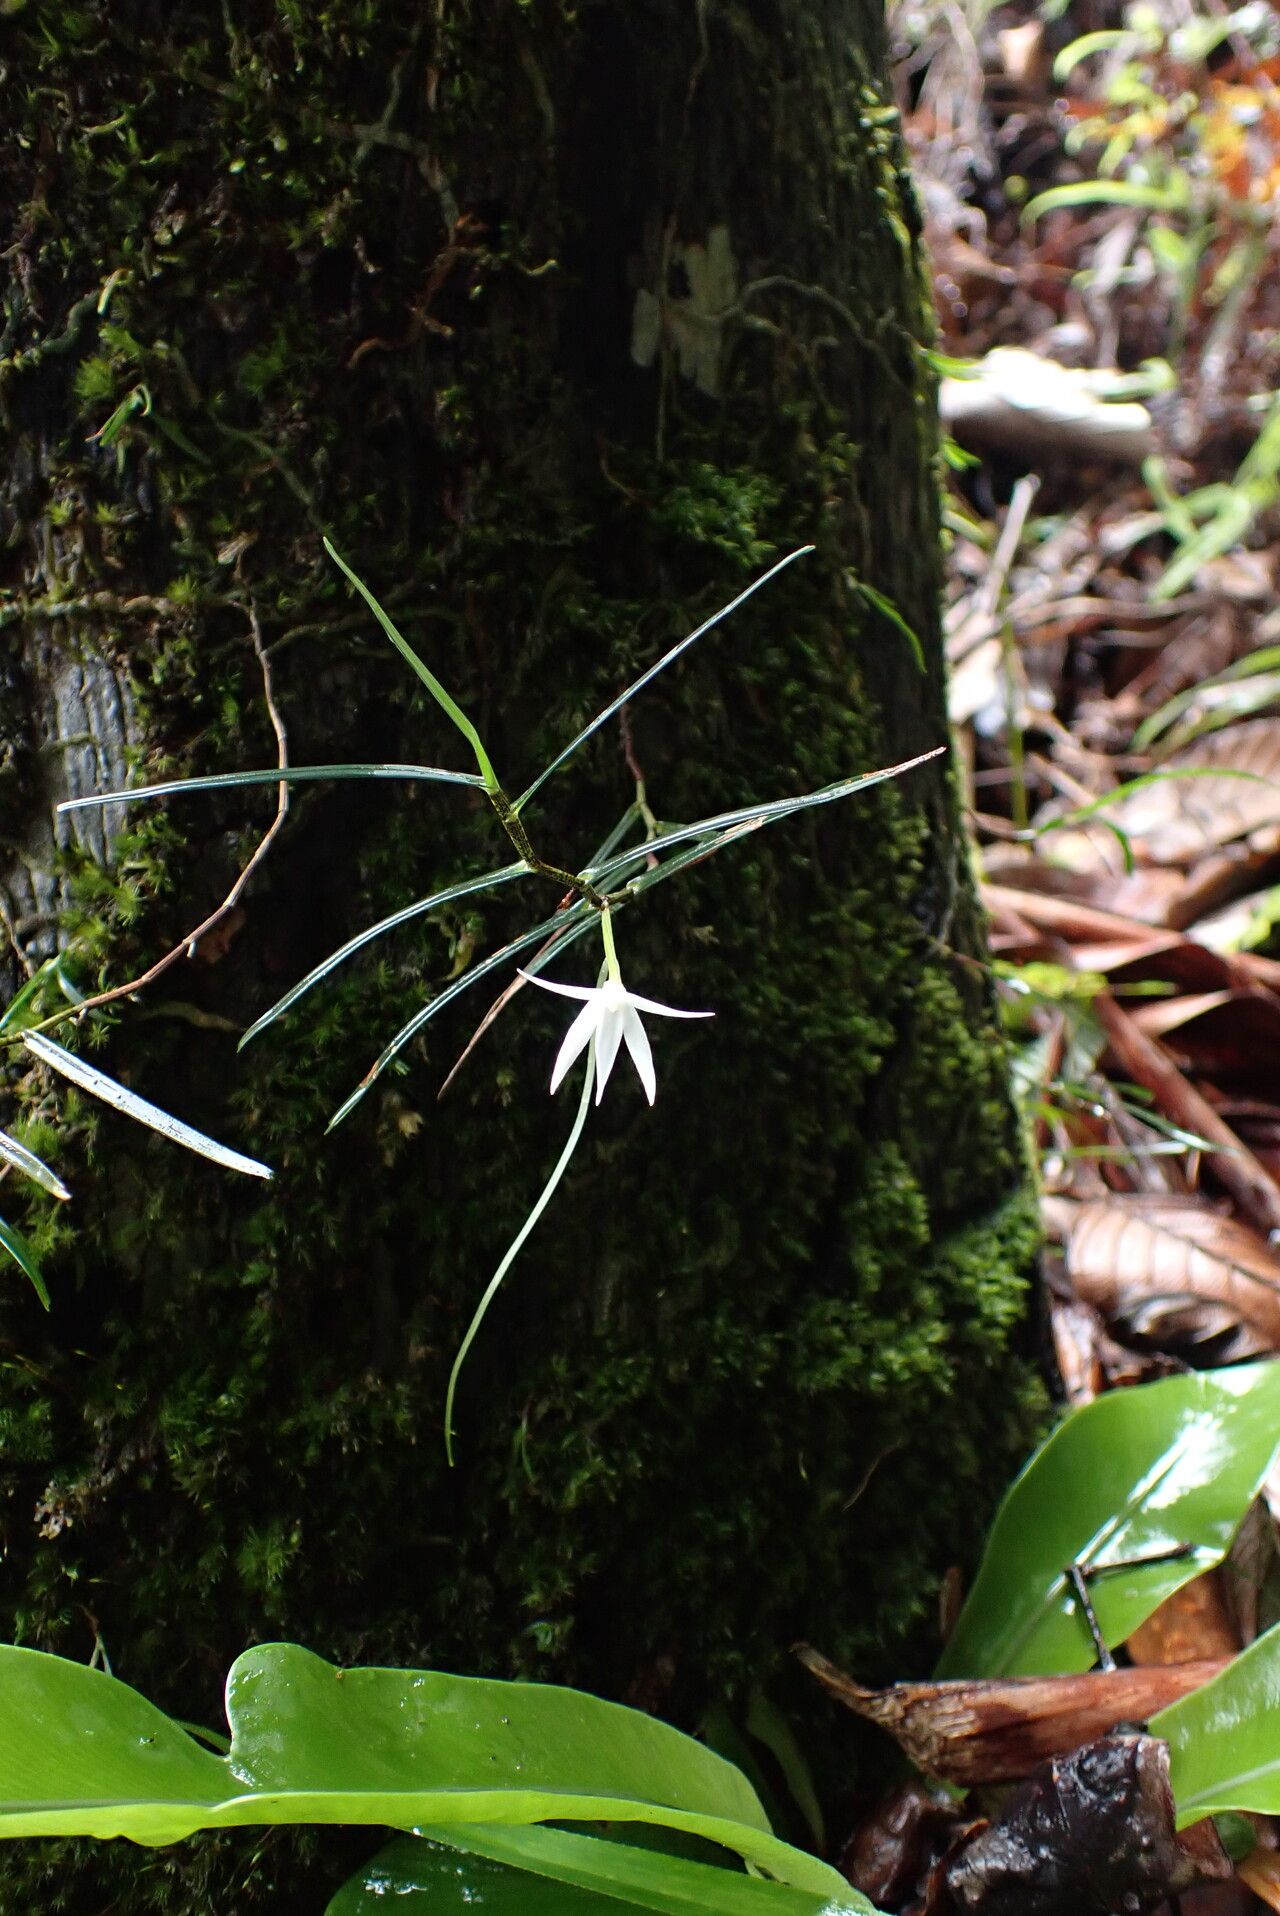
Oh, Angraecum filicornu! If you’ve ever seen one of these beauties in bloom, you know what I mean. Those long, delicate, thread-like blooms cascading downwards, looking like tiny shooting stars – it’s pure enchantment. Many of you have asked me about getting more of this special orchid. Well, I’m here to tell you, it’s absolutely doable, and immensely rewarding. While it’s not the easiest orchid for someone just starting out with propagation, with a little patience and the right approach, you can absolutely succeed. Think of it as a gentle learning curve, not a steep cliff!
When the Stars Align: The Best Time to Propagate
For Angraecum filicornu, I find the sweet spot for propagation is during its active growth period. This typically means late spring through summer. You’ll want to see new roots or foliage emerging. This tells you the plant has the energy reserves needed to put into developing those brand-new babies. Trying to propagate when the plant is dormant is like asking someone to run a marathon without proper training – it’s just not going to go well.
Your Essential Toolkit
As with any gardening endeavor, having the right tools makes all the difference. Here’s what you’ll want to have on hand:
- Sharp, sterile pruning shears or a clean, sharp knife: Essential for making clean cuts that prevent disease.
- Cinnamon or rooting hormone (optional but recommended): Cinnamon acts as a natural fungicide, while rooting hormone can give new roots a helpful boost.
- Small pots or trays: For housing your new propagations.
- Well-draining orchid mix: I like a blend of fine bark, perlite, and charcoal. This is crucial for good aeration and preventing soggy conditions.
- Clear plastic bags or a propagator: To create a humid environment.
- Spray bottle: For gentle misting.
- Warmth: A seedling heat mat can be marvelous for encouraging root development.
Bringing New Life: Propagation Methods
Angraecum filicornu is primarily propagated through division, as it tends to form small pseudobulbs or offsets at its base. Gemmation (producing plantlets directly on the stem) is rare but possible.
Division: The Most Common Path
This is your go-to method for Angraecum filicornu.
- Gently remove the plant from its pot. If it’s really stuck, running a knife around the edge can help.
- Inspect the root system. Look for divisions that are at least one-third the size of the mother plant and have their own healthy roots. You’re looking for distinct pseudobulbs that seem to be growing independently.
- Using your sterile shears or knife, carefully separate the division. Make sure each piece has a good portion of roots attached. If there are long, tangled roots, it’s okay to trim them slightly to make separation easier.
- Dust the cut surface with cinnamon or your chosen rooting hormone. This helps to seal the wound and prevent infection.
- Pot up the new division. Use your well-draining orchid mix in a small pot. You want the new plant to be stable.
- Give it a light watering. Don’t drench it, just moisten the medium.
- Place the new pot in a humid environment. A clear plastic bag with a few air holes or a small propagator works wonders.
Stem Cuttings (Less Common, More Experimental)
While not typical for this specific orchid, some orchids can be propagated from stem cuttings. If your plant has a long, leggy stem with developed nodes:
- Identify a section of stem that has at least two nodes. Nodes are small bumps where leaves or roots can emerge.
- Make a clean cut below a node.
- Remove any leaves from the bottom node.
- Dust the cut end with cinnamon or rooting hormone.
- Place the cut end into your orchid mix, burying the lower node.
- Follow the same humid environment steps as for division. This method is much less reliable for Angraecum filicornu, so don’t be discouraged if it takes a while or doesn’t work.
The “Secret Sauce”: My Insider Tips
- Don’t be afraid to gently loosen compacted roots. Sometimes, the roots can become very dense. Carefully teasing them apart with your fingers or a blunt tool can reveal more division points and make for healthier new plants.
- Bottom heat is your friend! A gentle warmth from below, from a seedling mat set to around 70-75°F (21-24°C), significantly speeds up root development and overall success. It mimics the conditions of a tropical growing season.
- Patience is paramount with watering. After potting up, resist the urge to overwater. Keep the potting medium lightly moist, not soggy. Overwatering is the fastest way to invite rot, which is the biggest enemy of new propagations.
Nurturing Your New Star & What to Watch For
Once your division or cutting is potted, keep it in that humid, bright-but-indirect light location. Mist the leaves occasionally, but avoid letting water sit in the crown, as this can lead to rot, especially in the early stages.
You’ll know you’re on the right track when you start to see new root growth emerging from the base of your division or from the nodes of a stem cutting. This can take weeks, even months, so be patient!
Signs of Trouble:
- Yellowing leaves and mushy stems: This is a classic sign of rot, usually from too much moisture. If you see this, gently remove the plant, trim away any rotten material with sterile tools, dust with cinnamon, and repot in fresh, dry medium. You might lose the propagation, but it’s worth a try.
- Wilting without new growth: The plant might be too dry or not getting enough light. Check your watering routine and ensure it’s receiving adequate, but not direct, light.
Keep Growing and Enjoy!
Propagating Angraecum filicornu is a journey, and like all rewarding gardening experiences, it requires a bit of faith and a lot of observation. Celebrate the small victories, learn from any setbacks, and remember why you started – for that unmatchable starry beauty. Happy growing, my friends!
Resource:
https://identify.plantnet.org/k-world-flora/species/Angraecum%20filicornu%20Thouars/data