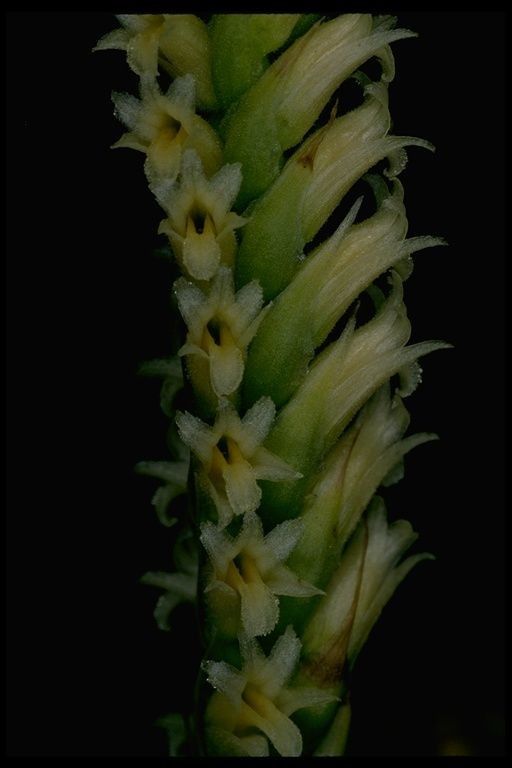
Hey there, fellow plant lovers! I’m so excited to talk to you today about a truly captivating orchid: Spiranthes porrifolia. You might know it as the “Western Spiranthes” or “Lady’s Tresses.” Its delicate, spiraling flower spikes are just…magical. Watching them unfurl is a real treat, and there’s a special kind of joy in coaxing new life from your existing plants.
Now, if you’re just starting out on your propagation journey, Spiranthes porrifolia might be a little bit of a challenge. It’s not typically the first plant I’d recommend for absolute beginners. But don’t let that scare you off! With a little patience and the right approach, you can absolutely have success.
The Best Time to Start
For Spiranthes porrifolia, I find the late winter or very early spring is absolutely the sweet spot. Think of it as just as the plant is waking up from its dormancy but before it’s put all its energy into blooming again. This is when the tubers are at their most robust and ready to push out new growth.
Supplies You’ll Need
Gathering your tools beforehand makes the whole process smoother. Here’s what I keep handy:
- Sterilized pruning shears or a sharp knife: Cleanliness is key to preventing diseases.
- Well-draining potting mix: A blend of
- 2 parts orchid bark
- 1 part perlite
- 1 part coco coir or sphagnum moss
- Small pots or propagation trays: Nothing too big, just enough to house the divisions.
- Watering can with a fine rose attachment: Gentle watering is crucial.
- Labels and a waterproof marker: You’ll thank yourself later for knowing what’s what!
- Rooting hormone (optional, but helpful): Especially for divisions, a little boost can encourage faster root development.
Propagation Methods: Division is Key!
Spiranthes porrifolia is best propagated through division. These orchids grow from tubers, which often multiply over time. Here’s how to do it:
- Gently remove the plant: Carefully take your mature Spiranthes porrifolia out of its pot. If it’s looking a bit tight, you might need to loosen the soil around the edges.
- Inspect the tubers: You’ll see fleshy, potato-like tubers. Look for where new tubers are attached to the main or older ones. These are your potential new plants!
- Make the cut: Using your sterilized shears or knife, carefully separate the divisions. Aim to keep at least one or two good tubers with each new shoot. If there are existing roots attached to the division, that’s a bonus!
- Trim any damaged parts: If you see any mushy or damaged bits on the tubers or roots, trim them away with your clean tool.
- Apply rooting hormone (optional): If you have it, lightly dip the cut end of the tubers into rooting hormone.
- Pot them up: Place each division into its own small pot filled with your well-draining mix. Make sure the tubers are just barely covered with soil, with the shoot pointing upwards. Don’t plant them too deeply.
- Water gently: Give them a light watering, just enough to settle the soil.
The “Secret Sauce” (Pro Tips)
You asked for the insider tricks, so here are a few things I’ve learned over the years:
- Don’t overwater newly divided plants. They are very susceptible to rot. I mean it – hold back on the watering, especially in the first few weeks. Let the soil dry out a bit between waterings.
- Provide gentle bottom heat. If you can, place your pots on a propagation mat set to a low temperature. This warmth encourages root development from below without stressing the delicate new growth. It’s like a cozy little greenhouse for your tubers.
- Watch for the signs of new growth. This is your cue that the roots are taking hold! It might start with a tiny new leaf emerging. It takes time, so don’t panic if you don’t see immediate results.
Aftercare & Troubleshooting
Once your divisions start showing signs of life – usually a new leaf uncurling – you can gradually increase watering. Be sure to keep them in bright, indirect light. Avoid direct sun, which can scorch their delicate leaves.
The most common problem you’ll encounter is rot, which is usually a sign of too much moisture. If a tuber turns dark, mushy, or smells foul, unfortunately, it’s likely lost. You can try to cut away the rot and repot the healthy part, but it’s often a lost cause. Keeping the soil on the drier side is your best defense.
A Encouraging Closing
Propagating Spiranthes porrifolia is a journey. It requires a bit more finesse than some other plants, but the reward of seeing those delicate spirals reappear on a new plant you’ve grown is truly immense. Be patient, observe your plants closely, and trust your gardening instincts. You’ve got this! Happy propagating!
Resource:
https://identify.plantnet.org/k-world-flora/species/Spiranthes%20porrifolia%20Lindl./data