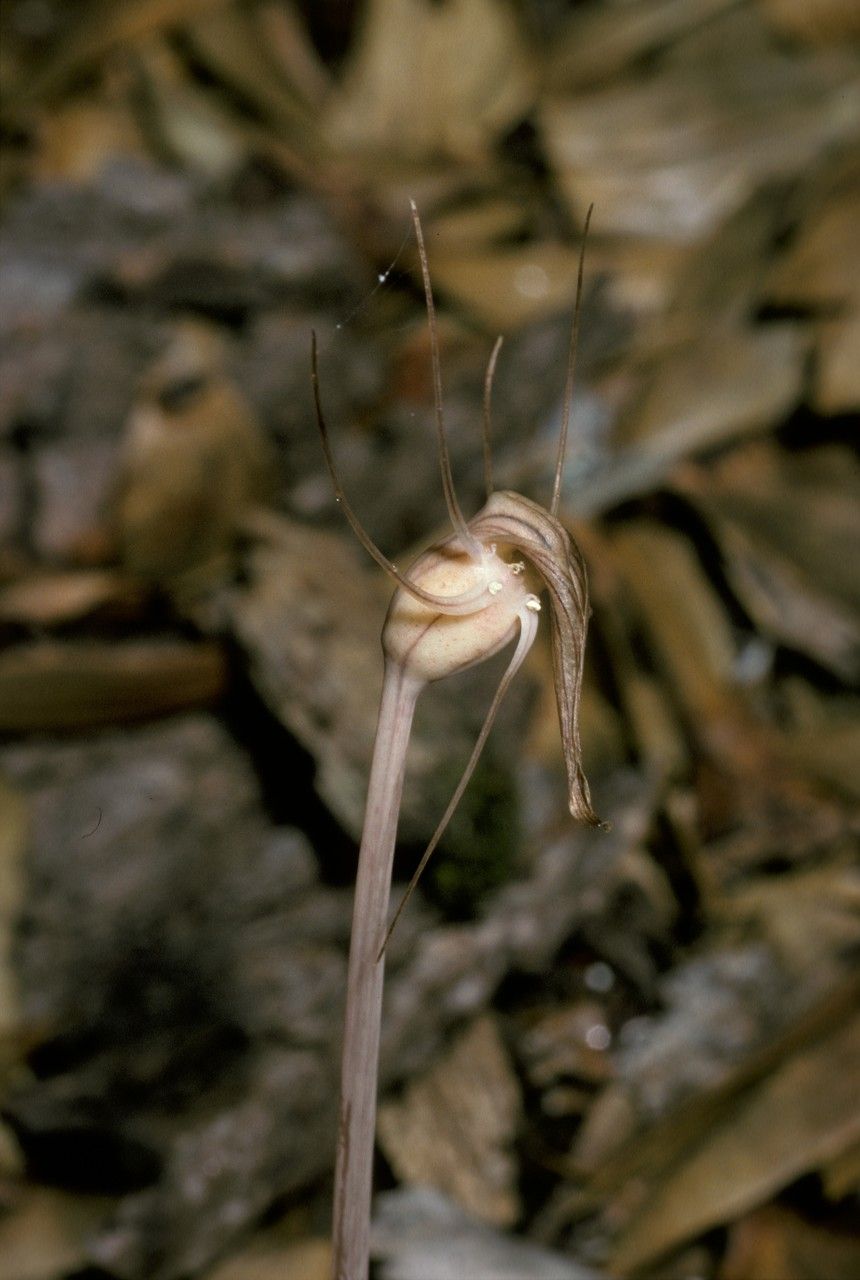
Hello there, fellow garden enthusiasts! I’m so glad you’ve stopped by. Today, we’re diving into the wonderful world of propagating Arachnitis uniflora, also known as the “Chilean Orchid” or sometimes the “Spider Orchid.” This is a truly special plant, isn’t it? With its delicate, almost ethereal blooms and a fascinating, somewhat shy nature, it’s a real jewel in any collection. If you’ve ever admired one and wished you could have more, you’re in the right place. Propagating these beauties is a journey that brings so much satisfaction, watching a tiny piece of a beloved plant grow into its own independent life. Now, I’ll be honest, Arachnitis uniflora isn’t your everyday pothos. It can be a little particular, and beginners might find it a tad challenging compared to some of the more forgiving houseplants. But with a little patience and the right approach, it’s absolutely achievable!
The Best Time to Start
For us gardeners, timing is everything, right? With Arachnitis uniflora, the sweet spot for propagation is typically in the late spring to early summer. This is when the plant is actively growing, usually after its blooming period. You’ll be looking for healthy, new growth that’s firm but not yet woody. This vigorous energy is exactly what we want to tap into for successful rooting.
Supplies You’ll Need
Gathering your tools beforehand makes the whole process feel much smoother. Here’s what I usually have on hand:
- Sharp Pruning Shears or a Knife: Cleanliness is key to preventing disease.
- Rooting Hormone (powder or gel): This is a personal preference, but I find it can give cuttings a real boost.
- Well-Draining Potting Mix: A good base is crucial. I often use a mix of equal parts perlite, coir, and orchid bark for excellent aeration.
- Small Pots or Seedling Trays: Ensure they have drainage holes!
- Clear Plastic Bag or Dome: To create a humid environment.
- Watering Can with a Fine Rose: For gentle watering.
- Labels and a Marker: So you don’t forget what you’ve propagated!
Propagation Methods: Stem Cuttings
This is my go-to method for Arachnitis uniflora because it’s generally the most reliable.
- Select Your Cuttings: Look for healthy stems that have at least two or three leaf nodes. A node is where a leaf attaches to the stem. These are the magic spots where roots will emerge.
- Make the Cut: Using your sterilized pruning shears or knife, make a clean cut just below a leaf node. Aim for cuttings that are about 4-6 inches long.
- Prepare the Cutting: Gently remove the leaves from the bottom half of the cutting. If any leaves are very large, you can even cut them in half to reduce water loss.
- Apply Rooting Hormone: If you’re using it, dip the cut end of the stem into the rooting hormone, tapping off any excess.
- Potting Up: Fill your small pots with your well-draining potting mix. Make a small hole in the center with your finger or a pencil.
- Insert the Cutting: Place the prepared cutting into the hole, ensuring that at least one or two leaf nodes are buried in the soil. Gently firm the soil around the base.
- Water Gently: Give the soil a light watering, making sure it’s moist but not soggy.
- Create Humidity: Now, for the crucial step. Cover the pot with a clear plastic bag or place it under a propagation dome. This will create a humid environment, which is vital for preventing the cuttings from drying out before they can form roots.
The “Secret Sauce” (Pro Tips)
Here are a few things I’ve learned over the years that can really make a difference:
- Don’t let the leaves touch the water (if you try water propagation): While I prefer soil for these, if you’re tempted to try water propagation, be very careful. Only the stem should be submerged, not the leaves. Any leaves in the water are a recipe for rot.
- Consider bottom heat: Arachnitis uniflora loves a little warmth to get its roots going. Placing your pots on a heated propagation mat can significantly speed up the rooting process and increase your success rate. It mimics that lovely warm soil of spring.
- Patience is key with dormancy: If your parent plant has a period of dormancy, avoid propagating during this time. Wait until it’s showing active new growth. Trying to propagate a plant that’s resting is like asking someone to run a marathon when they’re fast asleep!
Aftercare & Troubleshooting
Once you’ve potted up your cuttings, the real waiting game begins!
- Keep it Humid and Bright: Continue to maintain that humid environment under the plastic. Place your pots in a bright location, but avoid direct, harsh sunlight, which can scorch delicate cuttings.
- Check for Roots: After a few weeks, you can gently tug on a cutting. If you feel resistance, you likely have roots! You can also look for new leaf growth as a sign of success.
- Acclimatize Slowly: Once you see good root development, it’s time to gradually acclimatize your new plant to normal household humidity. Start by opening the plastic bag for a few hours each day, slowly increasing the time over a week or two.
- Signs of Trouble: The most common issue is rot. If you see a cutting turning mushy, black, or smelling foul, it’s usually a sign of too much moisture and not enough airflow, or it’s just not going to make it. Unfortunately, once rot sets in, it’s very difficult to save. Ensure your soil drains well and doesn’t stay waterlogged. Yellowing leaves without new growth can sometimes mean it needs a bit more humidity or a slightly warmer spot.
A Little Encouragement
So there you have it! Propagating Arachnitis uniflora is a journey that requires a bit of care and observation, but the rewards are immense. Don’t be discouraged if your first attempt isn’t perfect; gardening is all about learning and adapting. Keep at it, be patient, and enjoy the magical process of creating new life from an old favorite. Happy propagating!
Resource:
https://identify.plantnet.org/k-world-flora/species/Arachnitis%20uniflora%20Phil./data