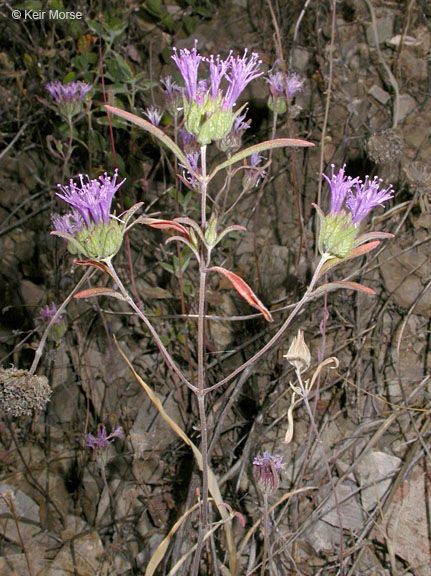
Hello green thumbs! I’m so delighted you’re curious about propagating Monardella douglasii. This native gem, also known as Douglas’s Monardella or California pennyroyal, is a true treasure for any garden. Its delicate, fragrant blooms attract pollinators in droves, and its sweet, minty scent is simply intoxicating. For me, the real joy comes from multiplying these beauties, growing my collection, and sharing them with fellow plant lovers. And guess what? While some plants can be a bit finicky, Monardella douglasii is surprisingly approachable, even for beginners. It’s a fantastic plant to practice your propagation skills on!
The Best Time to Start
When it comes to getting Monardella douglasii to take off, spring is your golden ticket. This is when the plant is bursting with new growth, making it the perfect time to take cuttings. You can also have success in early summer, as long as you’re giving your cuttings enough time to establish before cooler weather arrives. Aim for when the plant is actively growing, not when it’s stressed or dormant.
Supplies You’ll Need
Before we get our hands dirty, let’s gather our tools:
- Sharp Pruning Shears or a Knife: Cleanliness is key to preventing disease.
- Rooting Hormone (Optional but Recommended): This can give your cuttings a helpful boost.
- Small Pots or Seed Trays: Something to house your new plant babies.
- Well-Draining Potting Mix: I like a blend of equal parts perlite, peat moss or coco coir, and sandy loam. You can also buy a good quality seed-starting mix.
- Watering Can or Mister: Gentle watering is crucial.
- Clear Plastic Bag or Dome: To create a humid environment for your cuttings.
- Small Pebbles or Bark Chips: For a top dressing to retain moisture.
Propagation Methods
I find that stem cuttings are wonderfully effective for Monardella douglasii. It’s a straightforward process that yields great results.
Here’s how I do it:
- Take Your Cuttings: In spring or early summer, select healthy, non-flowering stems. I look for stems that are about 4-6 inches long and have started to harden slightly, but aren’t woody. Using your sterile shears, make a clean cut just below a leaf node (where a leaf attaches to the stem). Remove the lower leaves, leaving about 2-3 sets of leaves at the top.
- Prepare the Cutting: If you’re using rooting hormone, dip the cut end of the stem into it. Gently tap off any excess.
- Plant Your Cuttings: Fill your small pots or trays with your prepared potting mix. Make a small pilot hole with a pencil or your finger, then insert the cutting. You want the leaf nodes to be buried in the soil. Gently firm the soil around the base of the cutting.
- Water and Cover: Water the soil lightly. You want it moist, not waterlogged. Then, place the pot inside a clear plastic bag, or cover it with a clear dome to trap humidity. This is crucial for preventing the cuttings from drying out. You can place a few small pebbles or bark chips on top of the soil to help retain moisture and give it a nice finish.
The “Secret Sauce”
Now, for a couple of my personal tricks that help ensure success:
- Don’t Let Leaves Touch the Water (If Doing Water Propagation): While I primarily use soil for Monardella douglasii, if you decide to try a few in water, be sure only the cut stem is submerged. Any leaves that dip into the water will rot, which can kill your whole cutting before it even has a chance to root.
- Think Bottom Heat: If you have the option, placing your pots on a gentle heating mat can significantly speed up root development. It mimics the warmth of spring soil and encourages those roots to form much faster. Just be sure the heat isn’t too intense; we want warm, not hot!
Aftercare & Troubleshooting
Once your cuttings are planted, place them in a bright spot with indirect light. Avoid direct sun, which can scorch those tender new leaves. Keep the soil consistently moist but not soggy. You’ll know your cuttings are happy when you see new leaf growth emerging, usually within 2-4 weeks.
The most common sign of trouble is rot. If you see mushy, discolored stems or leaves, it usually means there’s too much moisture and not enough air circulation. In this case, you might need to remove the affected cutting and try again, ensuring your soil drains well and you’re not overwatering. If a cutting just wilts and stays that way, it likely didn’t form roots. Don’t get discouraged; it happens to the best of us!
A Heartfelt Closing
Propagating plants is such a rewarding journey. It’s a chance to connect with nature, expand your garden, and share the beauty of plants with others. Be patient with your Monardella douglasii cuttings. Watch for those tiny signs of life, and celebrate every little bit of progress. You’re nurturing new life, and that’s a truly special thing. Happy gardening!
Resource:
https://identify.plantnet.org/k-world-flora/species/Monardella%20douglasii%20Benth./data