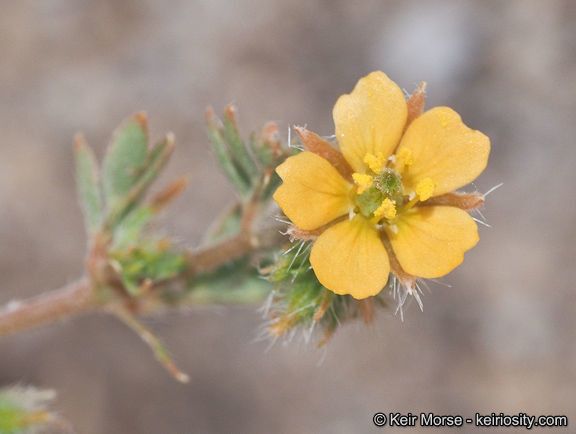
Hello fellow plant lovers! Today, we’re going to talk about a real charmer: Kallstroemia parviflora. This little desert wildflower, with its cheerful blooms that often go unnoticed in its native arid landscapes, is a delight to have in the garden. Its tenacity and beautiful, though fleeting, flowers make it a rewarding plant to grow. And the best part? You can easily multiply this beauty yourself! Propagating Kallstroemia parviflora is generally a rewarding and quite accessible process, even for those just dipping their toes into the world of plant propagation.
The Best Time to Start
For the highest success rate with Kallstroemia parviflora, I always recommend working with actively growing, healthy stems. Spring, as new growth really kicks off, is generally your golden window. You can also have good luck in early summer before the plant gets too stressed by intense heat. Aim to take cuttings when the plant isn’t flowering profusely – you want its energy to go into root development, not seed production.
Supplies You’ll Need
Gathering your tools beforehand makes the whole process smoother. Here’s what I’ve found helpful:
- Sharp Pruning Shears or a Clean Knife: For making clean cuts.
- Potting Mix: A well-draining mix is crucial. I often use a blend of perlite and peat moss (about 50/50), or a good quality cactus/succulent mix.
- Small Pots or Seed Trays: With drainage holes, of course!
- Rooting Hormone (Optional but Recommended): A good powder or gel can significantly boost your success rate.
- Watering Can or Spray Bottle: For gentle watering.
- Plastic Bag or Humidity Dome: To create a mini-greenhouse effect for your cuttings.
Propagation Methods
Kallstroemia parviflora is wonderfully amenable to propagation from stem cuttings. It’s my go-to method, and I think you’ll find it works beautifully.
Stem Cuttings:
- Select Your Stems: Look for healthy, non-flowering stems that are about 4-6 inches long. They should be somewhat flexible but not too soft.
- Make the Cut: Using your clean shears or knife, make a clean cut just below a leaf node. A leaf node is where a leaf attaches to the stem; this is where roots are most likely to form.
- Prepare the Cutting: Gently strip off the lower leaves, leaving just a few at the very top. This prevents them from rotting once planted.
- Apply Rooting Hormone (Optional): If you’re using rooting hormone, dip the cut end into the powder or gel. Tap off any excess.
- Plant the Cutting: Fill your small pots with your prepared, moistened potting mix. Make a small hole with your finger or a pencil, and insert the cutting about 1-2 inches deep. Gently firm the soil around it.
- Water Gently: Give the soil a light watering to settle it around the cutting. Avoid waterlogging.
- Create a Humid Environment: Place the pot inside a plastic bag or cover it with a humidity dome. This traps moisture, which is essential for cuttings to root. Make sure the leaves don’t touch the plastic if possible.
- Find a Sunny Spot: Place the pots in a bright location with indirect sunlight. Avoid direct sun, which can scorch the leaves.
The “Secret Sauce” (Pro Tips)
After years of coaxing new plants into existence, I’ve picked up a few tricks that can make all the difference.
- My absolute favorite tip: Use bottom heat! Placing your pots on a propagation mat or even a warm windowsill can significantly speed up root development. It mimics the warmth of summer soil and really encourages those little roots to emerge.
- When you water, don’t drown them! A gentle misting or watering from the bottom (by setting pots in a shallow tray of water for a short period) is usually best. You want the soil moist, not soggy. Soggy soil is the express lane to rot for tender cuttings.
- Don’t be afraid to experiment with different stem thicknesses. While 4-6 inch stems are a good starting point, I’ve had success with slightly thinner or woodier pieces too. Nature is wonderfully resilient!
Aftercare & Troubleshooting
Once your cuttings have rooted (this can take anywhere from 2-6 weeks), you’ll start to see signs of new growth at the top. You can gently tug on a cutting; if there’s resistance, roots have formed.
Once roots are established, gradually acclimate your new plants to normal humidity. Slowly open the plastic bag over a few days, or remove the humidity dome for longer periods. Continue to water as needed, letting the soil dry out slightly between waterings.
The most common problem you’ll encounter is rot. If you see your cuttings turning black and mushy, it’s a sign of too much moisture and poor air circulation. Unfortunately, anything that rots is usually beyond saving. Ensure your potting mix is well-draining and that you’re not overwatering. If you spot rot early, you can try to salvage any healthy-looking bits by taking fresh cuttings, but prevention is key!
A Encouraging Closing
Propagating plants is a wonderful way to connect with nature’s cycles. Be patient with your Kallstroemia parviflora cuttings. Not every attempt will be a roaring success, and that’s perfectly okay! Each cutting is a learning opportunity. Enjoy the process, celebrate every new root, and soon you’ll have a beautiful collection of these resilient desert gems to share. Happy gardening!
Resource:
https://identify.plantnet.org/k-world-flora/species/Kallstroemia%20parviflora%20Norton/data