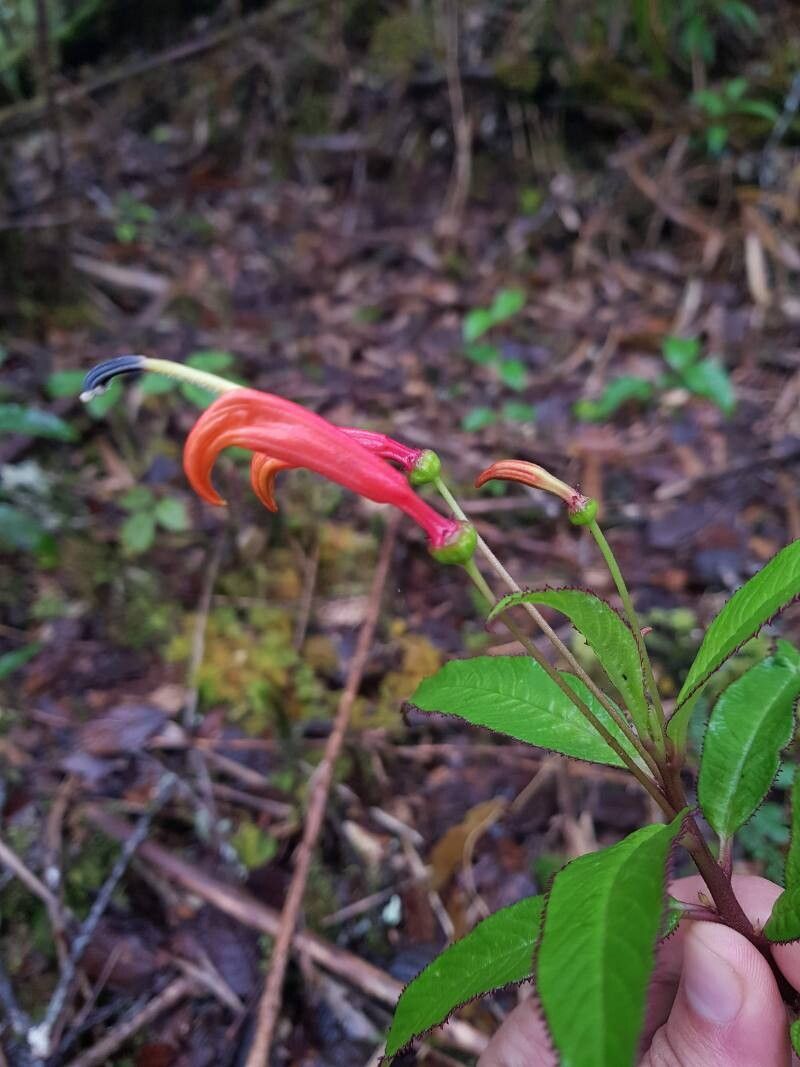
Oh, hello there, fellow plant enthusiast! I’m so glad you’ve stopped by for a chat about Centropogon ferrugineus. If you’re like me, you’ve probably admired its gorgeous clusters of fiery red-orange blooms. They really are a sight for sore eyes, aren’t they? And the fuzzy, almost velvety texture of its leaves? Just divine!
Propagating these beauties is a truly rewarding endeavor. It’s like getting to play little garden fairy, multiplying these stunning plants to share with friends or to fill every sunny nook in your own home. Now, for beginners, I’d say Centropogon ferrugineus falls somewhere in the moderately easy category. It’s not as fuss-free as a pothos, but with a little patience and the right approach, you’ll be successful in no time.
The Best Time to Start
For the highest success rate, early spring is your golden ticket. Think of it as giving your new cuttings the longest growing season ahead of them. Starting them right after your plant has finished its winter rest (or has started showing new, vigorous growth) means they have all the energy they need to put out roots and establish themselves. Avoid trying to propagate during the heat of summer or the depths of winter when growth naturally slows down.
Supplies You’ll Need
Gathering your supplies beforehand makes the whole process much smoother. Here’s what you’ll want to have on hand:
- Sharp, clean pruning shears or a sharp knife: A clean cut is crucial for preventing disease.
- Small pots or seedling trays: Anything with drainage holes will do!
- A well-draining potting mix: I personally love a mix of equal parts peat moss, perlite, and coarse sand. This ensures good aeration and prevents waterlogging. You can also buy a good quality seedling mix and add extra perlite.
- Rooting hormone (optional but recommended!): This can give your cuttings a real head start. Look for one with IBA (indole-3-butyric acid).
- Plastic bags or a propagator lid: To create a mini-greenhouse effect.
- Watering can or spray bottle: For gentle watering.
- Labels and a marker: So you don’t forget what you planted where!
Propagation Methods
There are a couple of tried-and-true ways to get more Centropogon ferrugineus plants. I find stem cuttings to be the most reliable method.
Stem Cuttings
- Select your cuttings: Look for healthy, non-flowering stems on your mature plant. You want healthy, semi-hardwood cuttings, about 4-6 inches long. Avoid overly soft, new growth or old, woody stems.
- Make the cut: Using your sharp, clean shears or knife, make a cut just below a leaf node. A leaf node is where a leaf attaches to the stem. This is where the magic of root development happens!
- Prepare the cutting: Gently remove the lower leaves, leaving just a couple of sets at the top. This prevents them from rotting once they’re in the soil.
- Apply rooting hormone (if using): Dip the cut end of the stem into your rooting hormone powder or gel. Tap off any excess.
- Plant the cuttings: Fill your small pots or seedling tray with your prepared potting mix. Make a small hole in the center with your finger or a pencil.
- Insert the cutting: Gently place the cut end of the stem into the hole, making sure it’s seated firmly.
- Water gently: Water the soil thoroughly but gently, until you see water draining from the bottom of the pot.
- Create a humid environment: Cover the pot with a clear plastic bag or place it inside a propagator with a lid. Make sure the leaves don’t touch the plastic. You can insert a couple of small stakes to keep the bag from collapsing onto the leaves.
Water Propagation (Less Common, but Works!)
While stem cuttings are my go-to, you can also try water propagation.
- Prepare the cutting: Follow steps 1-3 from the stem cutting method.
- Place in water: Put the prepared cuttings in a clean glass jar or vase filled with fresh water.
- Essential tip: Crucially, ensure that no leaves are submerged in the water. This is where they’ll start to rot.
- Monitor and change water: Place the jar in bright, indirect light. Change the water every few days to keep it fresh and prevent bacterial growth.
- Wait for roots: You should start to see roots forming within a few weeks. Once the roots are about an inch long, you can carefully transplant them into your potting mix.
The “Secret Sauce” (Pro Tips)
Here are a few little tricks I’ve learned over the years that can really boost your propagation success:
- Bottom Heat is Your Friend: Centropogon ferrugineus loves a bit of warmth from below. Placing your pots on a heated seed starting mat can significantly speed up root development. It mimics the warmth of the soil in spring and really encourages those roots to grow.
- Don’t Be Afraid to Mist: While you want the soil to be consistently moist, not waterlogged, a light misting of water on the leaves every few days can help keep the cuttings turgid, especially if they’re in a very humid environment. Just be careful not to overdo it.
- Patience with a Mature Plant: If you’re taking cuttings from a plant that’s just finished flowering, give it a little time to recover and start producing new, tender growth before you snip. This new growth has more stored energy for rooting.
Aftercare & Troubleshooting
Once you start seeing tiny roots peeking out from the drainage holes or new growth appearing on your cutting, it’s time to transition to a new phase of care.
- Acclimatization: If you’ve used plastic bags, gradually remove them over a few days to allow the new plant to adjust to the ambient humidity.
- Watering: Continue to water regularly, allowing the top inch of soil to dry out between waterings. Avoid letting them sit in water.
- Light: Keep them in bright, indirect light. Once they are well-established, you can gradually introduce them to more direct sunlight, as Centropogon ferrugineus enjoys a sunny spot.
- Fertilizing: Wait until you see noticeable new growth before you start feeding with a diluted liquid fertilizer.
Common Signs of Failure
- Rot: The most common culprit! If your cuttings turn black and mushy, it’s a sign of too much moisture and poor drainage. Ensure your potting mix is well-draining, and don’t overwater. If you catch it early, you might be able to salvage a cutting by making a fresh cut above the rotted section and replanting.
- Wilting: Sometimes cuttings just fail to root and will wilt. This can happen if the cutting was too old, too young, or simply didn’t have the energy reserves to form roots. Don’t be discouraged; just try again!
A Little Encouragement
Growing plants is a journey, and propagation is a wonderful part of that adventure. Don’t get discouraged if your first few attempts aren’t perfect. Every gardener has had their share of cuttings that didn’t make it. The most important thing is to be patient, observe your plants, and enjoy the process. Soon, you’ll have a lovely collection of Centropogon ferrugineus to brighten your home and share with loved ones. Happy propagating!
Resource: