Hello there, fellow plant enthusiast! I’ve got to tell you, there’s something truly special about taking a piece of a plant you love and coaxing it into a whole new life of its own. Today, we’re diving into the wonderful world of propagating Agave dealbata.
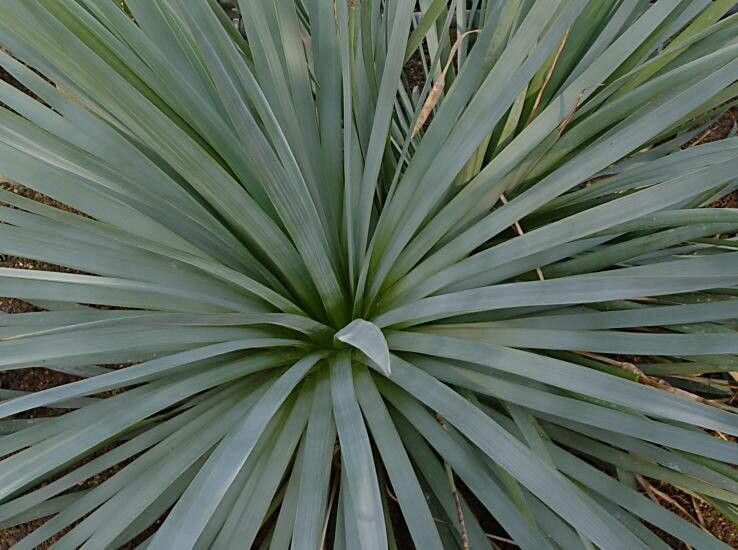
These architectural beauties are such statement makers in any garden, with their sculptural rosettes of silvery-blue leaves. They bring a touch of the desert right to your doorstep. And the joy of watching a tiny pup unfurl and grow into its own mature plant? Priceless! For beginners, I’d say propagating Agave dealbata is moderately easy, but with a little know-how, you’ll be a pro in no time.
The Best Time to Start
Honestly, the spring and early summer months are your golden ticket here. This is when your Agave dealbata is actively growing and buzzing with energy. You’ll find it has the best chance of successfully rooting during this time. Look for pups that are well-formed and have started to develop their own substantial base, rather than tiny, wispy sprouts.
Supplies You’ll Need
Gathering your tools beforehand makes the whole process so much smoother. Here’s what I always have on hand:
- Sharp, clean pruning shears or a sturdy knife: For making clean cuts.
- Gloves: Agave leaves can be prickly!
- Rooting hormone powder (optional but recommended): This helps encourage those roots to form faster.
- Well-draining potting mix: A cactus or succulent blend is perfect. You can also make your own by mixing equal parts potting soil, perlite, and coarse sand.
- Small pots or containers: With drainage holes, of course.
- A watering can or spray bottle: For gentle watering.
- Newspaper or cardboard: To set those cuttings on while they callus.
Propagation Methods: Making New Agaves!
The most common and successful way to propagate Agave dealbata is through offsets, also called pups. These are the baby plants that grow from the base of the mother plant.
- Identify and Prepare: Gently dig around the base of your Agave dealbata to expose the pups. You’re looking for ones that are at least a few inches across and have begun to develop their own root system, even if it’s small.
- Careful Separation: Using your sharp pruning shears or knife, carefully cut the pup away from the mother plant. Try to get as much of the base, with its nascent roots, as possible. If a pup is already partially separated, it makes it even easier!
- Let It Callus: This is a crucial step! After you’ve removed the pup, place it on a dry surface like newspaper or cardboard in a well-ventilated area, out of direct sunlight, for several days to a week. You want the cut end to dry out and form a callus. This prevents rot when you plant it.
- Planting: Once the cut end is completely dry and callused, you can plant your pup. Fill a small pot with your well-draining potting mix.
- Rooting Hormone (Optional): If you’re using rooting hormone, dip the callused end of the pup into the powder, tapping off any excess.
- Planting the Pup: Gently insert the callused end into the soil, pressing down just enough to keep it stable. Don’t bury it too deep – you want the base of the rosette to sit just above the soil line.
- First Watering: Wait a few days after planting before giving it its first light watering. You want to let that callus heal completely.
The “Secret Sauce” (Pro Tips)
Here are a couple of tricks I’ve picked up over the years that really boost your success rate:
- Don’t rush the watering: Patience is key! Overwatering a newly planted pup is the fastest way to invite rot. Wait until you see new growth or the soil is thoroughly dry before watering again.
- A touch of warmth helps: If you can, place your newly potted pups in a warm spot. A little bit of gentle bottom heat (like a seedling heat mat set on low) can really encourage root development. Just make sure it’s not too hot – we’re encouraging not cooking!
Aftercare & Troubleshooting
Once your pup has roots, treat it like a young, but still drought-tolerant, agave. Water sparingly, only when the soil is completely dry. You want to mimic its natural arid environment.
The most common issue you’ll encounter is rot. This usually happens if the cutting was planted too soon, or if it’s sitting in soggy soil. Signs of rot include mushy, discolored leaves, often from the base upwards, and a foul smell. If you see this, it’s often too late to save it. Prevention is definitely the best cure here! Another sign something isn’t quite right is if the pup just looks increasingly shriveled without any signs of rooting after a long period. This could mean it simply failed to root, or it’s also a sign of too little water or not enough warmth.
A Encouraging Closing
Propagating Agave dealbata is such a rewarding journey. It requires a bit of patience, a watchful eye, and a willingness to get your hands dirty. But seeing those new plants thrive, knowing you helped bring them to life? That’s a gardening joy that truly can’t be beaten. So grab your tools, find a healthy pup, and enjoy the process! Happy propagating!
Resource:
https://identify.plantnet.org/k-world-flora/species/Agave%20dealbata%20É.Morren%20ex%20K.Koch/data