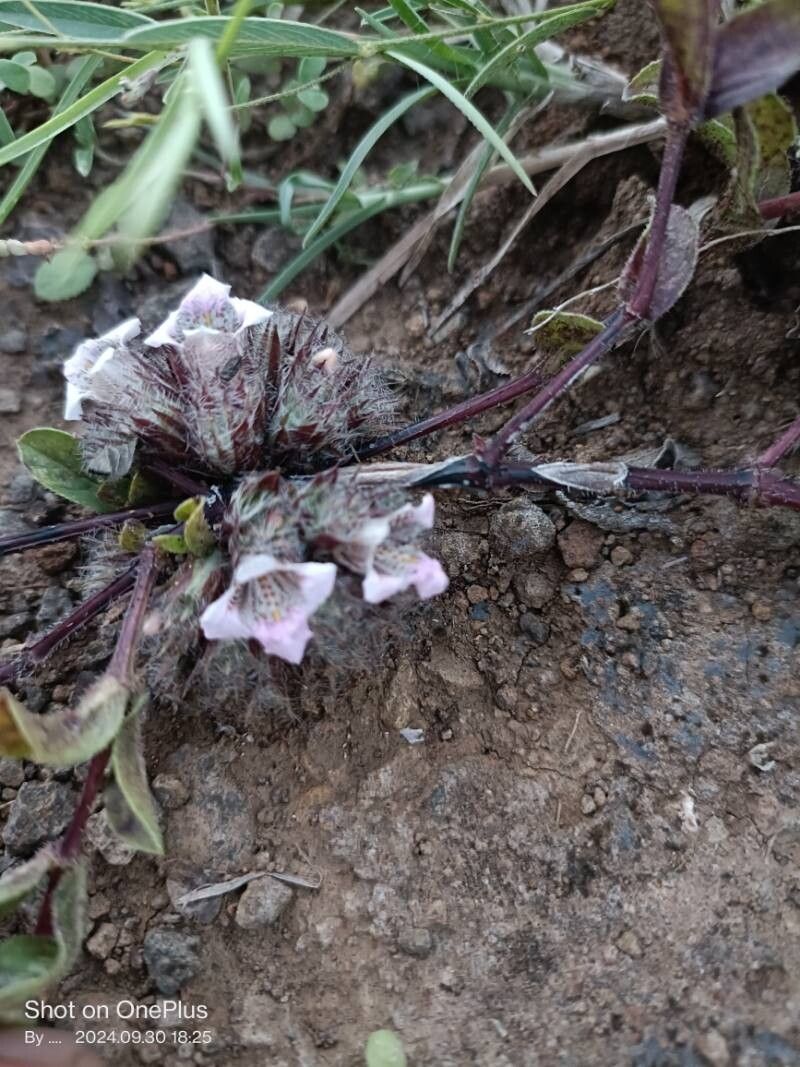
Hello fellow plant lovers! Let’s talk about a gem that often flies under the radar but absolutely deserves a spot in your collection: Lepidagathis trinervis. I’ve been smitten with this one for years. Its delicate, often vibrant green foliage, sometimes with a lovely bronzy undertone, creates such a beautiful, airy texture in the garden or on a windowsill. And the satisfaction that comes from coaxing a new plant into life from just a tiny piece of the parent? Pure gardening joy! Now, if you’re just starting out, I’d say Lepidagathis trinervis is a pretty forgiving plant to work with. You’re in for a treat!
The Best Time to Start
My experience tells me that spring is truly your golden ticket for propagating Lepidagathis trinervis. As the days lengthen and temperatures begin to warm, the plant is entering its most vigorous growth spurt. This surge in energy means it’s ready to channel all its effort into producing new roots rather than just sitting there, wondering what’s happening. You’ll find cuttings take off with much more enthusiasm then.
Supplies You’ll Need
Here’s what I usually have on hand when I’m getting ready to propagate:
- Sharp Pruning Shears or a Clean Knife: For making precise cuts.
- Rooting Hormone (Optional but Recommended): A little boost can really help.
- Well-Draining Potting Mix: A blend of equal parts peat moss or coco coir, perlite, and a touch of coarse sand works wonders.
- Small Pots or Seedling Trays: Clean and with drainage holes, of course.
- Clear Plastic Bag or Humidity Dome: To create a humid microclimate.
- Small Watering Can or Spray Bottle: For gentle watering.
- Labels and a Marker: So you remember what’s what!
Propagation Methods
For Lepidagathis trinervis, I find stem cuttings to be the most reliable and straightforward method. It’s also quite effective, meaning you’ll likely get a good success rate.
Stem Cuttings:
- Take Your Cuttings: As I mentioned, spring is ideal. Look for healthy, non-flowering stems. Using your clean shears, make a cut just below a leaf node – that’s the point where leaves emerge from the stem. Aim for cuttings that are about 4-6 inches long.
- Prepare the Cuttings: Gently remove the lower leaves from the cutting, leaving just a couple at the very top. This prevents them from rotting when buried in the soil.
- Apply Rooting Hormone (If Using): Dip the cut end of the stem into your rooting hormone powder or liquid. Tap off any excess.
- Plant Your Cuttings: Fill your small pots or trays with your prepared potting mix. Make a hole in the center with your finger or a pencil. Gently insert the cutting into the hole, ensuring the nodes where you removed the leaves are at or just below the soil surface. Firm the soil gently around the base of the cutting.
- Provide Humidity: Water the soil lightly and then cover the pots with a clear plastic bag or a humidity dome. This creates a greenhouse effect, keeping the cuttings moist and encouraging root development. Place them in a bright spot, but out of direct sunlight, which can scorch the delicate cuttings.
The “Secret Sauce” (Pro Tips)
Here are a couple of things I’ve learned over the years that make a real difference:
- Don’t Drown Your Newcomers: When you first water after planting, make sure the soil is moist but not waterlogged. Then, resist the urge to overwater. Let the top inch of soil dry out slightly between waterings. Overwatering is probably the quickest way to invite rot, and we want healthy roots, not mushy stems!
- Bottom Heat is Your Friend: If you have a heat mat designed for seedlings, placing your pots on it can significantly speed up the rooting process. Gentle warmth from below encourages root formation beautifully in those crucial first few weeks. You’ll often see root development happening much faster this way.
Aftercare & Troubleshooting
Once your cuttings have been happily sitting in their humid environment for a few weeks, it’s time to check for roots! You can gently tug on a cutting – if there’s resistance, you’re likely to have roots. Once they’re established, gradually acclimate them to lower humidity by opening the plastic bag a little bit each day.
The most common sign of failure you’ll encounter is rot. If a cutting turns dark, mushy, and just won’t firm up, it’s likely succumbed to rot. This usually points back to overwatering or poor drainage at the start. If you see this, sadly, it’s best to discard the affected cutting and start fresh, perhaps with a few more cuttings to increase your chances. Keep an eye out for wilting, too, but if the leaves are still green and turgid, wilting might just be a sign of thirst.
A Little Patience Goes a Long Way
Propagating Lepidagathis trinervis is such a rewarding endeavor. It might take a few weeks, and sometimes a cutting or two may not make it, but that’s all part of the learning curve. Don’t get discouraged! Just keep practicing, enjoy the process of nurturing these little pieces of life, and soon you’ll have even more of this delightful plant to share or enjoy. Happy propagating!
Resource:
https://identify.plantnet.org/k-world-flora/species/Lepidagathis%20trinervis%20Nees/data