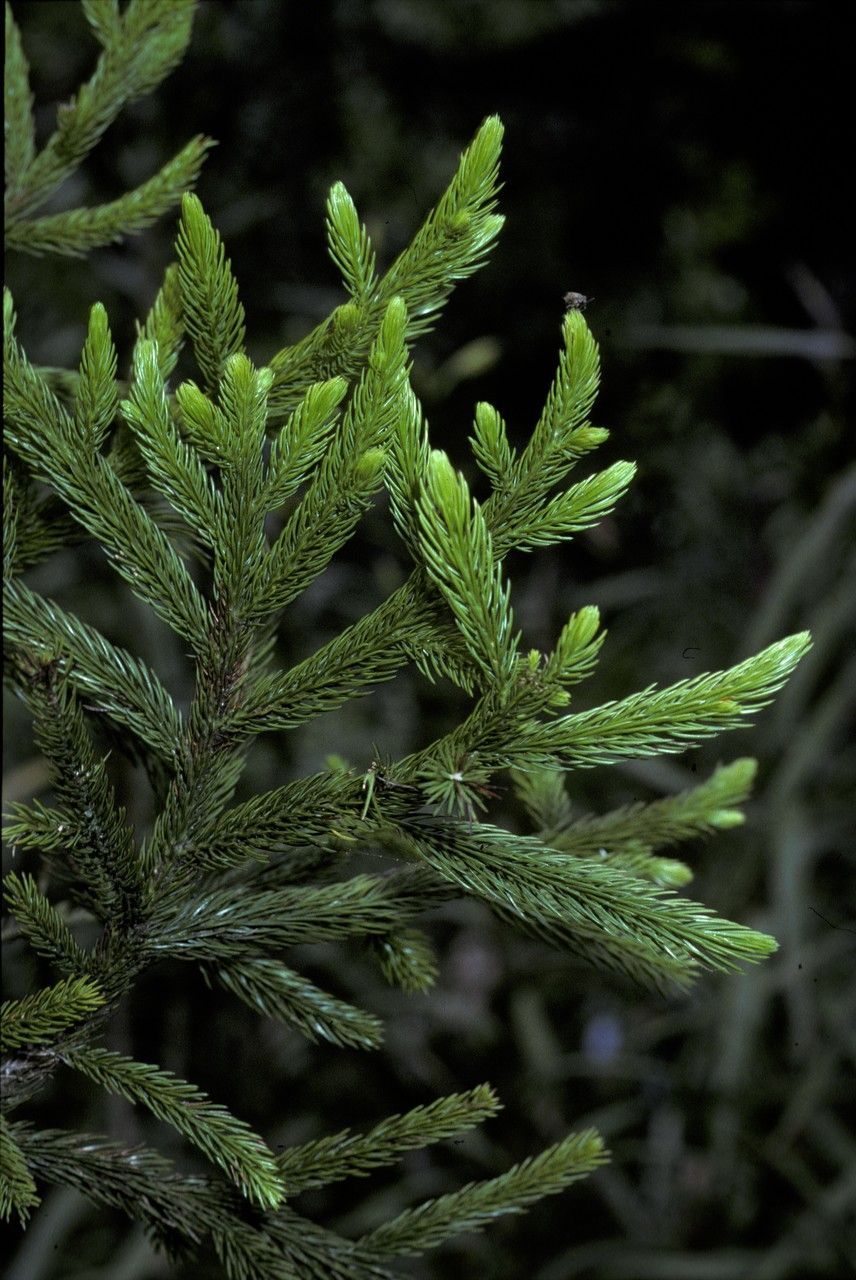
Hello there, fellow plant lovers! Today, I want to chat about a truly special coniferous gem: Dacrydium gibbsiae. Sometimes called the “Bornean Pine” or “Gibbs’ Podocarpus,” this elegant tree is a stunner with its gracefully drooping foliage. It brings a touch of the exotic to any garden, evoking ancient forests and tranquil mountain landscapes. Propagating it yourself is incredibly rewarding, a chance to grow your own piece of that wild beauty. Now, I won’t lie, Dacrydium gibbsiae isn’t the absolute easiest plant to propagate for absolute beginners, but with a little care and patience, it’s certainly achievable and well worth the effort!
The Best Time to Start
For the best chance of success with your Dacrydium gibbsiae propagation, I always aim for late spring to early summer. This is when the plant is actively growing, and new shoots are typically more vigorous and responsive to rooting. You want to be taking cuttings from healthy, actively growing stems, not those that are woody and old, or spindly and weak.
Supplies You’ll Need
Here’s a handy list of what you’ll want to have on hand before you get started:
- A sharp, clean pruning shear or a sharp knife. Sterilize your tools beforehand with rubbing alcohol to prevent disease.
- A potting mix that drains well. I love a blend of roughly equal parts peat moss or coco coir, perlite, and a little bit of coarse sand.
- A rooting hormone. A powder containing IBA (indole-3-butyric acid) is usually a good bet for conifers.
- Small pots or trays with drainage holes.
- A plastic bag or a humidity dome. This will create a mini-greenhouse effect.
- Labels to mark your cuttings! Trust me, you’ll thank yourself later.
- Optional, but highly recommended: a heat mat.
Propagation Methods
The most reliable way to propagate Dacrydium gibbsiae is through stem cuttings. Here’s how I do it:
- Select Your Cuttings: Go to your parent plant and look for healthy, semi-hardwood stems that are about 4-6 inches long. You want a stem that’s firm but still has some flexibility. Avoid any brittle, old wood or very soft, new growth.
- Make the Cut: Using your sterile pruning shear or knife, make a clean cut just below a leaf node (where a leaf attaches to the stem). This is where roots are most likely to form.
- Prepare the Cutting: Gently remove the lower leaves from the bottom inch or two of the stem. This prevents them from rotting when buried in the soil. If the stem is particularly long, you can pinch off the very tip to encourage bushier growth later on.
- Apply Rooting Hormone: Dip the cut end of the stem into your rooting hormone, tapping off any excess. Make sure the end is well-coated.
- Plant Your Cuttings: Fill your small pots with your well-draining potting mix. Make a hole in the center with a pencil or your finger, and carefully insert the prepared cutting. Gently firm the soil around the base to ensure good contact.
- Water and Cover: Water the pot gently but thoroughly. Then, place the pot inside a clear plastic bag or cover it with a humidity dome. This is crucial for keeping the humidity high, which cuttings need to prevent drying out before they develop roots. Ensure the leaves do not touch the sides of the plastic bag if possible, as this can also lead to rot.
The “Secret Sauce” (Pro Tips)
Now, here are a couple of my little tricks that often make all the difference:
- When you first plant your cuttings, I highly recommend placing them on a heat mat set to a low temperature (around 70-75°F or 21-24°C). This gentle bottom heat encourages root development from beneath, essentially giving your cuttings a warm little foot bath to start growing.
- Don’t be tempted to peek too often, especially in the first few weeks! Resist the urge to yank on the cuttings to see if they have roots. The best way to tell is to observe the overall health of the cutting – does it look plump and green, or is it wilting and yellowing? Patience is key.
- If propagation isn’t working quickly, try slightly adjusting the humidity. Sometimes too much can encourage fungal growth. If you see any signs of mold, carefully remove the affected cutting and increase ventilation for a short period.
Aftercare & Troubleshooting
Once you see signs of new growth appearing on your cuttings – tiny leaves unfurling or perhaps a little shoot emerging – that’s a good indication that roots have formed! The next step is to gradually acclimate your new plants to normal room humidity. Start by opening the plastic bag or dome for a few hours each day, and slowly increase the time over a week or two. Continue to keep the soil consistently moist but not waterlogged.
The most common issue you’ll encounter is rot. This usually happens if the soil is too wet or if there’s poor air circulation leading to fungal growth. If a cutting turns black or mushy, unfortunately, it’s likely lost. Don’t get discouraged; just remove it and try again with a fresh cutting, paying close attention to soil moisture and ventilation. Wilting can also be a sign of insufficient humidity or, conversely, too much water leading to root rot.
A Encouraging Closing
Propagating Dacrydium gibbsiae is a wonderful way to connect with nature and build your gardening confidence. It’s a process that requires a bit of foresight and a lot of patience, but the joy of nurturing a tiny cutting into a thriving young tree is truly unmatched. So gather your supplies, find a healthy specimen, and give it a go! Enjoy the journey, and happy growing!
Resource:
https://identify.plantnet.org/k-world-flora/species/Dacrydium%20gibbsiae%20Stapf/data