Hey there, fellow plant lovers!
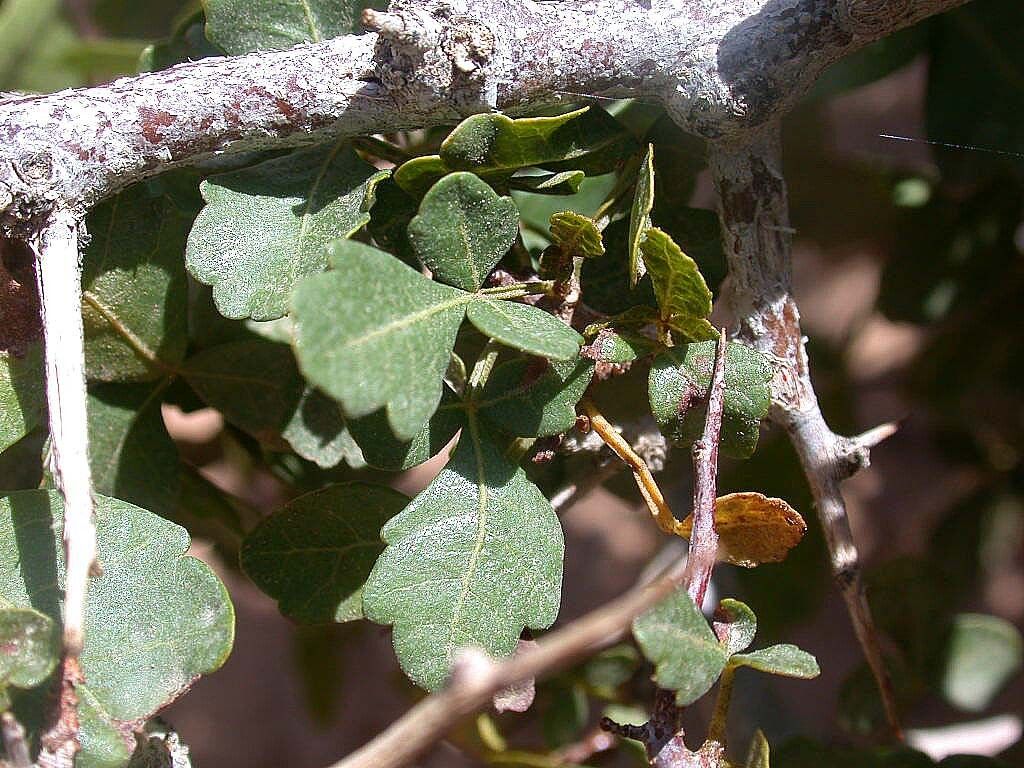
Let me tell you about Searsia tripartita, or Karoo Rhus as it’s often called. It’s that lovely, shrubby plant with the distinctive trifoliate leaves, often found gracing the drier parts of our landscapes. I’ve always admired its resilience and elegant, understated beauty. Plus, successfully propagating a plant from a cutting or a division just feels like magic, doesn’t it? It’s a wonderful way to get more of these gems for your own garden or to share with friends. And for those of you just dipping your toes into propagation, Searsia tripartita can be a bit of a learning curve, but don’t let that deter you! With a little care and attention, you can absolutely master it.
The Best Time to Start
For the highest chance of success with Searsia tripartita, I find that spring or early summer is your sweet spot. This is when the plant is actively growing, and those new, somewhat soft shoots have the best energy to root. Waiting until the growth has hardened off a bit, but before the intense heat of midsummer, is really key.
Supplies You’ll Need
Gathering your supplies beforehand makes the whole process so much smoother. Here’s what I always have on hand:
- Sharp Pruning Shears or a Knife: Clean cuts are essential for healthy rooting.
- Seedling Potting Mix or a Sandy Compost: Something well-draining is crucial. I often mix equal parts potting soil and perlite or coarse sand.
- Rooting Hormone (Optional but Recommended): This little helper can really boost your success rate, especially for trickier propagations.
- Small Pots or a Propagation Tray: Clean and with drainage holes, of course!
- Hand Trowel or Dibber: For making holes in the soil.
- Labels: Don’t forget to label your precious new plants!
- Watering Can with a Fine Rose: To water gently without disturbing your cuttings.
- Clear Plastic Bag or Propagation Dome: To create a humid environment.
Propagation Methods
There are a couple of ways we can coax new life from your Searsia tripartita.
Stem Cuttings
This is usually my go-to method for shrubs like this.
- Take your cuttings: In spring or early summer, select healthy, non-flowering stems from a mature plant. Look for stems that are pencil-thick and have started to firm up but aren’t woody.
- Make the cut: Using your clean shears, cut pieces about 10-15 cm long. Make your cut just below a leaf node (where a leaf attaches to the stem).
- Prepare the cuttings: Gently remove the lower leaves from the bottom half of each cutting. Leave just a couple of leaves at the very top to help with photosynthesis. If the remaining leaves are very large, you can even snip them in half to reduce water loss.
- Apply rooting hormone: Dip the cut end of each stem into your rooting hormone powder, tapping off any excess.
- Plant the cuttings: Fill your small pots or tray with your well-draining soil mix. Use a dibber or your finger to make a hole in the soil for each cutting. Gently insert the prepared cutting into the hole, ensuring the leaf nodes are buried. Firm the soil gently around the stem.
- Water and cover: Water thoroughly but gently. Then, cover the pots with a clear plastic bag or place them under a propagation dome to create a humid environment. You can prop the bag up with a few twigs so it doesn’t touch the leaves.
Division (If your plant is suitable)
If you have a clump-forming Searsia tripartita that is getting a bit large, division can be a great option. This is best done in autumn or early spring.
- Carefully dig up the plant: Water the plant thoroughly a day or two before you plan to divide it. This helps the soil fall away from the roots. Dig around the root ball, lifting the entire plant out of the ground.
- Separate the sections: Examine the root ball. You’re looking for natural divisions where you can see distinct crowns and root systems. You might be able to gently pull sections apart with your hands. For tougher divisions, you might need to use your clean spade or even a sharp knife to cut through the roots.
- Replant immediately: Replant the divided sections as soon as possible into their new locations, or into pots filled with your good potting mix. Ensure they are planted at the same depth they were previously growing.
- Water well: Water all divisions thoroughly.
The “Secret Sauce” (Pro Tips)
Here are a couple of little things that have made a big difference for me:
- The power of the node: Always make your cutting just below a leaf node. This is where the plant’s hormones are concentrated, and it’s the most likely place for roots to emerge.
- Bottom heat is your friend: For stem cuttings, placing your propagation tray or pots on a heated propagator mat can significantly speed up root development. It mimics the warmth of spring soil and encourages those roots to start exploring. If you don’t have a propagator, a warm spot out of direct sun will do, but the heat mat is a real game-changer.
Aftercare & Troubleshooting
Once those roots have started to form (you might see them peeking out of the drainage holes, or gently tugging on the cutting will offer resistance), it’s time for a little more attention.
- Gradual acclimatization: Slowly remove the plastic bag or dome over a week or so. Start by taking it off for a few hours each day, gradually increasing the time until the cutting is accustomed to normal humidity.
- Watering: Keep the soil consistently moist but not waterlogged. Overwatering is the quickest way to invite rot.
- Light: Place your new cuttings in a location with bright, indirect light. Direct sun can scorch those tender new leaves.
- Potting up: Once the roots are well-established, you can pot your new Searsia tripartita into slightly larger pots with a good quality potting mix.
Now, about troubleshooting. If you see your cuttings wilting and looking sad, it could be a few things. Too much direct sun, not enough water, or perhaps the soil is too dry. If you notice mushy, dark stems or leaves, that’s a clear sign of rot, usually due to overwatering or poor drainage. Don’t be discouraged! Sometimes cuttings just don’t make it, and that’s part of the learning process. Try to figure out what might have gone wrong, adjust your approach, and try again.
A Encouraging Closing
Growing plants from cuttings is a wonderfully rewarding journey. It teaches you patience and to observe the subtle signs of life. Don’t be afraid to experiment, and celebrate every little success. Enjoy the process, and soon you’ll have beautiful new Searsia tripartita to cherish!
Resource:
https://identify.plantnet.org/k-world-flora/species/Searsia%20tripartita%20(Ucria)%20Moffett/data