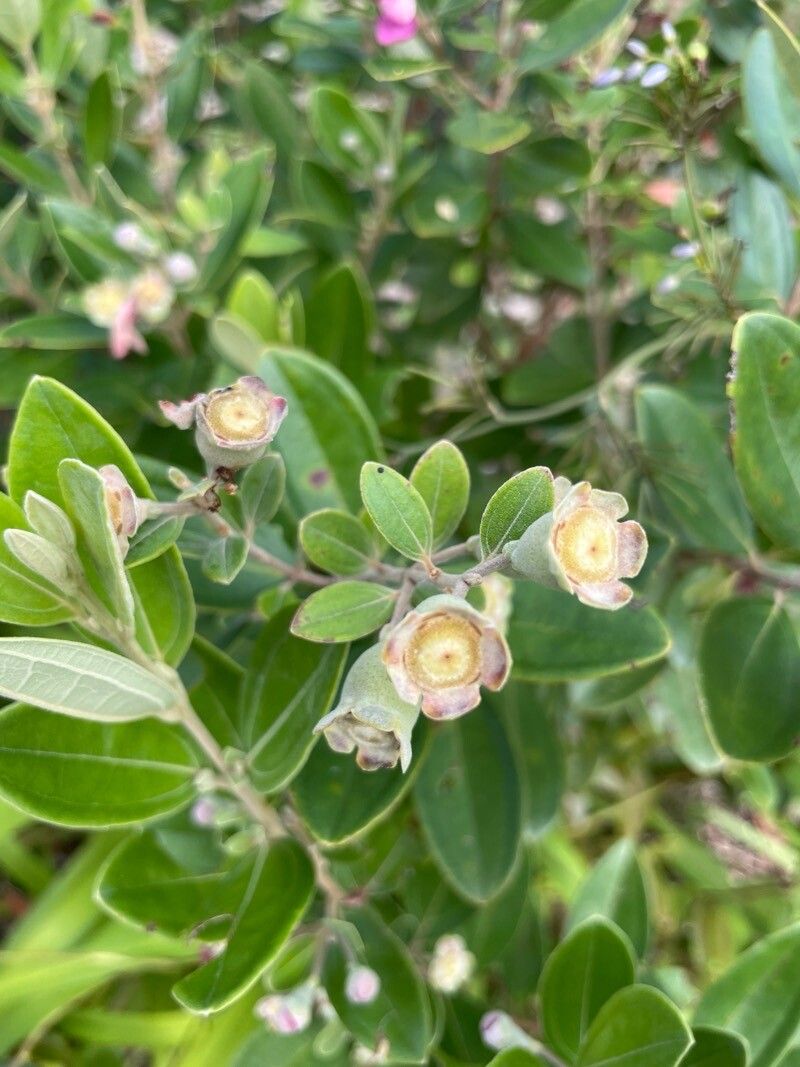
Oh, hello there! Come on in, grab a mug. I’m so glad you’re interested in Rhodomyrtus tomentosa, or as it’s commonly called, the Downy Rose Myrtle. It’s such a delightful shrub, isn’t it? With its charming pink flowers that resemble tiny roses and its edible berries (seriously, they’re quite tasty!), it’s a real gem in any garden. And the best part? It’s surprisingly rewarding to propagate.
If you’re just starting out in the world of plant propagation, I’d say the Downy Rose Myrtle is a moderately easy plant to work with. It’s not quite as foolproof as some succulents, but with a little care and attention, you’ll be well on your way to creating new plants. It’s a fantastic way to expand your collection or share these beauties with fellow garden lovers.
The Best Time to Start
For the highest success rate with your Rhodomyrtus tomentosa cuttings, late spring to early summer is your sweet spot. This is when the plant is actively growing and has plenty of new, tender growth that hasn’t yet hardened off. You can also have good luck with semi-hardwood cuttings later in the season, but those early summer cuttings are generally the easiest to root. Look for stems that are pliable but not so soft that they easily snap.
Supplies You’ll Need
Gathering your supplies beforehand makes the whole process much smoother. Here’s what you’ll want to have on hand:
- Sharp pruning shears or a clean, sharp knife: For taking clean cuts on your cuttings. Dull tools can damage the stems.
- A rooting hormone (optional but highly recommended): Powder or gel versions work well. This really helps encourage root development.
- A well-draining potting mix: I like to use a blend of equal parts peat moss or coco coir, perlite, and coarse sand. You want something that allows air circulation and doesn’t stay soggy.
- Small pots or propagation trays: Clean ones are crucial to prevent disease.
- A plastic bag or humidity dome: To create a humid environment for your cuttings.
- Labels and a permanent marker: So you don’t forget what you planted where!
- Clean water: For misting.
Propagation Methods
Let’s get down to business! I find stem cuttings to be the most reliable method for Rhodomyrtus tomentosa.
-
Take Your Cuttings: Head out to your healthy Downy Rose Myrtle. Look for new growth that is semi-firm. You want stems that are bendy but not floppy. Using your clean shears, take cuttings that are about 4-6 inches long. Make your cut just below a leaf node (the point where a leaf attaches to the stem), as this is where root hormones are concentrated. Remove any flowers or flower buds from your cuttings – they pull energy away from rooting.
-
Prepare the Cuttings: Gently remove the lower leaves from the bottom half of each cutting. Leave just a few leaves at the top. This reduces water loss and prevents the leaves from rotting when buried in the soil. You can also carefully dip the cut end into water, then into your rooting hormone, tapping off any excess.
-
Plant Your Cuttings: Fill your clean pots or trays with your well-draining potting mix. Make a small hole in the center of the mix with a pencil or your finger. Carefully insert the cut end of your prepared cutting into the hole, ensuring it’s deep enough to stand upright. Gently firm the soil around the base of the cutting.
-
Create a Humid Environment: Water the potting mix lightly until it’s evenly moist. Now, the key is to keep that humidity up! You can cover the pot with a clear plastic bag, making sure the bag doesn’t touch the leaves of your cuttings. Or, use a propagation tray with a clear lid. Place your pots in a bright, but indirect light location. Think a spot that gets morning sun, but is shielded from harsh afternoon rays.
The “Secret Sauce” (Pro Tips)
Here are a few little tricks I’ve learned over the years that can really give your cuttings a boost:
- Bottom Heat is Your Friend: While not strictly essential, placing your pots on a gentle heat mat designed for propagation can significantly speed up root development. It mimics the warmth of spring soil and really perks up those cuttings. Just set it to a low to medium setting – you don’t want to cook them!
- Don’t Let Those Top Leaves Drip: When you water or mist, be mindful of the leaves at the top. If they are constantly sitting in water, they are much more prone to fungal infections. A light misting is usually enough, and if you do water, do so carefully at the base of the plant.
- A Little Airflow Goes a Long Way: Even though we want to keep things humid, opening the plastic bag or lid for a few minutes each day can prevent stagnant air and reduce the risk of mold or mildew. It’s a balance, but a crucial one.
Aftercare & Troubleshooting
Once your cuttings have been in their humid haven for a few weeks, you can start checking for roots. The best way to tell is by giving a very gentle tug on the cutting. If you feel resistance, chances are roots have formed! Another sign is new growth appearing at the tips.
When you see those roots, it’s time to slowly acclimate your new plants to drier air. Gradually expose them to the ambient humidity over a week or so. Continue to keep the soil consistently moist but not waterlogged. As they grow stronger, you can transplant them into slightly larger pots with a good quality potting mix.
Now, for the not-so-fun part: troubleshooting. The most common issue you’ll encounter is rot. If a cutting turns mushy, black, or just wilts dramatically without any apparent reason, it’s likely succumbed to rot. This is often due to too much moisture, poor drainage, or lack of air circulation. If you see this, remove the affected cutting immediately to prevent it from spreading. It’s a learning curve, and sometimes, not all cuttings make it – and that’s perfectly okay!
A Encouraging Closing
Propagating plants is such a rewarding journey, isn’t it? It’s a little bit of science, a little bit of art, and a whole lot of patience. Don’t get discouraged if your first attempts aren’t perfect. Each cutting you take is a lesson learned. Keep observing, keep experimenting, and most importantly, enjoy the process of bringing new life into your garden. Happy propagating!
Resource:
https://identify.plantnet.org/k-world-flora/species/Rhodomyrtus%20tomentosa%20(Aiton)%20Hassk./data