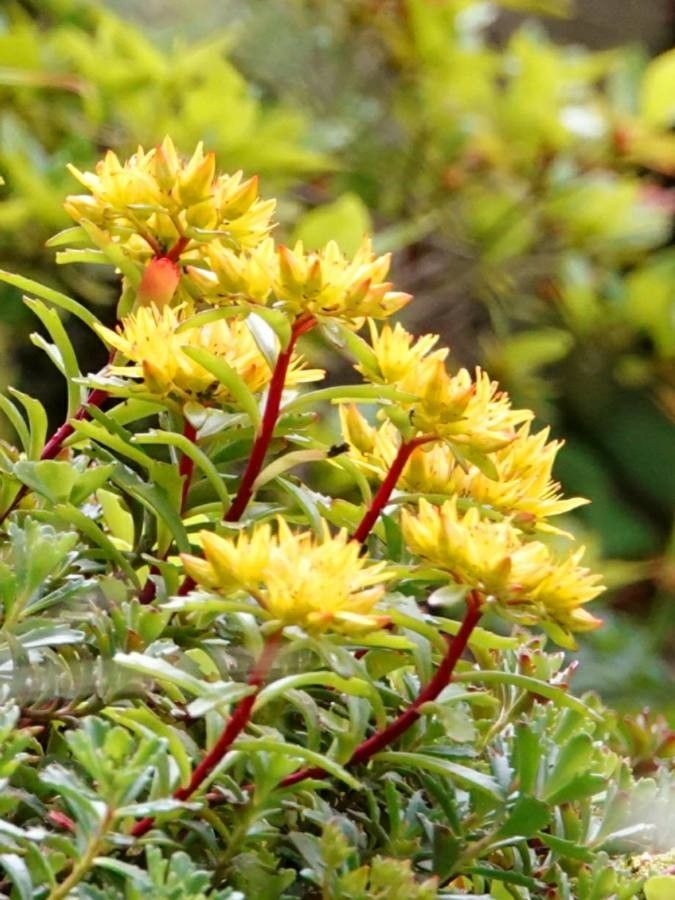
Hey there, fellow plant lovers! It’s so wonderful to connect with you today. I’ve got something special to share that’s been a real joy in my garden for years: Phedimus kamtschaticus, or as I affectionately call it, the Stonecrop Scavenger. This low-growing succulent is just dynamite. Its starry, yellow-orange flowers bloom in late summer, giving us a brilliant splash of color when many other things are starting to fade. Plus, its fleshy, dark green leaves are attractive even when it’s not in bloom.
If you’ve ever admired this tough-as-nails beauty and wished you had more of it to dot around your garden or share with friends, you’re in luck! Propagating Phedimus kamtschaticus is wonderfully straightforward. I’d say it’s an excellent choice, even for those just dipping their toes into the world of plant propagation. You’ll be amazed at how easily you can multiply your success.
The Best Time to Start
Honestly, I find the most success with Phedimus kamtschaticus when I propagate in late spring or early summer. This is when the plant is actively growing and has plenty of energy. The warmer temperatures and longer days really give those cuttings a boost. Waiting until after the initial burst of spring growth means you’re working with more mature, robust material.
Supplies You’ll Need
Here’s a little toolkit to get you going:
- Sharp, clean pruning shears or a sharp knife: For taking clean cuts.
- Small pots or trays: For housing your cuttings.
- Well-draining potting mix: A cactus or succulent mix is perfect. You can also make your own by mixing equal parts potting soil, perlite, and coarse sand.
- Optional: Rooting hormone: While not strictly necessary for Phedimus, it can give an extra bit of encouragement.
- Watering can or spray bottle: For gentle watering.
Propagation Methods
Let’s get our hands dirty! Here are my go-to methods:
1. Stem Cuttings (My Favorite!)
This is where the magic happens, and it’s so easy.
- Choose your stems: Look for healthy, non-flowering stems. About 4-6 inches long is ideal.
- Make the cut: Using your clean shears or knife, make a clean cut just below a leaf node. A leaf node is where a leaf attaches to the stem.
- Prepare the cutting: Gently remove the lower leaves from the bottom inch or two of the stem. This prevents them from rotting when planted.
- Let them callus: Here’s a crucial step! Let the cuttings sit in a dry, airy spot for a day or two, or until the cut end forms a dry, protective layer (callus). This step significantly reduces the risk of rot.
- Pot them up: Fill your small pots with your well-draining mix. You can dip the callused end in rooting hormone now, if you’re using it.
- Insert the cuttings: Gently push the callused end of the cutting about an inch deep into the soil. You can place multiple cuttings in one pot, giving them a little breathing room.
- Water lightly: Water the soil very gently, just enough to moisten it. Avoid waterlogging.
2. Division
This method is great if your existing plant is looking a bit crowded and you want to give it some space.
- Dig it up: In spring or early summer, carefully dig up your Phedimus kamtschaticus plant.
- Separate the clumps: Gently shake off excess soil so you can see the root structure. You should see natural divisions where the plant has grown outwards.
- Divide the roots: Using your hands or a sharp knife, carefully pull or cut the plant into smaller sections. Make sure each section has a good amount of roots and some healthy foliage.
- Replant: Immediately replant the divisions back into the ground or into pots with fresh potting mix. Water them in well.
The “Secret Sauce” (Pro Tips)
Now, for a couple of things I’ve learned over the years that make a real difference:
- Don’t overwater the cuttings once they’re planted. Seriously, this is the number one killer of new propagations. Succulents are built for dry conditions. Think “barely moist” until you see new growth. If your soil feels wet, wait.
- Bottom heat is your friend, but not essential. If you have a heated propagator or can place your pots on a heat mat, it can speed up root development. But don’t worry if you don’t have one; a warm windowsill will usually do the trick!
Aftercare & Troubleshooting
Once you’ve potted up your cuttings, place them in a bright spot, but avoid direct, harsh sunlight, especially when they don’t have roots yet. It can scorch those tender new leaves!
Keep the soil lightly moist, but never soggy. You’ll know your cuttings have rooted when you see new growth appearing at the tips or base of the stem. You can also gently tug on the cutting; if there’s resistance, roots have formed!
The most common issue I see is rot. If a cutting turns mushy, black, and smells funky, it’s likely rotted. This is usually due to too much moisture. If you see rot setting in, remove the affected cutting immediately to prevent it from spreading. Sometimes, you can salvage a piece by cutting off the rotted part and letting the remaining healthy bit callus before trying again.
A Little Encouragement
Propagating Phedimus kamtschaticus is a beautiful way to learn about plant life cycles and to fill your garden with more of what you love. Be patient. Gardens have their own rhythms, and sometimes those tiny cuttings take their sweet time to show us they’re ready to take hold. Enjoy the process, celebrate the small successes, and before you know it, you’ll have a whole new army of these delightful succulents! Happy planting!
Resource: