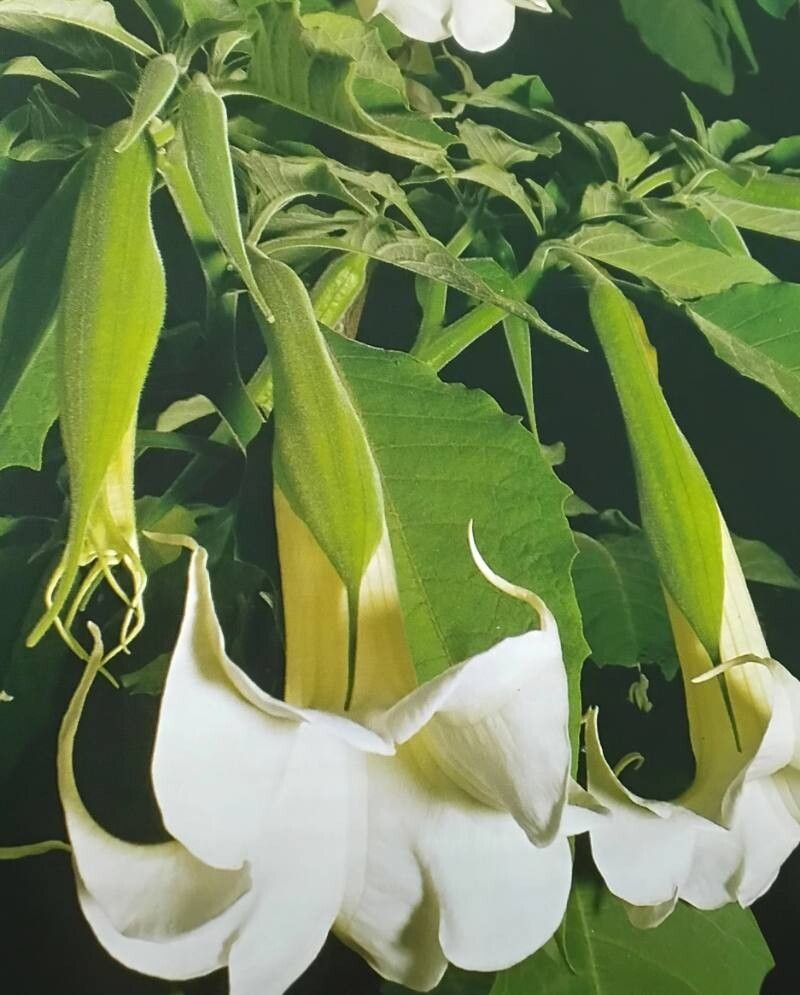
Oh, hello there! So, you’ve fallen head over heels for the enchanting Angel’s Trumpet, haven’t you? I don’t blame you one bit. Brugmansia arborea, with its cascading trumpet-shaped blooms and intoxicating fragrance, is truly a showstopper. And the best part? You can share that magic! Propagating these beauties is a wonderfully rewarding endeavor, a way to multiply that joy and maybe even gift a little bit of your garden’s soul to friends.
Now, don’t be intimidated. While Brugmansia can be a bit particular, propagating them is entirely achievable, even for those of you just dipping your toes into the horticultural waters. With a little patience and some gentle guidance, you’ll be well on your way to a whole chorus of these magnificent plants.
The Best Time to Start
My best advice for success with Brugmansia cuttings? Think active growth. Spring and early summer are your golden windows. You want to take cuttings from stems that are actively producing new leaves and look healthy and vigorous. This ensures the cutting has the energy it needs to root. Trying to propagate from dormant or stressed wood is just asking for disappointment.
Supplies You’ll Need
Gathering your tools beforehand makes the whole process so much smoother. Here’s what I always have on hand:
- Sharp Pruning Shears or a Craft Knife: Crucial for clean cuts to prevent disease.
- Rooting Hormone: This is a game-changer! I prefer a powder form, but gels work wonderfully too.
- Well-Draining Potting Mix: A blend of peat moss, perlite, and a little bit of compost is ideal. You want something that doesn’t hold too much moisture.
- Small Pots or Seed Trays: Clean pots are a must!
- Plastic Bags or Clear Domes: To create a humid microclimate.
- Watering Can with a Fine Rose: For gentle watering.
- Optional: Bottom Heat Mat: This can significantly speed up rooting, especially if your home is on the cooler side.
Propagation Methods
I find stem cuttings to be the most reliable and straightforward method for Brugmansia. It’s how I’ve always done it, and it works like a charm.
- Select Your Cuttings: Choose healthy, non-flowering stems from your mature plant. Aim for pieces about 6-8 inches long. You’re looking for stems that are semi-hardwood – not brand new and green, but not old and woody either. They should have at least a couple of leaf nodes (the little bumps where leaves grow from).
- Make Your Cut: Using your sharp pruners or knife, make a clean cut just below a leaf node. This is where the magic of rooting hormones and root formation happens.
- Prepare the Cutting: Gently remove the lower leaves from your cutting, leaving just a couple of leaves at the very top. If the top leaves are large, you can even cut them in half horizontally to reduce water loss through transpiration. This is really important!
- Apply Rooting Hormone: Dip the cut end of your stem into your rooting hormone, tapping off any excess. Make sure the hormone coats the entire cut surface and the area immediately above the node.
- Potting Up: Fill your clean pots with your well-draining potting mix. Make a hole in the center of the soil with your finger or a pencil.
- Plant Your Cutting: Gently insert the base of the cutting into the hole, ensuring the leaf nodes are below the soil surface. Firm the soil around the cutting to make good contact.
- Water Gently: Water thoroughly but gently, using your watering can with a fine rose. You want the soil to be moist, not waterlogged.
- Create Humidity: Cover the pot with a clear plastic bag or a plastic dome. Make sure the leaves don’t touch the plastic if possible – this can encourage rot. Secure the bag around the pot with a rubber band or string.
The “Secret Sauce” (Pro Tips)
Here are a few little tricks I’ve picked up over the years that really boost my success rates:
- The “Don’t Let Leaves Touch Water” Rule isn’t just for water propagation! Even in soil, if the leaves of your cutting are pressed against the sides of the pot and staying constantly wet, they’re much more prone to fungal issues. Try to keep them elevated and in good air circulation.
- Bottom heat is your best friend! This is especially true if you’re propagating in cooler months or if your home isn’t the warmest. Placing your pots on a heat mat specifically designed for plants provides gentle, consistent warmth to the roots, encouraging them to emerge much faster. It makes a world of difference!
- Don’t be afraid to test for roots! After about 4-6 weeks, you can gently tug on your cutting. If you feel resistance, it means those lovely roots are forming! You can also try to carefully scrape a tiny bit of the outer layer of the stem near the base. If you see green underneath, it’s still alive and working on rooting.
Aftercare & Troubleshooting
Once you see signs of new growth, congratulations! Your cutting has hopefully taken root. Here’s how to nurture it:
- Acclimatize: Gradually remove the plastic bag or dome over a week or so. Start by taking it off for a few hours a day, then longer, allowing the new plant to get used to regular humidity levels.
- Continue Watering: Keep the soil consistently moist but not soggy. Water when the top inch of soil feels dry to the touch.
- Light: Place your new plant in bright, indirect light. Avoid harsh, direct sun for the first few weeks.
- Patience is Key: New growth is the best indicator. If you don’t see any activity for 2-3 months, it’s possible the cutting didn’t take.
Common Signs of Failure:
- Rot: If your cutting becomes mushy, dark, and smells foul, it’s likely rotting. This usually happens from too much moisture and poor air circulation. Unfortunately, these usually can’t be saved.
- Wilting and Yellowing: While some initial wilting is normal, persistent wilting and significant yellowing of the leaves that doesn’t improve can indicate that the cutting isn’t rooting. Check the moisture levels – it could be too dry or too wet.
A Big Hug and Happy Growing!
Don’t get discouraged if your first few attempts aren’t picture-perfect. Every gardener has had their share of cuttings that didn’t quite make it. The beauty of propagation is that it’s a process of learning and observing. Keep trying, keep experimenting, and most importantly, enjoy the journey of nurturing life from a simple stem. Soon, you’ll have a whole yard full of these fragrant beauties! Happy gardening!
Resource:
https://identify.plantnet.org/k-world-flora/species/Brugmansia%20arborea%20(L.)%20Sweet/data