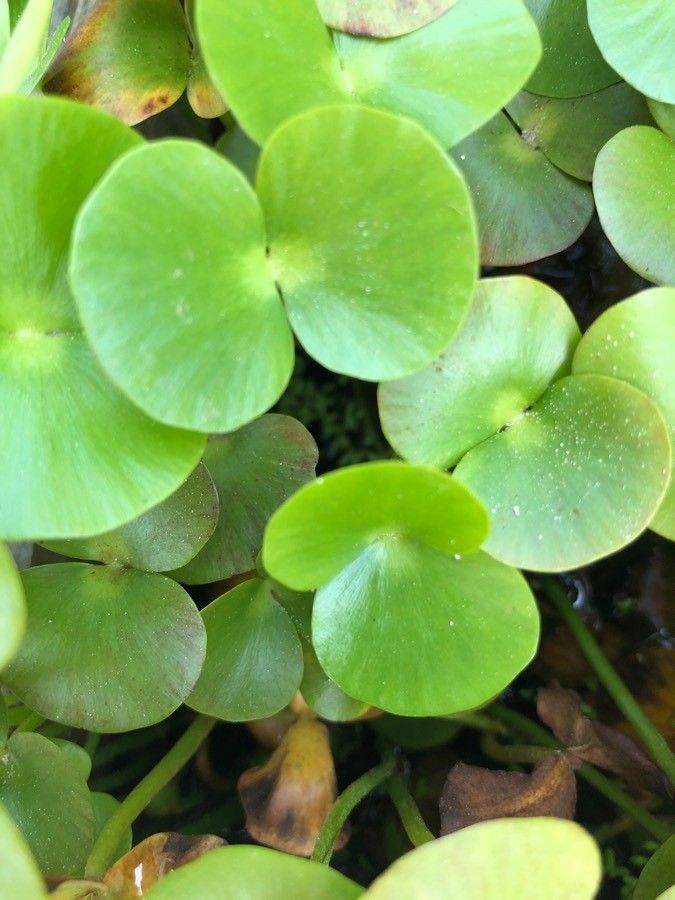
Hello fellow plant lovers! Today, we’re diving into the wonderful world of propagating Regnellidium diphyllum, also known as the Two-leaved Regnellidium. If you’re looking for an aquatic plant that brings a touch of understated elegance to your water garden or aquarium, this is it. Its attractive, spade-shaped leaves, often held aloft on slender stems, create a lovely visual texture. And the best part? Bringing more of these beauties into your life through propagation is a deeply satisfying experience. While it’s not quite as “stick-it-in-water-and-watch-it-grow” simple as some of its water-loving cousins, with a little attention to detail, it’s certainly achievable for most gardeners.
The Best Time to Start
The sweet spot for propagating Regnellidium diphyllum is during its active growing season. For most of us, this means late spring through summer. You’ll see the most vigorous growth and best results when the days are longer and temperatures are warm. Avoid propagating when the plant is stressed, perhaps from a cold snap or extreme heat, as it will have less energy to put into producing new roots.
Supplies You’ll Need
To give your cuttings the best chance of success, gather these essentials:
- Sharp, clean pruning shears or scissors: To make clean cuts without damaging the parent plant.
- A well-draining potting mix: For Regnellidium, I often lean towards a bog garden mix or a blend of peat moss, perlite, and compost. You want something that retains moisture but doesn’t stay waterlogged.
- Small pots or trays: With drainage holes, of course!
- Rooting hormone (optional but helpful): A powder or gel can give your cuttings a nudge.
- A spray bottle: For keeping humidity levels up.
- Clear plastic bags or a propagation dome: To create a mini-greenhouse effect.
- A watering can or gentle stream of water: To keep things moist.
- Labels and a marker: To keep track of what you’ve propagated and when.
Propagation Methods
Regnellidium diphyllum is typically propagated through division or stem cuttings. Both methods are quite effective.
Division
This is my preferred method, as it usually leads to quicker establishment.
- Gently lift the parent plant from its container or planting spot. If it’s in a pond, carefully dig around it with your hands or a trowel.
- Inspect the root ball. You’ll see where the plant naturally wants to divide, often with multiple crowns or established shoots.
- Carefully tease apart the sections. You can use your hands for this, or if it’s a bit stubborn, a clean knife can help. Aim for sections that have at least one healthy leaf and a good portion of the root system.
- Pot up the divisions into their own smaller pots filled with your chosen potting mix.
- Water thoroughly to settle the soil around the roots.
Stem Cuttings
This method requires a bit more patience but can yield many new plants.
- Select a healthy stem from the parent plant. Look for one that has at least a couple of leaves and is about 3-6 inches long.
- Make a clean cut just below a leaf node (the point where a leaf attaches to the stem).
- If you’re using rooting hormone, dip the cut end into the powder or gel.
- Plant the cutting into your prepared potting mix, inserting the cut end about an inch deep. Make sure to position it so the leaves are above the soil surface.
- Water gently to moisten the soil.
The “Secret Sauce” (Pro Tips)
Here are a few things I’ve learned over the years that make a big difference:
- Don’t let the leaves touch the water when water propagating: If you choose to root cuttings in water (which is less ideal for Regnellidium compared to soil, but possible), make sure only the cut stem is submerged. Any leaves below the water line are prone to rot, which can take down your whole cutting.
- Bottom heat really speeds things up: Placing your pots or trays on a heating mat designed for plant propagation can significantly accelerate root development. It mimics the warmth of summer soil and encourages those roots to get going. Keep the mat on for at least 8 hours a day.
- Hydration is key, but not drowning: For both divisions and cuttings, maintaining consistent moisture is crucial. However, I always make sure my pots have excellent drainage. Soggy soil is the quickest way to invite rot. A good practice is to water thoroughly, then let the top inch of soil dry slightly before watering again.
Aftercare & Troubleshooting
Once your divisions or cuttings have developed a decent root system (you can gently tug on a leaf to feel for resistance, or peek at the drainage holes for roots), it’s time to treat them like small, but established, plants.
- Gradually acclimate them. If they were in a humid mini-greenhouse, start by opening the plastic gradually or removing the dome for longer periods each day.
- Continue regular watering. As they grow, you’ll need to water them more frequently. They’ll love being kept in consistently moist, but not soggy, conditions.
- Introduce them to brighter light, but avoid direct, scorching sun initially. A dappled shade or bright, indirect light is perfect.
The most common issue you might encounter is rot. This usually stems from overwatering or poor drainage. If you see a cutting or division turning mushy or black, it’s unfortunately a sign of rot. Remove any affected parts immediately to prevent it from spreading. Sometimes, a bit of air circulation can help, so ensure your propagation setup isn’t completely sealed.
A Encouraging Closing
Propagating Regnellidium diphyllum is a journey, and like any good garden endeavor, it requires a dash of patience and a healthy dose of observation. Don’t be discouraged if not every cutting takes. Learn from each attempt, adjust your methods, and most importantly, enjoy the process of nurturing new life. Soon enough, you’ll have a beautiful collection of these elegant aquatic plants to admire! Happy propagating!
Resource:
https://identify.plantnet.org/k-world-flora/species/Regnellidium%20diphyllum%20Lindm./data