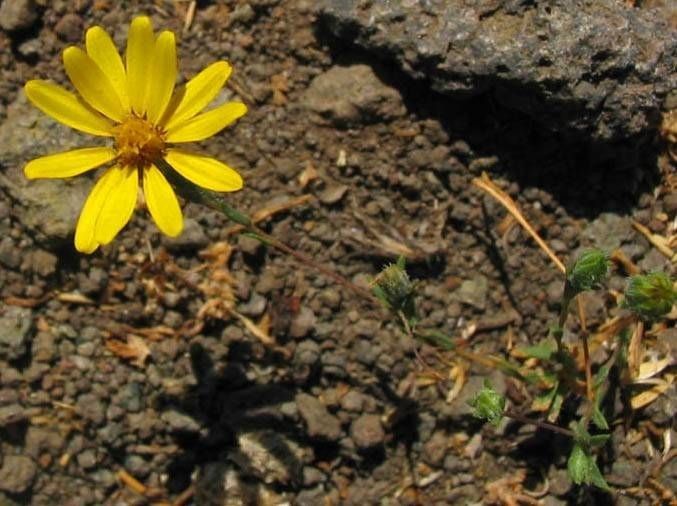
Oh, hello there! It’s so lovely to have you join me today. We’re going to dive into something truly special: Pentachaeta lyonii, also known as Lyon’s pentachaeta. If you’re a fan of those cheerful, sunny wildflower blooms that just shout “California native,” you’re going to adore this one. It’s a delightful addition to any garden, bringing a burst of golden goodness. And the best part? Propagating it yourself is incredibly rewarding. It can be a little bit of a learning curve at first, not the absolute easiest for a complete beginner, but with a little guidance, you’ll be well on your way to having a whole patch of these beauties.
The Best Time to Start
For the highest chance of success with Pentachaeta lyonii, I always recommend starting in the late spring or early summer. This is when the plant is actively growing, and its energy is directed towards new shoots and leaves. You’ll want to take cuttings from healthy, non-flowering stems. Trying to propagate from a plant that’s exhausted itself by flowering might not yield the best results. Think of it as harvesting right when the plant is at its most vigorous.
Supplies You’ll Need
Gathering your tools is the first step to a smooth propagation session. Here’s what I usually have on hand:
- Sharp Pruning Shears or a Craft Knife: Clean cuts are crucial for healthy rooting.
- Rooting Hormone: This isn’t always strictly necessary for Pentachaeta lyonii, but it can certainly give your cuttings a boost. I prefer a powder form.
- Potting Mix: A lightweight, well-draining mix is essential. I often use a blend of equal parts peat moss or coco coir and perlite or coarse sand.
- Small Pots or Seed Trays: Ensure they have drainage holes!
- Plastic Bags or a Clear Dome: To create a humid environment for your cuttings.
- Watering Can with a Fine Rose: Gentle watering is key.
- Labels: Don’t forget to label your pots so you know what you’ve planted!
Propagation Methods: Taking Cuttings
The most reliable way I’ve found to propagate Pentachaeta lyonii is through stem cuttings. It’s straightforward once you get the hang of it!
- Select Your Cuttings: Head out to your healthy Pentachaeta lyonii plants. Look for young, flexible stems that are about 4-6 inches long. Avoid any that are woody or already flowering.
- Make the Cut: Using your sharp pruning shears or craft knife, make a clean cut just below a leaf node (where the leaves attach to the stem). This is where the magic happens, where roots are most likely to form.
- Prepare the Cutting: Gently remove the lower leaves from the cutting, leaving just the top couple of leaves. This prevents the submerged leaves from rotting.
- Apply Rooting Hormone (Optional but Recommended): Dip the cut end of the stem into your rooting hormone powder. Tap off any excess – you don’t want a thick clump.
- Plant Your Cuttings: Fill your small pots with your prepared potting mix. Make a small hole in the center of the soil with your finger or a pencil. Carefully insert the cut end of your Pentachaeta lyonii cutting into the hole, about an inch deep. Gently firm the soil around it.
- Water Gently: Water the pots thoroughly but gently, using your fine-rose watering can. You want the soil to be moist but not waterlogged.
- Create Humidity: This is a big one! Cover each pot with a plastic bag and secure it around the rim with a rubber band, or place them under a clear plastic dome. You want to create a mini greenhouse effect to keep the humidity high.
The “Secret Sauce” (Pro Tips)
Now, for a couple of tricks that have really helped me over the years:
- Never Let Leaves Touch Water: If you’re doing water propagation (which I find less successful for this plant but some folks try), ensure absolutely no leaves are submerged. Any leaf below the waterline is a prime candidate for rot, and it can take your whole cutting down with it. For stem cuttings in soil, this means making sure you’ve stripped enough of those lower leaves.
- Bottom Heat is Your Friend: If you have a bit of space and a propagator, placing your pots on a heat mat set to a low temperature can significantly speed up root development. This gentle warmth mimics the conditions of spring and encourages those roots to start reaching out.
Aftercare & Troubleshooting
Once your cuttings are potted and covered, find a bright spot for them, but avoid direct, hot sun. A sunny windowsill or under grow lights is perfect.
Keep an eye on the soil moisture. You want it to remain consistently moist but not soggy. You’ll know your cuttings are happy when you start to see new leaf growth appearing after a few weeks. This is a sign that roots have formed! You can gently tug on a cutting; if there’s resistance, it has rooted.
Now, what if things don’t go as planned? The most common culprit is rot. If you notice your cuttings turning black and mushy, it’s usually a sign of overwatering and/or poor air circulation. Don’t be discouraged! It happens to all of us. Remove the rotted cuttings, disinfect your tools, and try again, perhaps with a slightly less moist mix and better ventilation.
A Little Patience Goes a Long Way
See? It’s not too daunting, is it? Propagating Pentachaeta lyonii is a wonderful way to expand your collection and share these beautiful natives with friends. Remember to be patient; nature has its own timeline. Enjoy the process, and soon you’ll be able to delight in the golden hues of your own homegrown wildflowers. Happy gardening!
Resource:
https://identify.plantnet.org/k-world-flora/species/Pentachaeta%20lyonii%20A.Gray/data