Oh, hello there! Come on in and grab a mug. Today, we’re going to talk about something truly special: Myosotis pusilla, or as many of us lovingly call them, the tiny forget-me-nots.
Why You’ll Fall in Love with Tiny Forget-Me-Nots
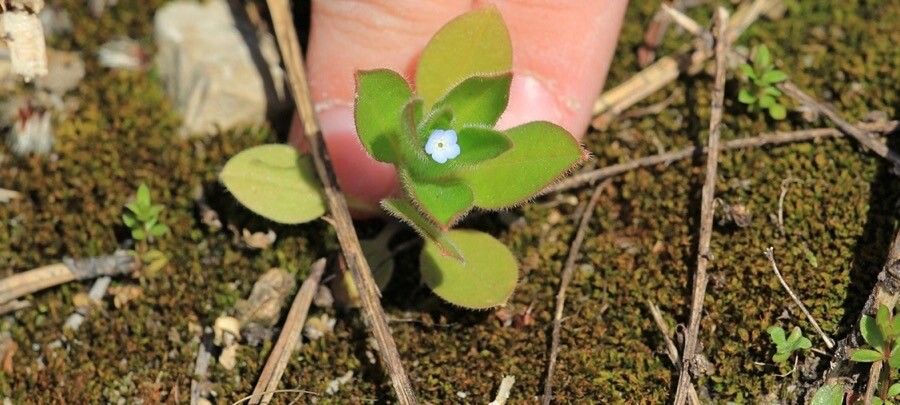
There’s something utterly charming about these little clusters of sky-blue flowers. They remind me of a miniature, perfect version of their larger cousins, bringing a delicate beauty to any corner of the garden that might feel a bit overlooked. And the best part? They’re surprisingly easy to multiply, making them a wonderful project, even for those just starting out with their green thumbs. Propagating them feels like creating a little bit of magic, spreading those joyful blue specks all around. It’s incredibly rewarding to see your garden flourish with plants you’ve nurtured from a tiny cutting or division.
The Best Time to Start: When Nature Whisters “Now”
For the highest chance of success with Myosotis pusilla, I always recommend working with them in the spring. When the plants are actively growing after the winter chill, and before the intense heat of summer sets in, they have the best energy reserves to heal from any disturbance and to put out new roots. You can also have good luck with late summer or early autumn propagation, giving the new plants time to establish a bit before winter, but spring is my go-to for a sure bet.
Supplies You’ll Need: Your Propagation Toolkit
Gathering your tools beforehand makes the whole process so much smoother. You’ll want to have these handy:
- Sharp Pruning Shears or a Craft Knife: For clean cuts.
- Small Pots or Seed Trays: With drainage holes, of course!
- A Good Potting Mix: I like a blend of equal parts seed-starting mix and perlite. This provides excellent drainage, which is crucial. You can also use a soilless potting mix.
- Optional: Rooting Hormone: While not always strictly necessary for Myosotis pusilla, it can give a little boost.
- Watering Can with a Fine Rose: To water gently.
- Labels: To keep track of what you’ve planted!
Propagation Methods: Bringing More Blue to Your Life
There are a couple of ways we can coax more forget-me-nots into existence, and they’re both quite straightforward.
Method 1: Stem Cuttings – The Classic Approach
This is my favorite method for Myosotis pusilla, as it reliably produces true-to-type plants.
- Take Your Cuttings: In the spring, select healthy, non-flowering stems from your established plant. Using your sharp shears, cut a section about 3-4 inches long. Make the cut just below a leaf node – that’s where roots are most likely to form. Gently remove the lower leaves, leaving just a few at the top.
- Prepare the Cuttings: If you’re using rooting hormone, lightly dip the cut end of each stem into it. A little goes a long way.
- Plant Them Up: Fill your small pots or trays with your prepared potting mix, moistening it slightly. Make a small hole with your finger or a pencil, and insert the cutting about an inch deep, ensuring the leaf nodes are below the soil surface. Gently firm the soil around the cutting.
- Water Gently: Give them a gentle watering to settle the soil.
Method 2: Division – Sharing the Wealth
If your forget-me-not plant has become a bit of a clump, dividing it is a fantastic way to get more plants and also give the original plant a new lease on life.
- Dig Up the Plant: In the spring, gently dig up the entire clump. Be careful not to damage the roots too much.
- Gently Separate: You can often gently pull the clump apart with your hands. If it’s a bit stubborn, use a clean trowel or knife to slice through the root ball, creating smaller sections. Aim for divisions that have a good number of leaves and some healthy roots attached.
- Replant Immediately: Plant the divisions into pots filled with your potting mix or directly into prepared garden beds.
The “Secret Sauce”: My Tried-and-True Tips
Now, every gardener has a few little tricks up their sleeve, and these are a couple that I’ve found make a real difference with forget-me-nots:
- Humidity is Your Friend: Once your cuttings are planted, creating a humid environment is key. You can do this by placing a plastic bag or a clear dome over the pots. Make sure the leaves aren’t touching the plastic – this can encourage rot. I often use small bamboo stakes to keep the plastic from drooping onto the foliage.
- Patience with Bottom Heat: While not absolutely essential, some of my most successful cuttings have come from using a gentle heat mat underneath the pots. This encourages root development from below without drying out the top of the soil. Just make sure it’s set to a mild temperature.
Aftercare & Troubleshooting: Nurturing the New Sprouts
Once you’ve got your cuttings or divisions planted, the real fun begins!
- Keep Them Moist, Not Soggy: Water them when the top of the soil feels slightly dry to the touch. Avoid letting them sit in water, as this is the fastest way to encourage rot.
- Watch for Roots: You’ll know your cuttings are rooting when you see new growth appearing at the tips of the stems. You can also give a very gentle tug – if there’s resistance, roots have likely formed.
- Watch for Rot: The most common problem is stem rot, which looks like mushy, brown stems. If you see this, it’s usually due to overwatering or poor air circulation. Remove the affected cutting immediately to prevent it from spreading.
A Little Bit of Patience Goes a Long Way
Seeing those tiny new plants emerge is such a joy. Remember, propagation is a journey, and sometimes it takes a little trial and error. Don’t get discouraged if not every single cutting makes it. The process itself is part of the gardening adventure, and the reward of a garden filled with the gentle blue of Myosotis pusilla, sown by your own hands, is truly priceless. Happy propagating!
Resource:
https://identify.plantnet.org/k-world-flora/species/Myosotis%20pusilla%20Loisel./data