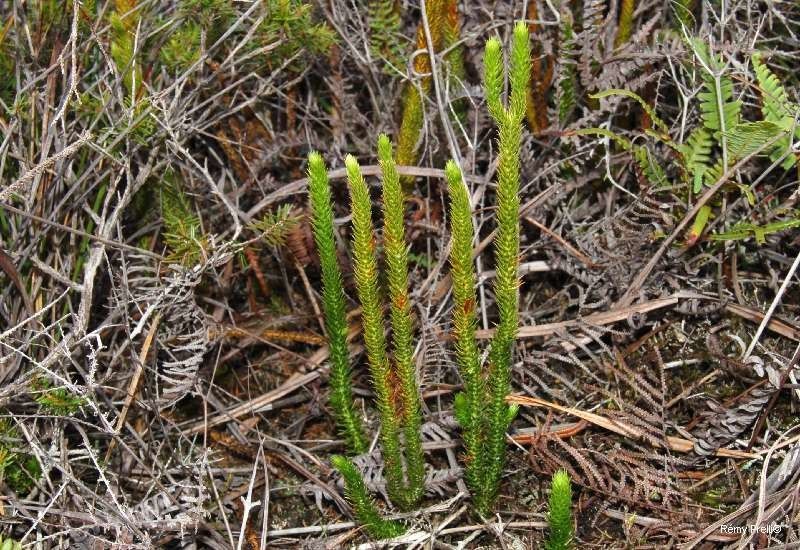
Hello, fellow plant enthusiasts! Today, we’re diving into the wonderfully unique world of Lycopodiella lateralis, often called the “trailing clubmoss.” If you’re drawn to plants with a prehistoric charm and a lush, ground-covering habit, you’re in for a treat. Seeing these delicate, wiry stems unfurl and spread is pure garden magic.
And the best part? You can bring that magic to more corners of your garden – or even share it with friends – through propagation! Now, I won’t sugarcoat it entirely; Lycopodiella lateralis isn’t the absolute easiest plant for a complete beginner to propagate. It requires a little finesse and understanding of its specific needs. But with this guide, you’ll have all the information to give it a really good go. The rewards are so worth the effort!
The Best Time to Start
When it comes to getting the best results with Lycopodiella lateralis, spring is your golden ticket. Think of it as your plant’s natural awakening after a winter’s rest. The new growth is vigorous and full of life, making it much more receptive to propagation. I find that collecting cuttings when the plant is actively growing rather than trying to take them when it’s stressed or dormant gives you the highest success rate.
Supplies You’ll Need
Before we get our hands dirty, let’s gather our tools:
- Sharp, clean pruning shears or a craft knife: This is crucial for making clean cuts to avoid damaging the plant.
- Rooting hormone (optional but recommended): A good quality rooting powder like Clonex can give your cuttings a significant boost.
- Well-draining potting mix: I usually blend about equal parts peat moss, perlite, and a little bit of coarse sand. This ensures good aeration, which is vital for preventing rot.
- Small pots or seed trays: Clean containers are a must.
- Plastic bags or a propagation dome: To create a humid microclimate for your cuttings.
- Watering can with a fine rose: For gentle watering.
- Gloves: To keep your hands clean.
- Labels and a permanent marker: Trust me, you’ll thank yourself later!
Propagation Methods
Lycopodiella lateralis is best propagated from stem cuttings. It’s the most reliable method I’ve found.
Stem Cuttings:
- Select your source: Look for healthy, mature stems that are actively growing but not flowering. You want stems that are flexible and have a bit of resilience.
- Take the cuttings: Using your sharp, clean shears, make a cut just below a leaf node (where a leaf attaches to the stem). Aim for cuttings that are about 3-4 inches long. Remove any lower leaves that would be submerged in the soil.
- Prepare the cuttings: If you’re using rooting hormone, dip the cut end of each cutting into the powder. Gently tap off any excess.
- Plant the cuttings: Fill your small pots with your prepared potting mix. Make a small hole in the center of each pot with your finger or a pencil. Gently insert the cut end of the stem into the hole, ensuring it’s making good contact with the soil. Firm the soil gently around the stem.
- Water gently: Water the soil lightly, just enough to moisten it without making it soggy.
- Create humidity: This is key! Cover each pot loosely with a plastic bag or place them inside a propagation dome. This creates the humid environment that mosses thrive in. Prop the bag up with a few small sticks so it doesn’t touch the leaves.
- Place in bright, indirect light: Find a spot that gets plenty of bright, filtered light but no direct sun. Direct sun can scorch your delicate cuttings.
The “Secret Sauce” (Pro Tips)
Here are a few things I’ve learned over the years that really make a difference:
- Don’t fuss too much with the leaves: You want the leaves to remain small and delicate. If your cuttings have any larger, more developed leaves, you can trim them back slightly to reduce water loss. Keep the very tip leaves intact.
- Bottom heat is your friend: If you have a heat mat designed for seedlings, using it for your Lycopodiella cuttings can dramatically speed up root development. The consistent warmth from below encourages those roots to form a little faster.
- Patience is truly a virtue: I know I said it’s not the easiest, but the rooting process can be slow. Don’t pull up your cuttings too soon to check for roots. Give them a good 6-8 weeks before you even think about gently tugging to test for resistance.
Aftercare & Troubleshooting
Once you see signs of new growth, that’s your cue that roots are forming!
- Gradually acclimate: Once your cuttings have established well, you can start to gradually remove the plastic covering over a week or two. This helps them adjust to the ambient humidity of your home or greenhouse.
- Keep soil consistently moist: Lycopodiella likes to stay damp, but not waterlogged. Water whenever the top layer of soil starts to feel dry.
- Watch out for rot: The biggest enemy of Lycopodiella lateralis propagation is rot. If you see stems turning black and mushy, or if the soil smells foul, it’s likely rot. This usually happens from overwatering and poor air circulation. If you spot rot, remove the affected cutting immediately to prevent it from spreading. Sometimes adjusting your watering schedule or increasing ventilation can help.
A Deep Breath and a Happy Garden
Propagating Lycopodiella lateralis is a journey, not a race. There will be times when a cutting doesn’t make it, and that’s perfectly okay. Every gardener experiences this! The joy is in the process, the learning, and the eventual success of creating new life. Be patient, observe your cuttings, and celebrate every tiny bit of progress. Soon, you’ll have more of this enchanting clubmoss to enjoy. Happy propagating!
Resource: