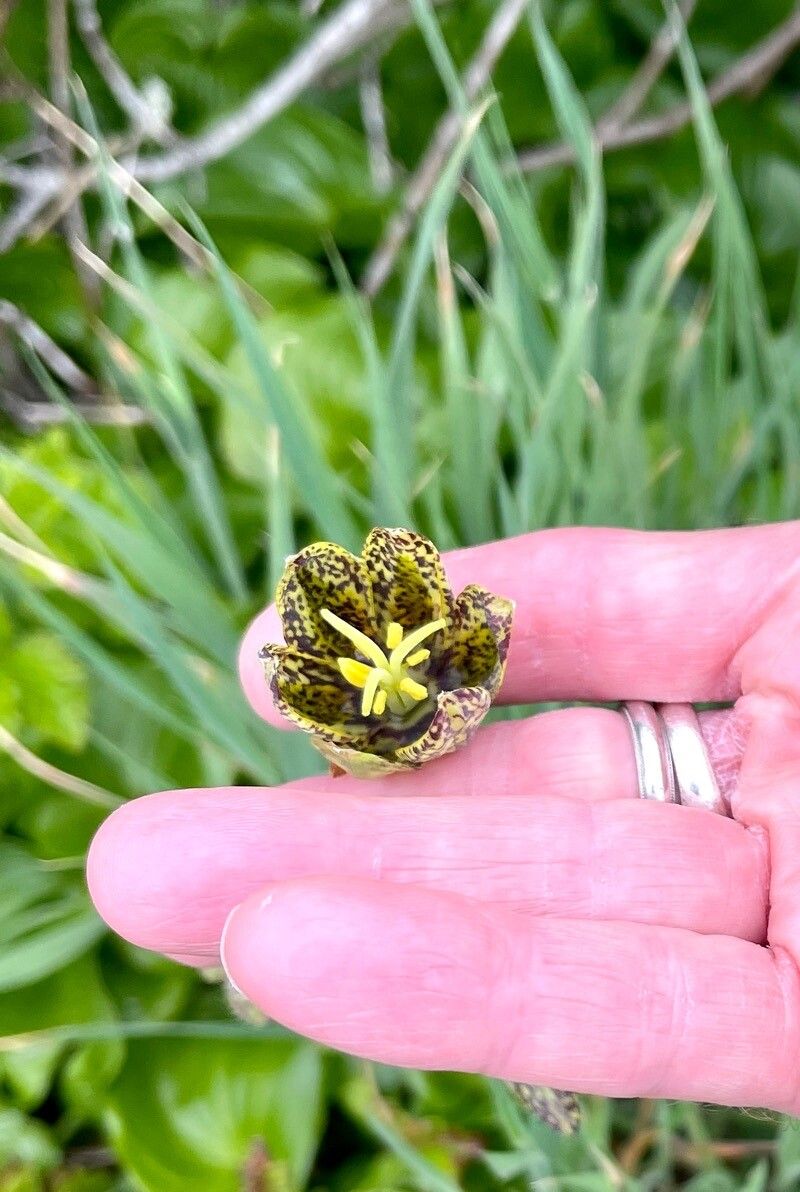
Oh, Fritillaria atropurpurea! Isn’t she a stunner? Those deep, rich purple bells, often with a sprinkling of speckles, really have a way of captivating the garden. For me, growing them from scratch feels like unlocking a little bit of botanical magic. It’s a way to truly connect with these unique beauties and, honestly, they’re not something you see everywhere, so having multiples is a true delight.
Now, for beginners, I’d say propagating Fritillaria atropurpurea is moderately challenging. It’s not as straightforward as a succulent cutting, but with a little patience and the right approach, it’s absolutely achievable.
The Best Time to Start
The sweet spot for propagating Fritillaria atropurpurea is really tied to its natural cycle. You’ll want to get your hands dirty in late spring to early summer, right after the plant has finished blooming and is starting to go dormant. This is when the energy reserves are still good, and before the bulb has fully retreated underground for its long summer rest. Trying to propagate when the plant is actively growing or in deep dormancy can be trickier.
Supplies You’ll Need
To set yourself up for success, gather these handy items:
- Well-draining potting mix: A good blend for bulbs is key. I like to use a mix of peat moss, perlite, and a bit of sharp sand. You can also buy specific bulb compost.
- Sharp, sterilized pruning shears or a clean knife: For clean cuts that prevent disease.
- Small pots or trays: Clean ones are a must!
- Watering can with a fine rose: For gentle watering.
- Rooting hormone (optional but recommended): Especially helpful for encouraging faster root development.
- Gravel or grit: For drainage in pots.
- Labels: Don’t forget to label what you’ve planted!
Propagation Methods
While you can sometimes get seeds to germinate, the most reliable and rewarding method for Fritillaria atropurpurea is propagating from bulb offsets (or bulbils). Think of these as baby bulbs that the mother plant produces.
- Gentle Excavation: When the foliage of your Fritillaria atropurpurea has turned yellow and started to die back (signaling dormancy), it’s time to carefully dig it up. Use your trowel or a garden fork and work around the plant to avoid damaging the main bulb. Gently loosen the soil and lift the entire clump.
- Bulbil Separation: You’ll likely see small bulbils clinging to the sides or base of the main bulb. These look like Miniature versions of the main bulb. Gently twist or carefully cut them away from the mother bulb. If they don’t come off easily, leave them. We don’t want to wound the parent bulb unnecessarily.
- Planting the Bulbils: Fill your pots or trays with your well-draining mix. Make a small hole for each bulbil. Plant them about 1-2 inches deep, depending on their size. The pointed end should be facing upwards.
- Water and Wait: Water the pots gently but thoroughly. Place them in a cool, dry location, perhaps a sheltered spot in the garden or a cool greenhouse, where they won’t get waterlogged.
Note: If you’re propagating from a mature bulb that has produced many offsets, you can also choose to divide larger clumps, but be very careful not to damage the main bulbs themselves.
The “Secret Sauce” (Pro Tips)
Here are a few things I’ve learned over the years that make a difference:
- Dry Dormancy is Key: Fritillarias hate sitting in wet soil during their summer rest. Make sure the pots where you’ve planted your bulbils are in a dry, airy spot over the summer. You’re basically mimicking their natural underground conditions. Avoid watering them at all during this period unless absolutely necessary to prevent desiccation, which is rare.
- Patience is a Virtue (and a Gardener’s Superpower!): Fritillaria atropurpurea bulbils are slowpokes! Don’t expect to see anything for a year, sometimes even two. They need time to establish themselves and grow a decent-sized bulb before they’ll be strong enough to send up a flower stalk. Resist the urge to dig them up and check!
- The Magic of Bottom Heat (for the impatient!): If you’re keen for them to get going a bit faster, placing your pots on a propagation mat that provides gentle bottom heat (around 10-15°C or 50-60°F) can encourage root formation over winter. Once you see signs of growth in the spring, you can remove them from the heat.
Aftercare & Troubleshooting
Once you see signs of new growth in the spring (these might be tiny green shoots emerging), continue to keep the soil moist but not soggy. Water them when the top inch of soil feels dry. As they grow, you can gradually introduce them to more sunlight.
What to watch out for:
- Rot: This is the most common enemy of bulb propagation. If you see mushy, brown stems or bulbs, it’s usually a sign of too much moisture and poor drainage. Ensure excellent drainage and don’t overwater. Remove any affected parts immediately.
- No Growth: As mentioned, expect patience! If nothing appears after two years, something might have gone wrong – perhaps the bulbils were too young, or the conditions weren’t right. Don’t be discouraged; try again next season.
A Encouraging Closing
Propagating Fritillaria atropurpurea is a journey, not a race. It teaches you about the plant’s life cycle and rewards you with the satisfaction of creating new life from a tiny bulb. So, grab your tools, be patient with these beautiful bell-shaped wonders, and most importantly, enjoy the process of nurturing them into existence. Happy gardening!
Resource:
https://identify.plantnet.org/k-world-flora/species/Fritillaria%20atropurpurea%20Nutt./data