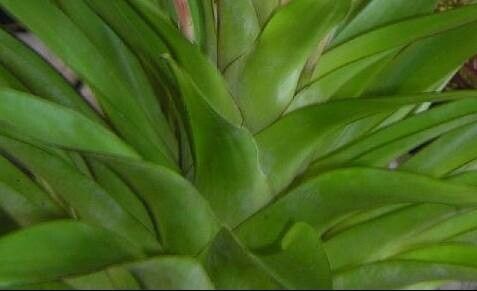
Hello, fellow plant lovers! It’s so nice to chat with you today. I want to talk about one of my absolute favorite bromeliads, Tillandsia deppeana. If you’ve ever seen one of these beauties, you know why they’re so special. They have these incredible, sculptural forms and can produce stunning, elegant blooms. And the best part? You can increase your collection by propagating them! It’s a wonderfully rewarding feeling to see a tiny new plant emerge from your efforts. For Tillandsia deppeana, it’s generally moderately easy to propagate once you get the hang of it—a lovely challenge for those looking to expand their green-thumb skills.
The Best Time to Start
Timing is everything, right? For Tillandsia deppeana, the sweet spot for propagation is usually when the plant is actively growing. Think late spring through summer. This is when they have the most energy reserves to put into producing pups or rooting cuttings. You’ll often see new growth or the beginning of offsets (those little baby plants that form at the base) during this vibrant period.
Supplies You’ll Need
Gathering your tools before you begin makes everything so much smoother. Here’s what I always have on hand:
- Sharp, sterile pruning shears or a sharp knife: For clean cuts that minimize damage and disease.
- A well-draining potting mix: For terrestrial bromeliads, a mix of orchid bark, perlite, and a bit of compost works wonders. For epiphytic types, less is more; sometimes just sphagnum moss or bark chips are enough to cradle the new plant.
- A clean spray bottle: For gentle misting.
- Small pots or trays: For your new propagations.
- Optional: Rooting hormone: While not strictly necessary for Tillandsia deppeana as they root fairly readily, it can give them a little boost.
Propagation Methods
Tillandsia deppeana can be propagated in a couple of ways, but for me, the most reliable method is through division of pups.
Division of Pups:
- Identify a Pup: Look for a small, leafy growth emerging from the base of your mature Tillandsia deppeana. A good pup will be at least one-third the size of the mother plant and have its own root structure starting to form.
- Gently Detach: Carefully wiggle the pup to see if it detaches easily. If it’s still firmly attached, use your sterile pruning shears or knife to make a clean cut as close to the mother plant’s base as possible, ensuring you get as many of the pup’s developing roots as you can.
- Allow to Dry (Optional but Recommended): I like to let the cut end of the pup air dry for a day or two in a bright, airy spot. This helps callus over the wound and reduces the risk of rot when you replant.
- Potting Up: Prepare a small pot with your well-draining mix. You can gently nestle the base of the pup into the mix, ensuring its developing roots are in contact with the substrate. You don’t need to bury it deeply; just give it stability.
- Initial Misting: Give the pup a gentle misting. Avoid overwatering initially.
- Placement: Place the new pot in a bright, indirect light location.
The “Secret Sauce” (Pro Tips)
Over the years, I’ve picked up a few tricks that seem to make a big difference.
- Avoid Wet Bottoms: This is crucial for bromeliads. When you pot up a pup, ensure the base isn’t sitting in stagnant water. Good air circulation around the roots is key to preventing rot.
- Think “Airy Home”: Even when potted, bromeliads still need excellent airflow. Don’t pack them too tightly in their new substrate. A looser potting mix will encourage root development and prevent issues.
- Patience is a Virtue (and Bottom Heat Helps!): While they will root, sometimes it takes a little time. If you have a propagator or can give your new pup a little warmth from below (around 70-75°F or 21-24°C), it can significantly speed up root formation. Just don’t overdo it!
Aftercare & Troubleshooting
Once your pup has established itself and you see new growth, you’re on the right track!
- Watering: Continue to mist lightly and infrequently. Let the potting mix dry out between waterings. If it’s in a more open bark mix, you might water a bit more regularly, but always check for dryness first.
- Light: Keep it in bright, indirect light. Direct sun can scorch developing plants.
- Fertilizing: Once the plant is clearly growing well, you can introduce a very dilute, balanced liquid fertilizer during the growing season, perhaps once a month or so.
What if things go wrong? The most common issue is rot. If you notice mushy, dark brown spots on the base of the pup, or if it suddenly wilts and turns black, it’s likely rot. This usually happens from too much moisture and poor air circulation. Unfortunately, if rot sets in severely, it can be hard to save. Be sure to remove any affected parts immediately and review your watering and air circulation.
A Encouraging Closing
Propagating Tillandsia deppeana is a journey, and like any gardening endeavor, it’s about the process as much as the outcome. Be patient with your new little plants. Give them a good start, keep an eye on their needs, and don’t be discouraged if a propagation doesn’t take. Every experience teaches you something new! Happy growing, and enjoy watching your Tillandsia family expand!
Resource:
https://identify.plantnet.org/k-world-flora/species/Tillandsia%20deppeana%20Steud./data