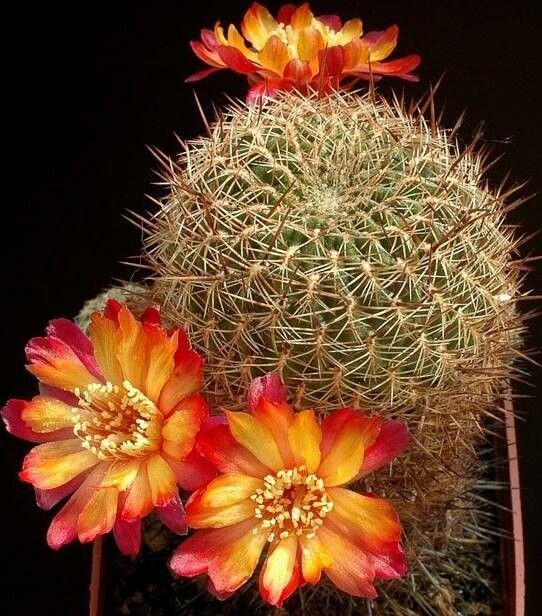
Hello, fellow plant enthusiasts! Today, we’re diving into the wonderful world of Rebutia steinbachii. If you haven’t met this little gem, imagine a tiny, fluffy cactus that practically oozes charm. It’s known for its clusters of vibrant flowers that erupt in a dazzling display, often covering the entire plant. Propagating these beauties isn’t just about creating more of them; it’s about experiencing the thrill of growth and sharing that joy with others. For beginners? I’d say Rebutia steinbachii is moderately easy to propagate. A little patience and attention, and you’ll be rewarded.
The Best Time to Start
Spring is really your sweet spot for kicking off propagation with Rebutia steinbachii. This is when the plant is waking up from its winter slumber and entering its active growth phase. You’ll find that any offsets (those little baby plants that sprout from the base) or divisions will be eager to establish themselves. Trying this in the heat of summer or the chill of winter can be a bit more of a challenge for them.
Supplies You’ll Need
Here’s what you’ll want to have on hand:
- Well-draining cactus and succulent soil mix: This is crucial! A good commercial mix is fine, or you can whip up your own with equal parts potting soil, perlite, and coarse sand.
- Sharp, clean pruning shears or a good quality knife: Sterilize them with rubbing alcohol to prevent any nasties from spreading.
- Small pots or seedling trays: Anything that allows for good drainage. Terra cotta pots are fantastic for cacti.
- Rooting hormone (optional but helpful): Especially if you’re propagating offsets that might be a bit smaller.
- Labels and a marker: To keep track of what you’ve planted and when.
- A spray bottle with water: For gentle misting.
Propagation Methods
For Rebutia steinbachii, the most successful and straightforward methods are going to be offset division and, sometimes, stem cuttings if you have a larger plant.
Offset Division
This is my favorite, as it’s like getting a head start! Rebutia steinbachii naturally produces offsets around its base.
- Gently remove the mother plant from its pot. It’s easier to see what you’re doing if the soil is a little dry. Turn the pot on its side and tap it gently.
- Identify distinct offsets. Look for baby cacti that are starting to form their own little root systems.
- Carefully separate the offsets. Using your clean knife or shears, gently slice through any connecting tissue. Try to get as many roots as possible with each offset. If an offset has no roots, don’t fret, it can still root.
- Allow offsets to callus. This is a very important step! Lay the separated offsets on a dry paper towel in a bright, indirect light spot for 2-3 days. This allows the cut surface to dry and form a protective scab, preventing rot.
- Pot your new babies. Fill your small pots with your well-draining cactus mix. Make a small hole in the center and gently place the offset in, ensuring the callused base is in contact with the soil. Don’t bury it too deep.
- Wait to water. Do not water immediately. Wait for another 3-5 days after potting. This gives any minor wounds a chance to heal in the soil. Then, water from the bottom if possible, or lightly mist the soil.
Stem Cuttings
While less common for these compact Rebutias, if you’re pruning a larger specimen or have a piece that breaks off, you can try this.
- Take the cutting. Use your sharp tool to take a healthy segment or offset.
- Allow to callus. This is absolutely essential for cuttings. Let the cut end dry and form a callus for at least a week to 10 days. The thicker the cutting, the longer it might need.
- Pot the cutting. Once callused, insert the cut end into your well-draining potting mix, about an inch deep.
- Water sparingly, or not at all initially. Wait to water for at least a week after potting. Then, water very lightly, perhaps with a misting, to encourage root formation.
The “Secret Sauce” (Pro Tips)
Here are a couple of things I’ve learned over the years that make a real difference:
- Don’t be tempted to overwater. This is the #1 killer of succulent and cactus babies. They’re desert plants, after all! Allow the soil to dry out completely between waterings, especially in the early stages. It’s better to underwater than to overwater.
- Gentle bottom heat can be a game-changer. If you have a seedling heat mat, placing your pots on it can significantly speed up root development. It mimics the warmth of spring soil and gives those nascent roots a real boost. Just make sure the heat isn’t too intense, and the soil doesn’t dry out too quickly.
Aftercare & Troubleshooting
Once your little Rebutia steinbachii has started to show signs of life – usually a bit of new growth or a slight plumpness – you know roots are forming! Continue to water sparingly, allowing the soil to dry between waterings. As they grow larger, you can gradually transition them to slightly larger pots and a more regular watering schedule, but always prioritize drainage and allowing the soil to dry out.
The biggest troublemaker you’ll encounter is rot. If you notice your new plant becoming mushy, turning black or brown at the base, or looking deflated and sad, it’s likely rot. This is almost always due to overwatering or inadequate drainage. Unfortunately, severely rotted plants are often hard to save, but if it’s caught very early, you might be able to cut away the affected parts and try to re-root the healthy bits.
A Encouraging Closing
Propagating Rebutia steinbachii is a truly rewarding experience. It’s a wonderful way to connect with nature, and there’s nothing quite like watching a tiny offset transform into a healthy, blooming plant. Don’t be discouraged if your first attempt isn’t perfect. Every gardener learns through trial and error! Be patient, celebrate the small wins, and enjoy the journey of growing beautiful cacti. Happy gardening!
Resource:
https://identify.plantnet.org/k-world-flora/species/Rebutia%20steinbachii%20Werderm./data