Oh, hello there, fellow plant lover! It’s so lovely to have you join me today. We’re going to dive into the wonderful world of propagating Pauridiantha callicarpoides.
Why I Adore Pauridiantha Callicarpoides (And Why You Will Too!)
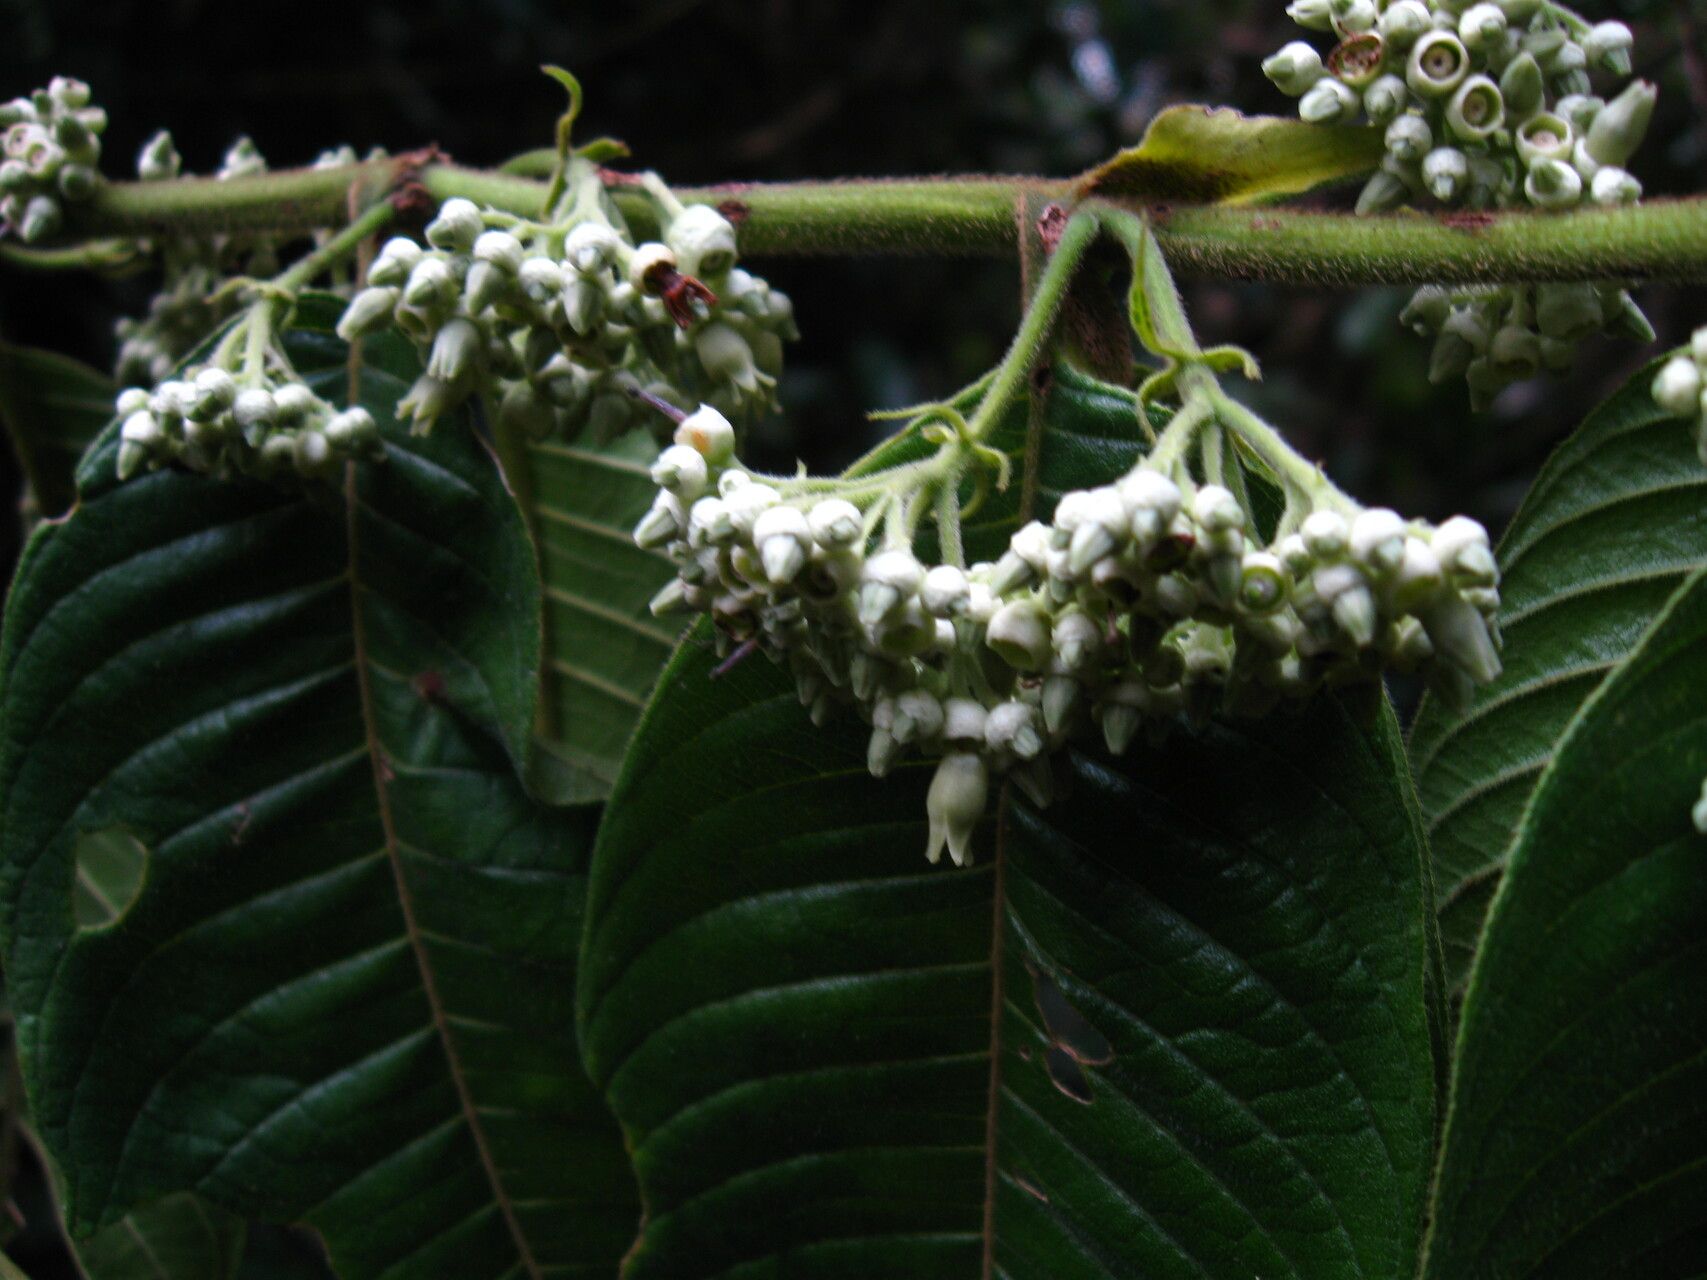
Let me tell you, Pauridiantha callicarpoides is a true gem in the garden. Its clusters of delicate, star-shaped flowers are just… well, they’re a little bit magical. And the way it perfumes the air? Divine! Growing more of these beauties from cuttings or divisions feels like such a special achievement. It’s a way to multiply that joy, share it with friends, and create a whole new generation of fragrant wonders. Now, for beginners, I wouldn’t say it’s the absolute easiest plant to start with, but with a little care and following these steps, you’ll find success. It’s a wonderfully rewarding challenge!
The Sweet Spot for Starting
For the best chance of success, late spring to early summer is your golden window. This is when the plant is in its active growing phase. You want to be taking cuttings from healthy, new growth that’s starting to firm up a bit. It shouldn’t be super soft and floppy, but not woody and old either. Think of it as perfectly pliable.
Your Propagation Toolkit
Here’s what you’ll want to have on hand:
- Clean, sharp pruning shears or a sharp knife: For making neat cuts.
- Rooting hormone powder or gel: This is a real booster, especially for Pauridiantha.
- Well-draining potting mix: I usually go for a 50/50 blend of perlite and peat moss or coco coir. Some growers also like to add a bit of orchid bark for excellent aeration.
- Small pots or trays: With drainage holes, of course!
- Plastic bags or a propagation dome: To create a humid environment.
- Water: For watering your cuttings.
- Optional: A heat mat: This can really speed things up by providing gentle warmth from below.
Let’s Get Propagating: Stem Cuttings are Key!
Stem cuttings are my go-to method for Pauridiantha callicarpoides. It’s efficient and generally yields excellent results.
- Select Your Cuttings: Look for healthy stems that are about 4-6 inches long. You want to find a spot just below a leaf node (where the leaf attaches to the stem).
- Make the Cut: Using your clean shears, make a clean, angled cut right below that leaf node. This is where the magic happens, where roots are most likely to form.
- Prepare the Cutting: Gently remove the lower leaves from your cutting, leaving just a few at the very top. This helps the plant focus its energy on rooting rather than leaf production.
- Dip in Rooting Hormone: Dip the cut end of the stem into your rooting hormone. Give it a good shake to remove any excess – you don’t want clumps.
- Plant Your Cuttings: Fill your small pots with your well-draining mix. Make a small hole in the center of the mix with your finger or a pencil. Carefully insert the cut end of your Pauridiantha cutting into the hole, and gently firm the soil around it.
- Water Gently: Water the soil well, but avoid making it waterlogged. You want it consistently moist, like a wrung-out sponge.
- Create a Humid Environment: This is crucial! Place a clear plastic bag loosely over the pot, or use a propagation dome. This traps moisture and keeps the leaves from drying out. Make sure the leaves aren’t touching the sides of the plastic if possible.
- Provide Light and Warmth: Place your pots in a bright spot with indirect sunlight. Avoid direct sun, which can scorch those tender cuttings. If you have a heat mat, place the pots on it.
My “Secret Sauce” for Extra Success
Here are a few things I’ve learned over the years that really make a difference:
- Don’t let those top leaves touch the water source. Whether it’s condensation in the bag or you’re misting, if the leaves sit in water for too long, they can rot. Aim for good airflow around the foliage.
- Bottom heat is your best friend. Seriously, that gentle warmth from a heat mat encourages root development like nothing else. It mimics a warm summer soil and really speeds things up.
- A light misting can help. If your cuttings look a little sad or the humidity seems to be dropping, give the leaves a very light mist with water every few days. Just a gentle spray!
Aftercare and What to Watch For
Once your cuttings have been planted, keep them consistently moist and humid. You’ll know they’re rooting when you start to see new leaf growth! This can take anywhere from a few weeks to a couple of months. Once they have a good root system – you can gently tug on them and feel resistance, or even peek at the drainage holes – it’s time to gradually acclimate them to normal conditions. Remove the plastic bag or dome for longer periods each day over a week or so.
Now, what if things go wrong? The most common culprit is rot. If you see the stem turning black and mushy, or the leaves look yellow and limp, it’s likely due to too much moisture or poor air circulation. Ensure your soil is draining well, and don’t let them sit in water. If rot sets in, unfortunately, that cutting is probably lost, but don’t despair! Just try again with fresh cuttings.
Keep Growing and Enjoy the Journey!
Propagating, like gardening in general, is an exercise in patience and observation. Don’t be discouraged if your first few attempts aren’t perfect. Each new plant you nurture is a testament to your care and understanding of nature. So, take a deep breath, get your hands in the soil, and enjoy the incredible process of creating more beauty. Happy propagating!
Resource: