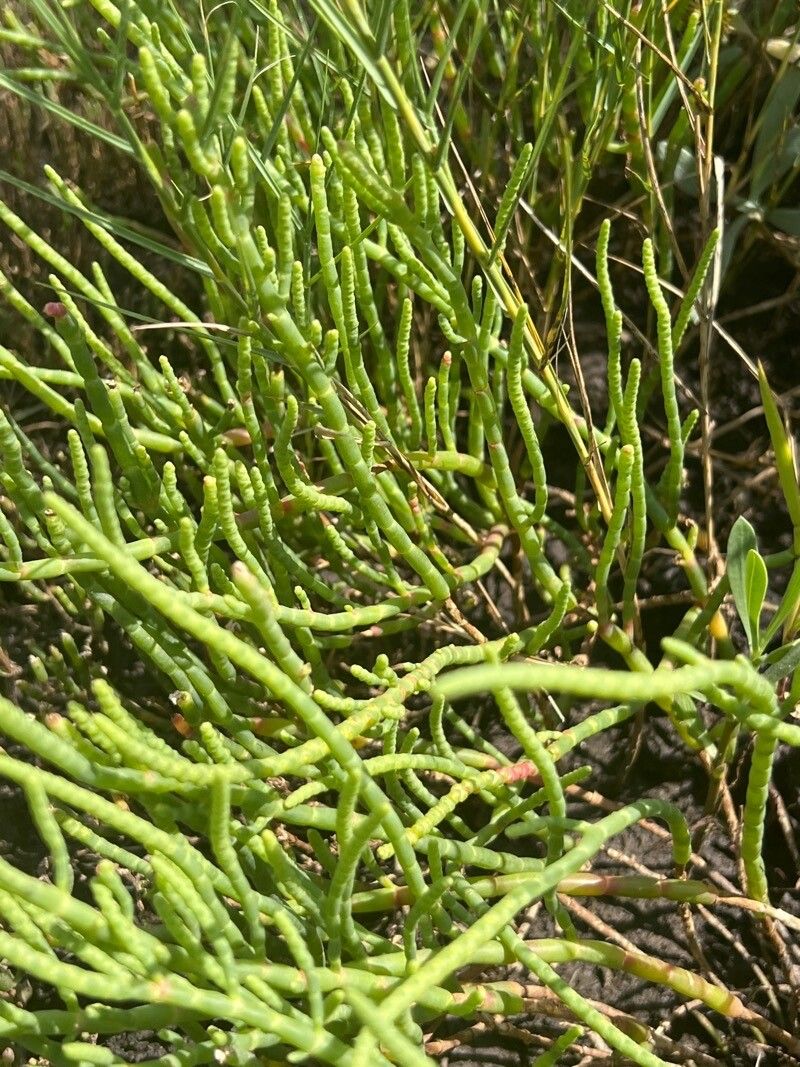
Ah, Salicornia virginica! Also known as Virginia glasswort, or creeping saltmarsh elder. Isn’t it just darling? I adore this little succulent. Its vibrant green, almost segmented stems bring a wonderful splash of color and texture to seaside gardens, rockeries, or even my favorite terracotta pots on the patio. Plus, there’s something incredibly satisfying about nurturing a new plant from just a tiny piece of its parent. It feels wonderfully resourceful, doesn’t it? And the good news? Propagating this little chap is generally quite straightforward. Even if you’re new to the gardening game, you’ll likely find success with these simple methods.
When to Get Your Hands Dirty
The absolute best time to propagate Salicornia virginica is during its active growing season. I find late spring through early summer to be ideal. The plant is full of vigor then, and the warmer temperatures really encourage those cuttings to get their roots going. You can also take cuttings in early autumn, but you might find growth slows down a bit as the days shorten. Just avoid trying this when the plant is dormant in the dead of winter.
Your Propagation Toolkit
Gathering your supplies beforehand makes the whole process so much smoother. Here’s what you’ll want to have on hand:
- Sharp Pruning Shears or a Clean Knife: For making clean cuts.
- Perlite & Coarse Sand Mix: About a 50/50 blend is perfect. This provides excellent drainage, which is key for Salicornia.
- Small Pots or Trays: Anything from shallow nursery pots to cleaned-out yogurt containers will do. Make sure they have drainage holes!
- Rooting Hormone (Optional but Recommended): A powdered hormone can give your cuttings a helpful boost.
- Watering Can with a Fine Rose: For gentle watering.
- Plastic Bag or Clear Dome: To create a humid microclimate if you’re worried about drying out.
Easy-Peasy Propagation Methods
Let’s dive into the practical side. Thankfully, Salicornia virginica is forgiving and happy to sprout from a few different approaches.
Stem Cuttings – My Go-To Method
This is the most common and effective way to multiply your Salicornia.
- Take Your Cuttings: With your sharp shears, snip off healthy stems that are about 3-4 inches long. Look for stems that are green and firm, not woody or leggy. I like to take cuttings from the terminal growth, the very tips of the plant.
- Prepare the Cuttings: Gently remove the tiny leaves from the bottom inch or so of each cutting. This prevents them from rotting when they’re in the soil.
- Dip in Rooting Hormone (Optional): If you’re using rooting hormone, lightly dip the cut end into the powder. Tap off any excess.
- Plant Your Cuttings: Fill your pots or trays with the perlite and sand mix. Make a small hole with your finger or a pencil and insert the prepared cuttings, about half an inch deep. Gently firm the soil around them.
- Water Gently: Water thoroughly but gently. You want the soil to be moist, not waterlogged.
Water Propagation – A Visual Treat
For those who enjoy watching progress, water propagation is a delight.
- Select and Prepare Stems: As with stem cuttings, take 3-4 inch healthy stem tips. Remove the lower leaves.
- Place in Water: Fill a small, clean jar or glass with fresh water. Place the prepared cuttings in the water, ensuring no leaves are submerged.
- Change Water Regularly: This is important! Change the water every 2-3 days to keep it fresh. Too much stagnation can lead to rot.
- Watch for Roots: You’ll start to see tiny white roots emerging from the submerged stem. This can take a few weeks.
- Pot Up: Once the roots are about half an inch to an inch long, it’s time to carefully transplant them into your perlite and sand mix.
My “Secret Sauce” for Success
Over the years, I’ve learned a few little tricks that seem to make all the difference.
- Don’t Overcrowd: When planting stem cuttings, give them a little breathing room. A few inches between each cutting in a pot will help prevent fungal issues and give them space to root.
- Bottom Heat is a Game Changer: If you have a heated propagator or can place your pots on a windowsill that gets gentle morning sun, that extra warmth from below really speeds up root development. It mimics the cozy conditions a plant loves.
- Patience with the Water Method: When propagating in water, it’s tempting to pot up too early. Wait until those roots have a decent length – at least half an inch to an inch. This gives them a stronger start once they’re in soil.
Aftercare and What to Look For
Once you see signs of life – new growth emerging on your cuttings or roots forming – you’re well on your way!
- Keep Moist, Not Soggy: Continue to water gently but regularly. The goal is consistently moist soil, not a swamp.
- Gradually Acclimate: If you’ve covered your cuttings to retain humidity, start gradually removing the cover over a few days. Let them get used to the normal air circulation.
- Watch for Rot: The biggest enemy here is overwatering and poor drainage, which can lead to rot. If you see your cutting turning mushy or dark and falling apart, it’s likely a goner. Don’t beat yourself up; just try again, focusing on excellent drainage and less frequent watering.
- Signs of Success: Look for tiny new shoots or leaves emerging from your cuttings. This is a clear sign they’ve established roots.
Happy Growing!
Propagating Salicornia virginica is such a rewarding experience. It’s a chance to connect with nature, learn a new skill, and fill your garden with more of this charming plant. Don’t be discouraged if your first few attempts aren’t perfect. Gardening is a journey, and patience is your best tool. Enjoy the process and celebrate each new little plant you bring into the world!
Resource:
https://identify.plantnet.org/k-world-flora/species/Salicornia%20virginica%20L./data