Hello, fellow plant enthusiasts! It’s wonderful to have you here. Today, we’re diving into the exciting world of propagation with a particularly delightful subject: Resnova maxima.
Why Grow and Propagate Resnova maxima?
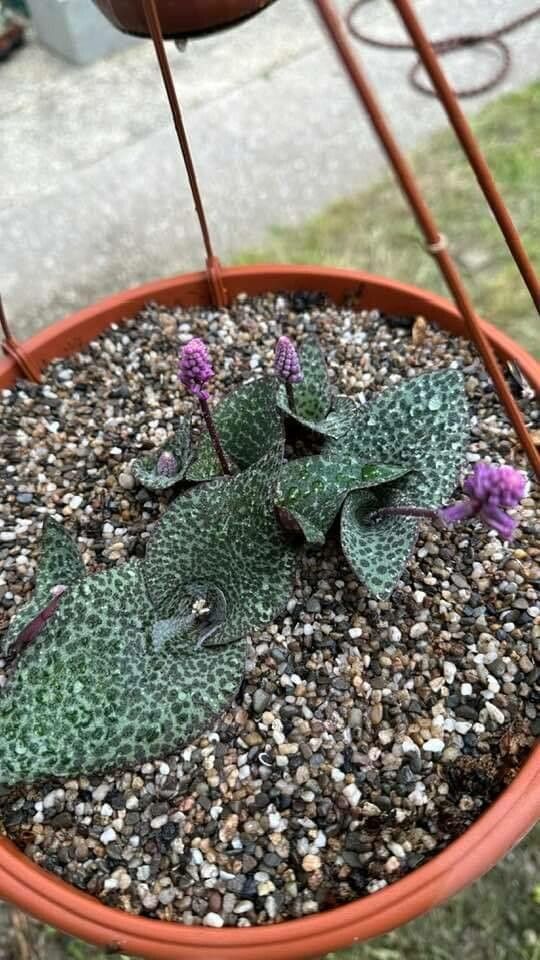
If you haven’t met Resnova maxima yet, picture this: lush, emerald foliage with just a hint of shimmer, often boasting intricate patterns that draw the eye. It brings a touch of elegance to any space, whether it’s gracing a windowsill or adding depth to a mixed planter. And the best part? Sharing this beauty by propagating it yourself is incredibly rewarding. It’s also a fantastic plant for beginners looking to dip their toes into propagation. You’ll get the hang of it in no time!
When to Get Your Hands Dirty
The sweet spot for propagating Resnova maxima is generally late spring to early summer. This is when the plant is actively growing and has the energy to produce new roots. Look for healthy, vibrant stems that aren’t too woody or too soft. You want that perfect in-between stage.
Your Propagation Toolkit
Before we begin, let’s gather our supplies. Having everything ready makes the process smooth and enjoyable:
- Sharp Pruning Shears or a Clean Knife: Essential for making clean cuts.
- Well-Draining Potting Mix: A blend of perlite, peat moss, and a good quality potting soil works wonders. I like to use about 50% perlite to ensure excellent aeration.
- Small Pots or Seedling Trays: Clean pots are crucial to prevent disease.
- Rooting Hormone (Optional but Recommended): This isn’t strictly necessary for Resnova maxima, but it can significantly speed up root development.
- Plastic Bag or Humidity Dome: To maintain high humidity around your cuttings.
- Watering Can with a Fine Rose: For gentle watering.
- Small Labels and a Pen: To keep track of your different plants and when you started them.
Methods for Multiplying Your Resnova maxima
There are a couple of simple ways to get more Resnova maxima plants. I find stem cuttings to be the most reliable.
Stem Cuttings: My Go-To Method
- Select Your Cuttings: Choose a healthy stem from your mature Resnova maxima. Look for a section with at least 2-3 sets of leaves.
- Make the Cut: Using your sharp shears or knife, make a clean cut just below a leaf node (where a leaf attaches to the stem). Aim for cuttings about 4-6 inches long.
- Prepare the Cutting: Gently remove the lower leaves from the cutting, leaving just 1-2 sets of leaves at the top. If the remaining leaves are very large, you can cut them in half horizontally to reduce water loss.
- Apply Rooting Hormone (if using): Dip the cut end of the stem into your rooting hormone, tapping off any excess.
- Plant Your Cuttings: Fill your small pots with your prepared potting mix. Make a small hole with your finger or a pencil, and insert the cut end of the stem. Gently firm the soil around the base of the cutting.
- Water Gently: Water thoroughly until you see water drain from the bottom of the pot.
- Create a Humid Environment: Place the pot inside a clear plastic bag, sealing it loosely, or cover it with a humidity dome. This creates a mini-greenhouse effect.
Water Propagation: A Visible Treat
This method is a bit more visual, which I always appreciate!
- Prepare the Cuttings: Follow steps 1-3 from the stem cutting method.
- Place in Water: Fill a clean jar or glass with room-temperature water. Place the prepared cuttings in the water, ensuring that no leaves are submerged.
- Find a Sunny Spot: Place the jar in a bright location, but out of direct, harsh sunlight.
- Change Water Regularly: Change the water every few days to keep it fresh and prevent bacterial growth. You’ll start to see tiny roots emerging from the nodes in a few weeks.
- Potting Up: Once the roots are about an inch long, you can carefully transplant them into your well-draining potting mix.
The “Secret Sauce” for Success
Here are a few little tricks I’ve learned over the years that can really give your Resnova cuttings a boost:
- Bottom Heat is Your Friend: Especially if your home is a bit on the cooler side, placing your pots on a seed starting mat can dramatically speed up root development. It mimics the warmth of spring soil.
- Don’t Fear the Slime: If you’re using stem cuttings in soil and notice a bit of a gummy or slimy residue where you made the cut, don’t panic! This is often the plant sealing its wound. Just ensure your soil is well-draining to prevent rot.
- Patience with Leaf Drop: Occasionally, a cutting might drop a leaf or two. This is often the plant prioritizing energy for root formation, not necessarily a sign of failure. As long as the stem itself looks healthy and firm, give it time!
Aftercare and What to Watch For
Once your cuttings have developed a healthy root system (you can gently tug on them – if there’s resistance, they’ve rooted!), it’s time to give them baby care.
- Gradual Acclimation: If you used a plastic bag or dome, slowly introduce your new plants to normal air over a few days by opening the bag a little more each day.
- Care Like the Parent: Treat your newly rooted plants much like you would your mature Resnova maxima. Provide bright, indirect light and keep the soil consistently moist but not soggy.
- Signs of Trouble: The most common issue you might encounter is rot. This usually happens if the cuttings are kept too wet or lack adequate air circulation. You’ll notice the stem turning mushy and brown. If you see this, remove the affected cutting immediately to prevent it from spreading. Another sign is wilting that doesn’t perk up with watering; this can indicate poor root development or rot.
Happy Propagating!
Growing new plants from cuttings is such a fulfilling part of gardening. It connects you deeper to your plants and is a wonderful way to share your love for Resnova maxima with friends and family. Be patient with the process, celebrate every little sprout, and most importantly, enjoy the journey. Happy growing!
Resource:
https://identify.plantnet.org/k-world-flora/species/Resnova%20maxima%20van%20der%20Merwe/data