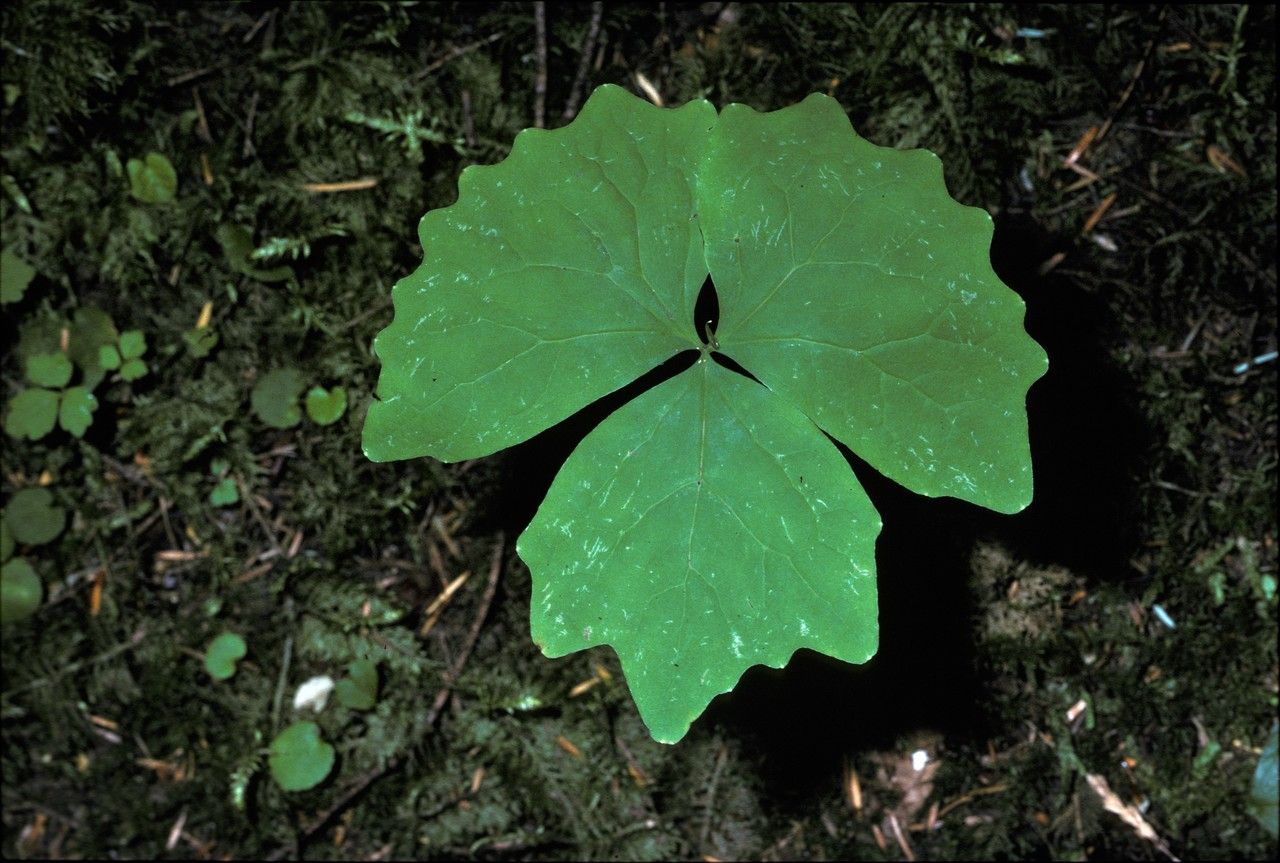
Hello, my fellow plant lovers! Today, we’re diving into the enchanting world of Achlys triphylla, often called Sweet Annie or Vanilla Leaf. It’s a native woodland gem that brings a delicate, fern-like beauty and a wonderfully sweet, vanilla-like fragrance to shady spots. There’s something truly special about coaxing new life from an existing plant, and Achlys triphylla is a delightful reward for your efforts, even if it asks for a little patience. For beginners, I’d say it’s a moderately rewarding plant to propagate – not impossible, but it definitely appreciates a bit of TLC.
The Best Time to Start
The key to success with Achlys triphylla lies in timing. You’ll have the best luck by propagating in late spring to early summer. This is when the plant is actively growing and has plenty of energy to put into developing new roots. Look for stems that are firm and have developed leaves. Avoid trying to propagate from very young, floppy shoots or from old, woody material.
Supplies You’ll Need
Here’s what you’ll want to have on hand before you get started:
- Sharp, clean pruning shears or a sharp knife: Essential for making clean cuts.
- Rooting hormone (optional but recommended): A powder or gel that encourages root development.
- Well-draining potting mix: I often use a blend of peat moss, perlite, and a bit of compost. For Achlys, a mix that stays moist but not soggy is ideal. Think about a good quality potting soil mixed with a good helping of perlite or vermiculite.
- Small pots or propagation trays: Clean containers with drainage holes are a must.
- Plastic bags or a propagation dome: To maintain humidity.
- Watering can or spray bottle: For gentle watering.
Propagation Methods
For Achlys triphylla, stem cuttings are generally the most successful and straightforward method.
Stem Cuttings
- Select Your Cuttings: Gently examine your Achlys plant and choose healthy, non-flowering stems. You want pieces that are about 4-6 inches long. Make your cut just below a leaf node (where a leaf attaches to the stem).
- Prepare the Cuttings: Carefully remove the lower leaves from the cutting, leaving just a few at the top. This helps the plant conserve energy and prevents the submerged leaves from rotting.
- Apply Rooting Hormone: If you’re using rooting hormone, dip the cut end of the stem into the powder or gel. Tap off any excess – you don’t need a thick coating.
- Plant the Cuttings: Fill your small pots or trays with your prepared potting mix. Make a small hole in the center with your finger or a pencil. Gently insert the cut end of the stem into the hole, ensuring it’s firm enough to stand on its own.
- Create a Humid Environment: Water the soil gently after planting. Then, cover the pots with a plastic bag or a propagation dome to trap humidity. You can prop the bag up with chopsticks or small stakes so it doesn’t touch the leaves.
- Place in Bright, Indirect Light: Find a spot that gets plenty of bright, indirect light but no direct sun. Too much sun will scorch your delicate cuttings.
The “Secret Sauce” (Pro Tips)
- Keep it Moist, But Not Drowned: This is crucial for Achlys. The potting mix should feel like a wrung-out sponge – moist to the touch but not waterlogged. Overwatering is the fast track to rot.
- Bottom Heat for Boost: If you have a seedling heat mat, using it can significantly speed up root formation. Just place your pots on top of it. The gentle warmth encourages root activity from below.
- Patience is a Virtue (with a capital P!): Achlys can be a bit slow to root. Don’t be discouraged if you don’t see immediate results. Wait at least 4-6 weeks before you gently tug on a cutting to feel for resistance – that’s your sign of new roots!
Resource:
https://identify.plantnet.org/k-world-flora/species/Achlys%20triphylla%20DC./data