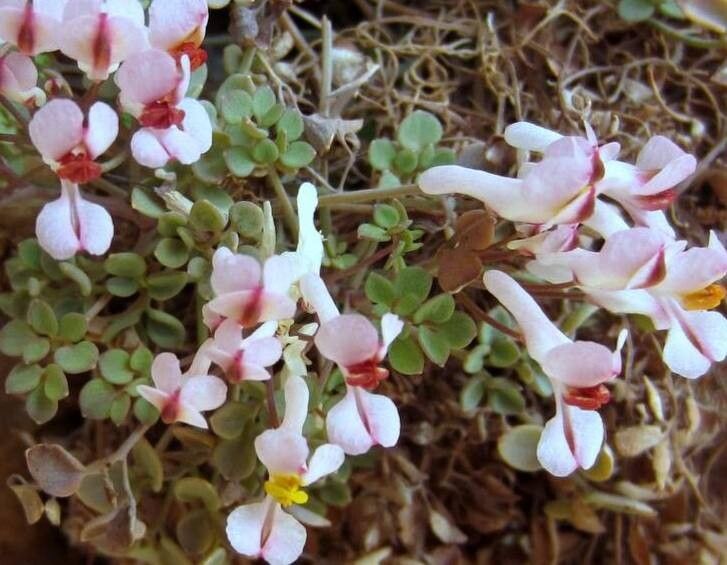
Hello there, fellow garden enthusiasts! I’m so excited to share some of my favorite plant propagation secrets with you. Today, we’re diving into the wonderful world of Sarcocapnos enneaphylla. If you’ve ever seen this charming plant gracing a rock garden or spilling artfully from a pot, you’ve likely been captivated by its delicate, almost ethereal appearance. Its dainty, white, pea-like flowers and tidy, mounding habit make it a true gem. And the best part? It’s surprisingly rewarding to multiply! For beginners, I’d say Sarcocapnos enneaphylla is a delightful challenge – not too difficult, but it requires a little attention and a gentle hand.
The Best Time to Start
For the highest success rate with Sarcocapnos enneaphylla, I find late spring to early summer is absolutely ideal. This is when the plant is actively growing, full of vigor, and has plenty of fresh, new stems to work with. Waiting until after it has finished its main flush of flowering is also a good bet. You want to catch it at a point where it’s showing robust growth, not when it’s stressed or dormant.
Supplies You’ll Need
Before we get our hands dirty, let’s gather our essentials:
- Sharp, clean pruning shears or a sharp knife: For making clean cuts. Rust and dirt are the enemies of healthy cuttings!
- Rooting hormone (optional but recommended): A powder or gel that encourages faster root development.
- Well-draining potting mix: I usually use a mix of equal parts seed-starting mix, perlite, and a touch of coco coir. This ensures good aeration and prevents waterlogging.
- Small pots or seedling trays: Clean ones, please!
- Plastic bags or a propagator lid: To create a humid environment.
- Watering can with a fine rose: For gentle watering.
- Labels and a permanent marker: To keep track of what you’ve propagated and when.
Propagation Methods
My go-to method for Sarcocapnos enneaphylla is stem cuttings. It’s reliable and gives you multiple new plants from a single parent.
- Take the Cuttings: Select healthy, non-flowering shoots that are about 3-4 inches long. Using your sharp pruning shears or knife, make a clean cut just below a leaf node (where a leaf attaches to the stem). Remove the lower leaves, leaving just a few at the top.
- Apply Rooting Hormone (Optional): If you’re using rooting hormone, lightly dip the cut end into the powder or gel. Tap off any excess. This step helps give the cutting a helpful boost.
- Pot Up Your Cuttings: Gently insert the cuttings into your prepared, moist potting mix, ensuring the leaf nodes where you removed the leaves are buried, as this is where roots will form. Firm the soil around them gently.
- Create a Humid Environment: Water gently to settle the soil. Then, cover the pots with a plastic bag, securing it around the rim with a rubber band, or place them under a propagator lid. This humidity is crucial for preventing the cuttings from drying out before they can root.
- Provide Bright, Indirect Light: Place the pots in a location that receives bright, indirect light. Avoid direct sunlight, which can scorch the delicate cuttings.
The “Secret Sauce” (Pro Tips)
Here are a couple of things I’ve learned over the years that can make a big difference:
- Don’t let leaves touch water: If you’re trying water propagation for some reason (though I find stem cuttings more effective for this plant), make sure the leaves are well above the water level. Any leaves submerged will rot, and that can quickly take down your whole cutting.
- Bottom heat is your friend: If you have a heat mat designed for seedlings, place your pots on it. This gentle warmth from below encourages root development much faster and more reliably. It really gives those little roots a nudge!
Aftercare & Troubleshooting
Once you start to see new growth appearing from the base or tip of your cuttings, that’s a good sign that roots are developing! It usually takes 4-6 weeks, sometimes a bit longer.
- Gradually Acclimatize: Once roots have formed, slowly introduce your new plants to normal air by opening the plastic bag or propagator lid for longer periods each day over a week.
- Watering: Continue to keep the soil consistently moist but not waterlogged. As they get more established, you can water them as you would your mature plants.
- Transplanting: When the root system is established enough that you see roots peeking out of the drainage holes (or gently tug them to feel resistance), you can transplant your new Sarcocapnos into slightly larger pots with a good quality, well-draining potting mix.
Troubleshooting: The most common issue you’ll encounter is rot. This usually happens if the cuttings are kept too wet or don’t have enough air circulation. If you see a cutting turning black and mushy, it’s best to remove it to prevent it from spreading to others. Make sure your potting mix is draining well and that you’re not overwatering.
Happy Propagating!
Propagating plants is a journey, and sometimes it takes a few tries to get it just right. But the satisfaction of nurturing a brand-new life from a tiny cutting is truly unmatched. Be patient, observe your little cuttings, and enjoy the process of watching them grow. Happy gardening!
Resource:
https://identify.plantnet.org/k-world-flora/species/Sarcocapnos%20enneaphylla%20(L.)%20DC./data