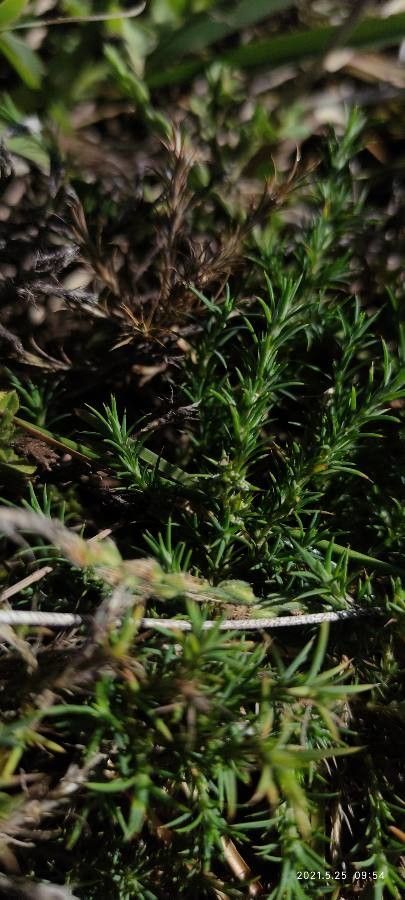
Oh, hello there! Come on in, grab a mug of something warm. Today, we’re going to talk about a real gem: Polycnemum arvense. It’s one of those understated beauties, isn’t it? Its delicate, wispy foliage and charming little blooms have a way of bringing a touch of wild charm to any garden. Propagating it myself has always felt like a small victory, a way to extend that charm and share it with friends. Now, if you’re just starting out, I’d say Polycnemum arvense is moderately easy to propagate. It’s not quite as straightforward as, say, a succulent, but with a little attention, you’ll be successful.
The Best Time to Start
For the absolute best chance of success, I find late spring to early summer is the sweet spot. This is when the plant is actively growing and has plenty of energy to put into developing new roots. Look for stems that are firm but not yet woody. Spring growth is usually the most vigorous and adaptable for propagation.
Supplies You’ll Need
Gathering your supplies beforehand makes the whole process much smoother. Here’s what I usually have on hand:
- Sharp, clean pruning shears or a clean knife: Essential for making precise cuts.
- Rooting hormone (optional but recommended): A little boost can make a big difference.
- Well-draining potting mix: A blend of peat moss, perlite, and a bit of coarse sand works wonders. You can also find specialized seed starting or propagation mixes.
- Small pots or seed trays: Clean ones are a must to prevent disease.
- A spray bottle: For gentle misting.
- Plastic bags or a propagation dome: To create a humid environment.
- A tray or saucer: To catch excess water.
Propagation Methods
Let’s get our hands dirty! I usually rely on stem cuttings for Polycnemum arvense, as it’s quite responsive to this method.
Stem Cuttings
- Select your cuttings: From a healthy, established plant, choose stems that are about 4-6 inches long. Make sure they have at least a few sets of leaves.
- Make the cut: Using your clean shears or knife, make a clean cut just below a leaf node. A leaf node is where a leaf attaches to the stem. This is where the magic happens, where roots are most likely to form.
- Prepare the cutting: Gently remove the lower leaves from the cutting, leaving only the top 2-3 sets. Discard any damaged or yellowing leaves.
- Apply rooting hormone (optional): If you’re using rooting hormone, dip the cut end of the stem into the powder or gel. Tap off any excess.
- Plant the cuttings: Fill your small pots or trays with your well-draining potting mix. Make a small hole in the center with a pencil or your finger, then carefully insert the cutting. Gently firm the soil around the stem. Don’t bury the leaves!
- Water gently: Water the soil thoroughly so that it’s moist but not soggy. A gentle shower from your spray bottle is often best.
- Create humidity: This is key. Cover the pots with a plastic bag or a propagation dome. Make sure the leaves don’t touch the plastic if possible. This traps moisture, creating the humid environment the cuttings need to root.
- Placement: Place the pots in a bright, indirect light location. Avoid direct sun, which can scorch the delicate cuttings.
The “Secret Sauce” (Pro Tips)
Now, for a few little tricks I’ve picked up over the years.
- Bottom Heat is Your Friend: If you have them, placing your pots on a gentle heat mat can significantly speed up root development. It mimics the warmth of the soil in summer and gives those roots a nudge.
- Don’t Be Afraid to Bottom Water: Once your cuttings are established in their pots, I often find that watering from the bottom works best. Place the pots in a tray of water and let them soak it up from below for about 15-20 minutes. This encourages roots to grow downwards towards the moisture.
- Scrape a Little for Extra Motivation: For slightly tougher stems, sometimes I’ll gently scrape a tiny sliver of the outer layer from one side of the cut end, just before applying the rooting hormone. This exposes more of the stem to the hormone and can encourage faster root formation. Don’t overdo it, though!
Aftercare & Troubleshooting
Once you see new growth appearing at the top of the cutting, that’s a good sign roots are forming! You can gently tug on a cutting – if there’s resistance, you’ve got roots!
- Gradual Acclimatization: When roots appear, start gradually increasing ventilation. Gradually open the plastic bag or dome for a few hours each day over a week or so. This helps the new plant adjust to normal humidity levels.
- Keep Moist but Not Soggy: Continue to water when the top inch of soil feels dry. Overwatering is still the enemy.
- Watch for Rot: The most common problem you’ll face is rot. If your cuttings turn mushy, black, or start to wilt despite being moist, it’s usually a sign of too much moisture and insufficient airflow. If you catch it early, you might be able to save a cutting by removing the affected part and repotting it in fresh, dry soil, but often it’s a lost cause. Good drainage is paramount.
A Encouraging Closing
So there you have it! Propagating Polycnemum arvense is a truly satisfying process. Be patient with your little green babies. Some will take faster than others, and that’s perfectly normal. Enjoy the journey of watching new life unfold right before your eyes. Happy gardening!
Resource:
https://identify.plantnet.org/k-world-flora/species/Polycnemum%20arvense%20L./data