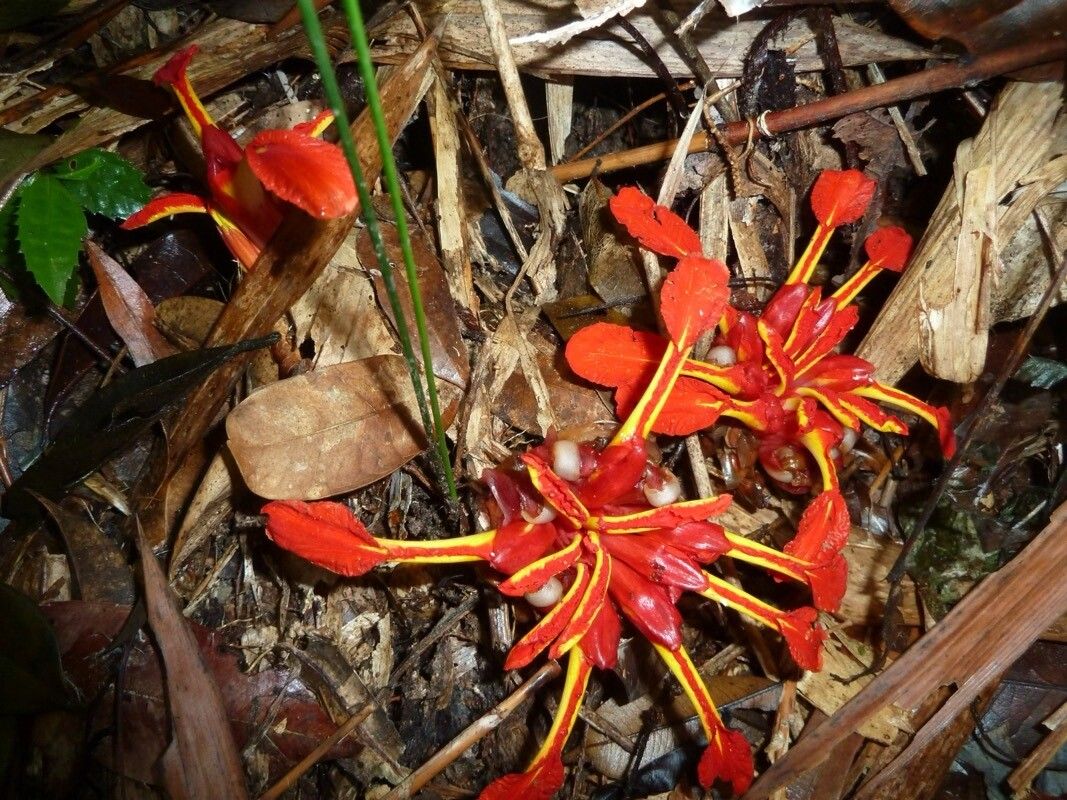
Oh, hello there! It’s so lovely to have you drop by. Today, we’re diving into the wonderfully vibrant world of Etlingera linguiformis, more commonly known as the “Labiate Ginger” or “Tongue Ginger.” If you’ve ever seen its stunning, almost alien-like floral bracts erupting from the soil, you know why it’s a showstopper. They’re like bright pink or red tongues, hence the name! Propagating these beauties can feel a little mysterious, but trust me, with a few key steps, you’ll be well on your way to filling your garden (or your home, if you’re in a cooler climate) with more of those incredible blooms. For beginners, I’d say Etlingera is moderately challenging, but definitely achievable with a bit of patience and love.
The Best Time to Start
When it comes to propagating Etlingera linguiformis, the sweet spot is really when the plant is actively growing. Think late spring through summer. You’re looking for healthy, vigorous growth. If you’re dealing with a plant that’s been dormant for a while, it’s best to wait until you see new shoots emerging. This ensures the plant has enough energy to put into creating new roots. Trying to propagate when it’s stressed or resting just won’t yield the results you’re hoping for.
Supplies You’ll Need
Gathering your tools beforehand makes the whole process smoother. Here’s what I always have on hand:
- Sharp, sterilized pruning shears or a clean knife.
- A well-draining potting mix. I like a blend of peat moss, perlite, and worm castings, or a commercial mix formulated for aroids or tropicals.
- Small pots or propagation trays. Terracotta pots are great for allowing the soil to breathe.
- Rooting hormone (powder or gel). This isn’t strictly necessary for everything, but it gives your cuttings a real boost.
- A clear plastic bag or a propagation dome to create a humid environment.
- Plant labels to keep track of what you’ve started.
- A spray bottle filled with clean water.
Propagation Methods
Etlingeras are best propagated by division. While stem cuttings can sometimes work, they’re quite challenging and often unsuccessful with this particular ginger. Division is your best bet for creating new, healthy plants.
Division – The Tried and True Method
- Assess Your Plant: Look for a mature clump of Etlingera that has several healthy pseudostems (those thick, cane-like stems). You’ll want to divide a section that has at least one or two developed pseudostems and some discernible rhizome (the underground stem).
- Gently Remove from Pot: If your plant is in a pot, carefully ease it out. If it’s in the ground, you might need to loosen the soil around the edges with a spade or garden fork. I like to do this on a slightly drier day if possible.
- Clean the Rhizomes: Gently brush away excess soil from the rhizome so you can clearly see where natural divisions occur.
- Make the Cut: Using your sharp, sterilized shears or knife, carefully cut or pry apart the rhizome. Try to make clean cuts, ensuring each division has its own healthy section of rhizome and at least one or two pseudostems. Don’t be afraid to be firm, but also be gentle to avoid damaging the precious growing points.
- Inspect and Trim: Look for any damaged or rotting sections on the rhizome and trim them away. You can dust the cut surfaces with a fungicide if you’re particularly worried about rot. I also like to trim back any excessively long or damaged leaves.
- Pot Up Your Divisions: Plant each division in its own pot using your well-draining potting mix. Ensure the rhizome is just slightly covered with soil, and the pseudostems are upright.
- Water and Cover: Water the newly potted divisions thoroughly. Then, cover the pots with a clear plastic bag or place them under a propagation dome to maintain high humidity. This is crucial for helping them bounce back and establish roots.
The “Secret Sauce” (Pro Tips)
Here are a couple of things I’ve learned over the years that make a big difference:
- Don’t Overwater Immediately: While humidity is key, soggy soil is the enemy of dividing rhizomes. Water them in well initially, but then let the top inch or two of soil dry out before watering again. This encourages root growth.
- Think Warmth: Etlingerias are tropicals, after all! Providing gentle bottom heat can significantly speed up root development. A seedling heat mat placed under your propagation trays or pots is a game-changer. It mimics the warmth the rhizomes would naturally experience in their native environment.
Aftercare & Troubleshooting
Once your divisions are potted and happy under humidity, give them indirect light. Direct sun will scorch those tender new shoots. Keep the humidity levels high. You’ll know they’re settling in when you start to see new leaf unfurling or shoots emerging from the rhizome. This can take anywhere from a few weeks to a couple of months, so patience is your best friend.
The biggest issue you might encounter is rot. If you see your pseudostems turning mushy and brown, or the rhizome becoming slimy, it’s usually a sign of too much moisture and not enough air circulation. In this case, you might need to pull the division out, trim away the rotted parts, let it dry for a day, and repot in fresh, dry soil, ensuring better drainage and a less humid environment. If it’s widespread, unfortunately, it might be a lost cause, but don’t let that discourage you!
A Encouraging Closing
Propagating Etlingera linguiformis is a journey, and like any garden project, there’s a learning curve. Seeing those beautiful, unique blooms appear on a plant you’ve nurtured from a small division is incredibly rewarding. Keep experimenting, keep learning, and most importantly, enjoy the process of bringing more of these botanical wonders into your life. Happy propagating!
Resource: