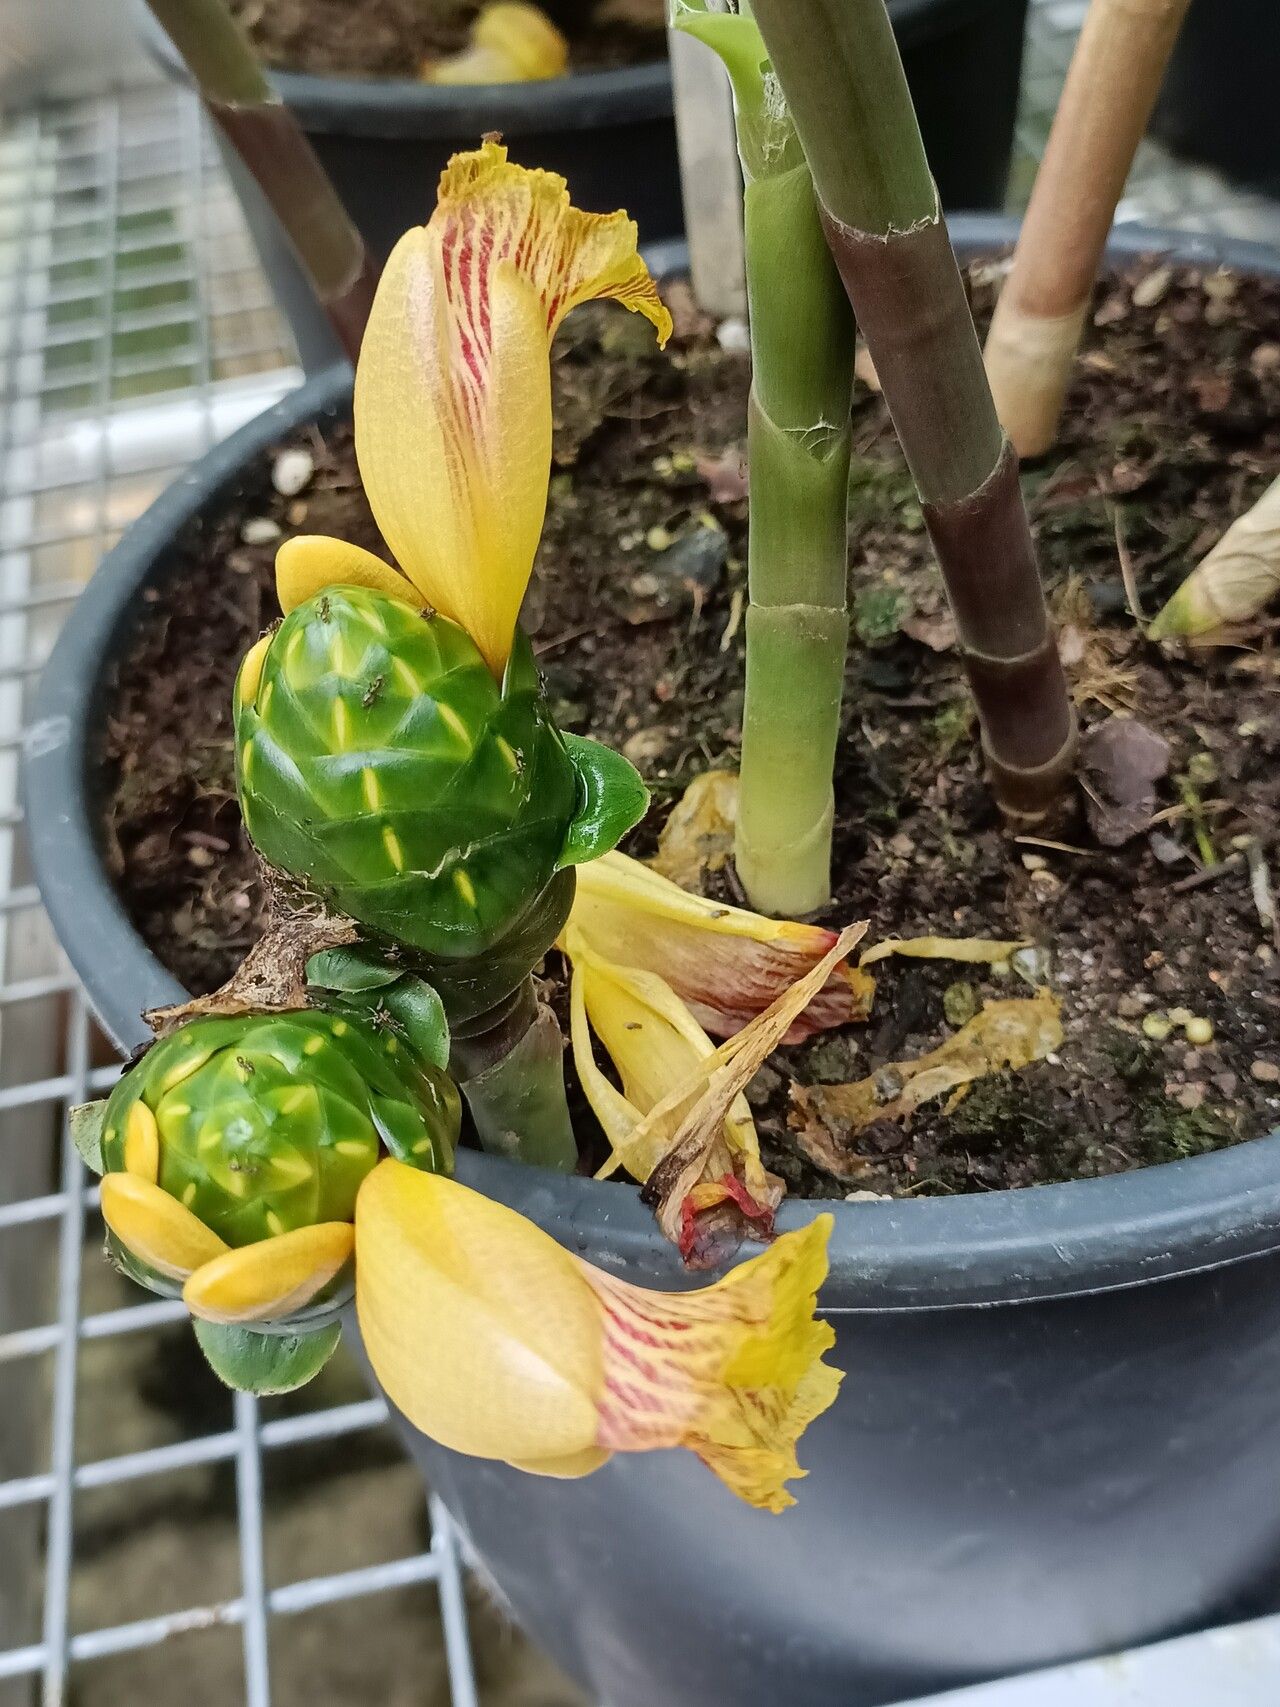
Hey there, fellow plant lovers! Let’s talk about a plant that’s really captured my heart over the years: Costus dirzoi. If you’re looking for something a little different, something with lush, tropical vibes and a fascinating growth habit, then you’ve found your match. These beauties, with their upright, bract-covered stems that resemble pinecones, are just sensational. And guess what? Propagating them is incredibly rewarding. It’s how I’ve filled my own garden with these stunners, and I’m here to guide you through it. For those just starting out, I’d say Costus dirzoi is moderately easy – you’ll have success with a little patience and the right approach.
The Best Time to Start
The sweet spot for propagating Costus dirzoi is when the plant is actively growing, which usually means late spring through summer. You want to catch it when it’s bursting with energy. This is when the stems are robust and full of life, giving them the best chance to root and thrive. Avoid trying to propagate during the plant’s dormant period, as the success rate will be much lower.
Supplies You’ll Need
Here’s what you’ll want to gather before you get started. Think of it as your little propagation toolkit:
- Sharp pruning shears or a clean knife
- Well-draining potting mix. I like a blend of peat moss, perlite, and compost.
- Small pots or trays for your new cuttings.
- Optional: Rooting hormone powder. It’s not essential, but it can give an extra boost.
- Optional: A heat mat for bottom warmth.
- A spray bottle for misting.
Propagation Methods
Costus dirzoi is wonderful because it’s quite forgiving and can be propagated using a couple of straightforward methods.
Stem Cuttings
This is probably my favorite way to make more Costus dirzoi.
- Select a healthy stem. Look for a piece that is at least 6-8 inches long and has a few active leaf nodes.
- Make your cut. Using your clean shears or knife, make a clean cut just below a leaf node. This is where the magic happens, where roots are most likely to form.
- Prepare the cutting. Gently remove the lower leaves, leaving just a few at the top. You can also cut larger leaves in half to reduce moisture loss.
- Apply rooting hormone (optional). If you’re using it, dip the cut end into the rooting hormone, tapping off any excess.
- Plant the cutting. Fill your small pot with your well-draining potting mix. Make a small hole in the center with your finger or a pencil.
- Insert the cutting. Place the cut end into the hole and gently firm the soil around it.
- Water gently. Give it a light watering to settle the soil.
Division
As your Costus dirzoi grows, it will naturally form clumps. Dividing these is a fantastic way to multiply your plants.
- Gently remove the plant from its pot. If it’s in the ground, dig around the root ball carefully.
- Inspect the root system. You’ll see multiple stems emerging from the rhizome.
- Gently tease apart the clump. You can use your hands or, if it’s tough, a clean spade or trowel to separate sections, ensuring each division has at least one or two healthy stems and some roots.
- Pot up the divisions. Plant each division into its own pot with fresh, well-draining soil.
- Water thoroughly. Water each pot well.
The “Secret Sauce” (Pro Tips)
Here are a couple of things I’ve learned over the years that really make a difference:
- When doing stem cuttings, don’t overcrowd your pots. Give each cutting a little space to breathe. This helps prevent fungal issues.
- Bottom heat is your friend! Placing your pots on a heat mat really encourages root development, especially if your ambient room temperature isn’t super warm. It mimics the cozy conditions the plant loves.
Aftercare & Troubleshooting
Once your cuttings or divisions are planted, they’ll need a little TLC.
- Keep the soil consistently moist, but not soggy. A light misting with your spray bottle a few times a day is perfect, especially for cuttings.
- Provide bright, indirect light. Avoid direct harsh sun, which can scorch young cuttings.
- Be patient! Rooting can take anywhere from a few weeks to a couple of months. You’ll know it’s taken when you see new leaf growth.
Now, if things go sideways, don’t despair. The most common culprit is rot. This usually happens if the soil stays too wet for too long, or if there’s poor air circulation. If you see a cutting turning black and mushy, it’s probably best to discard it to prevent it from affecting other cuttings. If you’ve done divisions and they seem to be struggling, ensure they’re not drying out too much.
A Encouraging Closing
So there you have it! Propagating Costus dirzoi is a journey, and like any good gardening adventure, it’s all about observation, patience, and a little bit of faith in the process. Don’t be afraid to get your hands dirty, and remember that every experienced gardener has had their share of cuttings that didn’t make it. Just keep trying, and enjoy the satisfaction of watching your beautiful Costus dirzoi collection grow! Happy growing!
Resource: