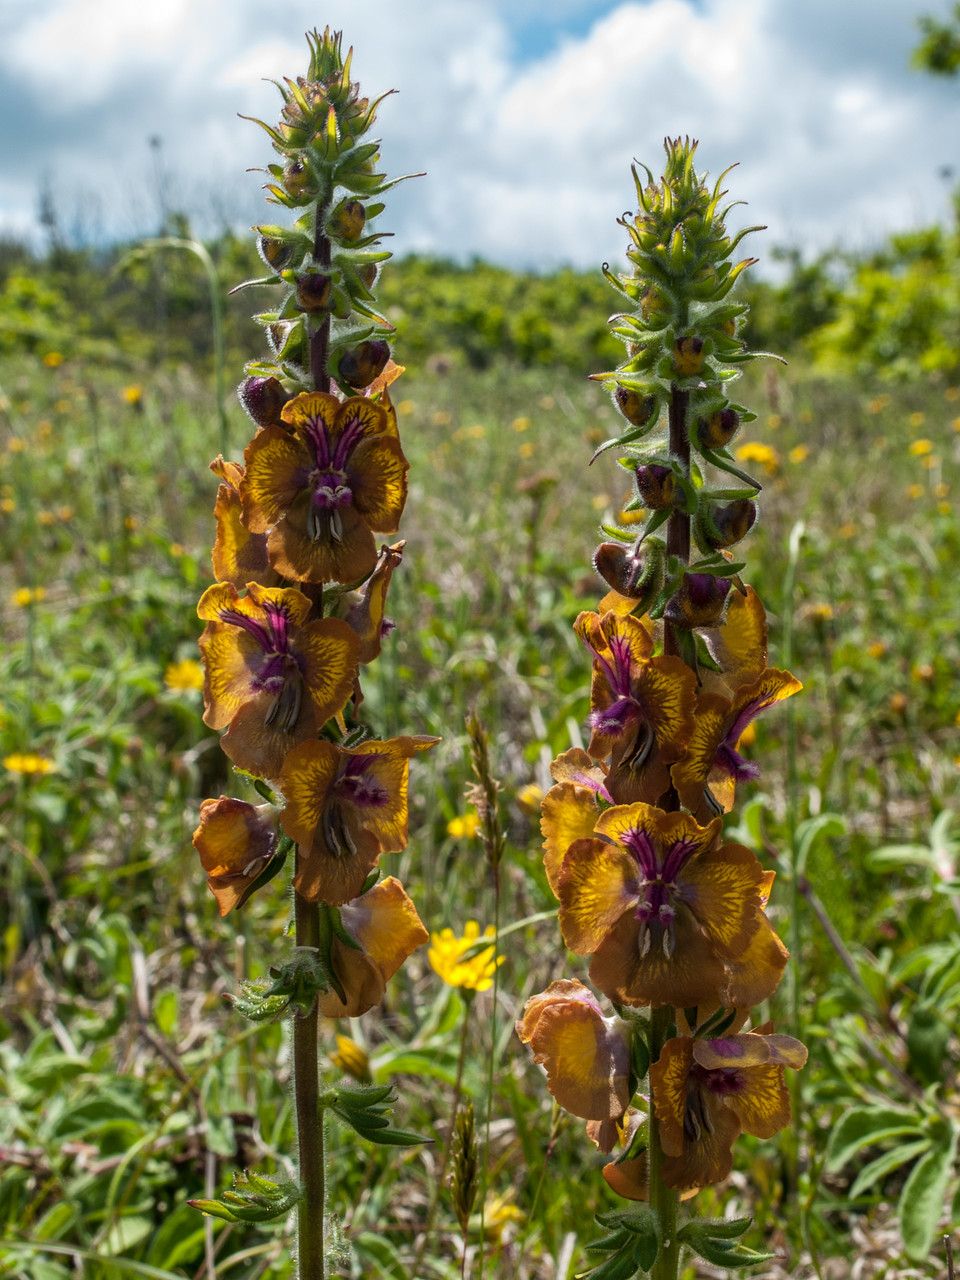
Ah, Verbascum bugulifolium! Isn’t it a stunner? I’ve always loved the way those fuzzy, silver-grey leaves catch the sunlight. And when it sends up those tall spires of charming yellow flowers? Pure magic. It’s a plant that truly brings a touch of cottage garden charm to any space.
If you’re looking to add more of these beauties to your garden without breaking the bank, propagating them yourself is incredibly satisfying. And the good news? Verbascum bugulifolium is generally considered a pretty easy-going plant to propagate, making it a wonderful project for gardeners of all levels. You’ll be rewarded with new plants to share or to fill in those empty spots!
The Best Time to Start
For Verbascum bugulifolium, the sweet spot for propagation is usually in late spring or early summer. After the harshest of the cold is gone, but before the intense heat of midsummer sets in, is when the plant is really eager to grow. You’re looking for new, non-woody growth – think stems that are still a bit flexible and a vibrant green.
Supplies You’ll Need
Here’s what I like to have on hand before I start:
- Sharp, clean pruning shears or a sharp knife: Essential for making clean cuts.
- Rooting hormone (optional, but recommended): A powder or gel that encourages root development.
- A well-draining potting mix: I usually go for a mix of seedling starter mix and perlite, about a 50/50 ratio. This ensures good aeration and prevents waterlogging.
- Small pots or trays: Whatever you have available, just ensure they have drainage holes.
- A plastic bag or propagation dome: To create a humid microclimate.
- A heat mat (optional, but very helpful): This provides gentle warmth from below, which roots absolutely love.
Propagation Methods
There are a couple of ways you can go about multiplying your Verbascum bugulifolium. I find stem cuttings to be the most reliable.
Stem Cuttings:
- Find your parent plant: Head out to your mature Verbascum bugulifolium. Look for healthy, vigorous stems that are about 4-6 inches long.
- Make the cut: Using your sharp shears, make a clean cut just below a leaf node. A leaf node is where a leaf attaches to the stem. This is a prime spot for root formation.
- Prepare the cutting: Gently remove the lower leaves from the cutting, leaving just a few at the very top. This prevents them from rotting once planted. If your cutting is a bit leggy, you can pinch off the very tip of the stem to encourage bushier growth later.
- Apply rooting hormone (optional): Dip the cut end of the stem into your rooting hormone, tapping off any excess.
- Plant your cuttings: Fill your small pots with your prepared potting mix. Make a small hole in the center with a pencil or your finger. Insert the bottom inch or so of your cutting into the hole and gently firm the soil around it.
- Water gently: Water the soil thoroughly but gently, allowing any excess to drain away.
- Create humidity: Place the pots into a clear plastic bag or cover them with a propagation dome. Seal it loosely to allow for some air circulation. If you’re using a heat mat, place the pots directly on top of it.
The “Secret Sauce” (Pro Tips)
Here are a few little tricks I’ve learned over the years that really make a difference:
- Don’t let the leaves touch the water: If you happen to be trying water propagation with young Verbascum stems (though I find cuttings more successful for this one), make sure only the stem is submerged. Any leaves dipping into the water are a fast track to rot.
- Bottom heat is your friend: Seriously, if you can swing a heat mat, do it. It mimics the warmth of spring and encourages those roots to develop much faster and more consistently. I’ve seen cuttings root in half the time with a little gentle warmth from below.
- Patience is key with V. bugulifolium: While they’re often cooperative, don’t despair if you don’t see immediate results. These woolly plants can sometimes take their sweet time to establish a good root system. A little extra patience goes a long way.
Aftercare & Troubleshooting
Once your cuttings have been planted, the main goal is to maintain consistent moisture and humidity. Keep the soil evenly moist, but not soggy. Check the soil moisture by gently poking your finger in; if the top inch feels dry, it’s time to water.
You’ll know your cuttings are establishing roots when you see new leaf growth emerging from the top. You might also feel a slight resistance when you gently tug on the cutting. Once roots have formed and new growth is evident (usually after 4-6 weeks), you can start gradually introducing them to more normal air conditions by opening the plastic bag a little more each day.
The most common issue you might encounter is rot. If your cuttings turn black and mushy, it’s usually a sign of too much moisture and not enough air circulation. Ensure your soil drains well and don’t overwater. If you see a bit of yellowing on the lower leaves, that’s often just the plant shedding older foliage to focus energy on rooting, so don’t panic unless it’s widespread.
A Encouraging Closing
Propagating Verbascum bugulifolium is a joy. It’s a tangible way to connect with the life cycle of these beautiful plants. Be patient, trust the process, and don’t be afraid to experiment. Soon enough, you’ll have a whole host of these lovely silver-leaved beauties to enjoy! Happy propagating!
Resource:
https://identify.plantnet.org/k-world-flora/species/Verbascum%20bugulifolium%20Lam./data