Oh, hello there, my fellow plant enthusiast! Come on in, grab a cuppa. Today, we’re diving into the delightful world of propagating Argemone mexicana, or as some of us affectionately call it, Mexican Prickly Poppy.
A Little Bit About the Mexican Prickly Poppy
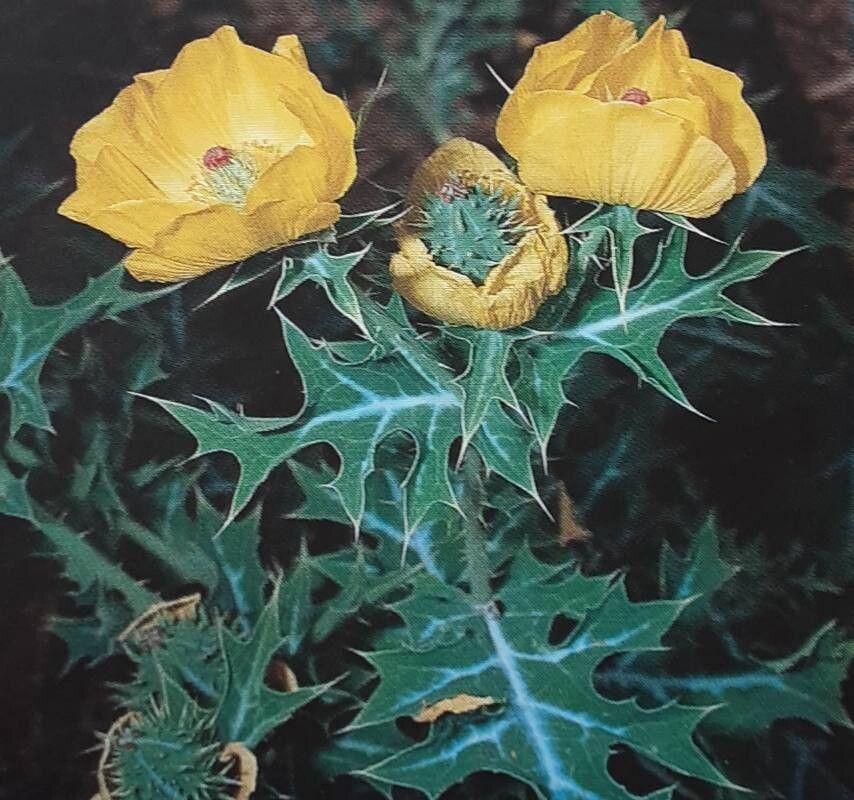
Now, this plant is a bit of a stunner, isn’t it? With its striking, poppy-like flowers in shades of cheerful yellow to creamy white, and those intricately lobed, slightly spiny leaves, it brings a unique architectural flair to any garden. Plus, it’s a real trooper, handling heat and drier conditions like a champ. Propagating it is a truly rewarding experience. You get to witness that little spark of life transform into a whole new plant, and it’s surprisingly forgiving, which makes it a good one to try, even if you’re new to the propagation game.
When the Magic Happens: The Best Time to Start
For the highest success rate with Argemone mexicana, spring is your golden ticket. As the weather warms up after the chill of winter and before the most intense heat of summer sets in, the plant is actively growing. This vigor translates beautifully into successful propagation. Aim for this sweet spot when new growth is readily available.
Gathering Your Arsenal: Supplies You’ll Need
You don’t need a whole workshop for this, just a few essentials:
- Sharp Pruning Shears or a Clean Knife: For taking clean cuts.
- Rooting Hormone (Optional but Recommended): Especially helpful for cuttings.
- Small Pots or Seed Trays: Whatever you have on hand will do.
- Well-Draining Potting Mix: A good blend of potting soil, perlite, and a bit of sand works wonders. You want it airy!
- Watering Can or Spray Bottle: For gentle watering.
- Labels and a Marker: To keep track of your precious projects!
Bringing New Life: Propagation Methods
Argemone mexicana is fairly straightforward to propagate, and the most reliable methods I’ve found are through stem cuttings.
Propagating by Stem Cuttings
This is my go-to method for this plant. It’s efficient and gives you a great chance of success.
- Select Your Cuttings: Look for healthy, non-flowering stems. You want pieces that are about 4-6 inches long.
- Make the Cut: Using your sharp pruning shears or knife, make a clean cut just below a leaf node. A leaf node is where a leaf attaches to the stem; this is where roots are most likely to emerge.
- Prepare the Cutting: Gently remove the lower leaves from the stem, leaving just a couple of sets at the top. This helps the cutting focus its energy on rooting rather than supporting foliage.
- Apply Rooting Hormone (Optional): If you’re using rooting hormone, dip the cut end of the stem into the powder or gel. Tap off any excess.
- Plant Your Cuttings: Fill your small pots with your prepared, well-draining potting mix. Make a small hole in the center with your finger or a pencil.
- Insert and Water: Carefully place the cutting into the hole, ensuring the leaf nodes are below the soil surface. Gently firm the soil around the base of the cutting. Lightly water the soil.
The “Secret Sauce”: My Insider Tips
Having spent years with my hands in the soil, I’ve picked up a few tricks that can make all the difference.
- Don’t Be Afraid of a Little Sap: Argemone mexicana produces a yellow sap when cut. It’s perfectly normal! Let the cut end “heal” or callous over for a few hours in a dry, airy spot before planting. This helps prevent rot.
- Bottom Heat is Your Friend: If you can, place your pots on a heat mat designed for seedlings. This gentle warmth from below encourages root development and significantly speeds up the process.
- Watch the Humidity: Your cuttings will appreciate a bit of humidity, but not so much that they get waterlogged. A mini greenhouse or covering the pots with a clear plastic bag can create a humid microclimate. Just make sure to open it for a bit each day to allow for air circulation and prevent fungal issues.
Nurturing Your New Sprouts: Aftercare & Troubleshooting
Once your cuttings have roots – and you’ll know because you’ll see new leaf growth or feel a gentle tug when you lightly pull on the stem – it’s time for them to truly establish themselves.
- Watering: Continue to water gently, allowing the soil to dry out slightly between waterings. Avoid overwatering, as this is the quickest way to invite rot.
- Light: New plants appreciate bright, indirect light. As they grow stronger, you can gradually introduce them to more direct sunlight, mimicking the conditions they’ll thrive in outdoors.
- Repotting: Once your young plants have a good root system and are showing steady growth, you can pot them up into slightly larger containers.
What if things go wrong? The most common culprit for cutting failure is rot. If your stem turns black and mushy, or if there’s a foul smell, it’s usually a sign of too much moisture and not enough air. Unfortunately, this is often unrecoverable. Don’t despair though! Many gardeners find that even with a few failures, the successes are well worth the effort. Just clean your tools and try again with your next batch of cuttings.
Happy Growing!
Propagating Argemone mexicana is a wonderful way to multiply your garden’s beauty. It’s a process that teaches patience and observation. So go ahead, get your hands dirty, and enjoy the satisfaction of watching your new plants take root and flourish. Happy gardening, my friends!
Resource:
https://identify.plantnet.org/k-world-flora/species/Argemone%20mexicana%20L./data