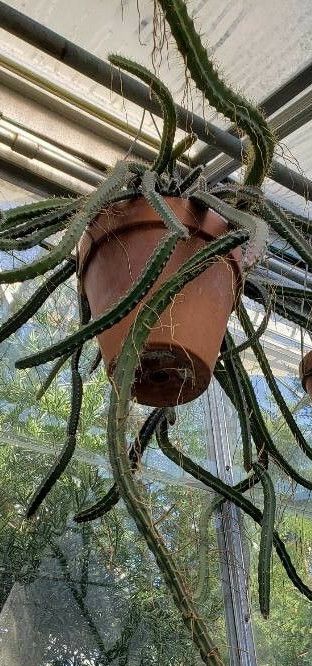
Oh, hello there! Pull up a chair, let me pour you some coffee. Today, we’re diving into the enchanting world of Selenicereus grandiflorus, the Queen of the Night. You know, the one that unfurls its glorious, fragrant blooms under the moonlit sky? It’s truly a magical experience, and the thought of creating more of these beauties from your own plant is just… delightful.
Welcome the Queen of the Night into Your Garden (Again!)
I get so many questions about propagating Selenicereus grandiflorus. It’s a plant that captures the imagination, isn’t it? Its dramatic flowers are a reward in themselves, but being able to share that magic by growing new plants is an even bigger joy. Now, is it easy? Honestly, for a beginner, it presents a moderate challenge. It’s not as fuss-free as, say, a pothos cutting, but with a little patience and these tips, you’ll be well on your way. The satisfaction of watching a tiny cutting transform into a flowering marvel is absolutely worth the effort.
When to Invite New Growth: The Best Time to Start
The absolute best time to think about propagating your Queen of the Night is during its active growing season. For most of us, that means late spring through high summer. This is when the plant is full of vigor and has the energy to push out roots and new growth. Trying to propagate when the plant is dormant (in cooler months) is much less likely to be successful. Look for healthy, mature stems that are firm and show signs of growth – that’s your money plant!
Your Propagation Toolkit: What You’ll Need
Don’t worry, it’s not an overwhelming list. We’ll keep it simple:
- Sharp Pruning Shears or a Clean Knife: For making clean cuts. Dull tools can damage the stem.
- Well-Draining Potting Mix: This is crucial for cacti and succulents. A mix specifically for cacti and succulents is ideal. You can also amend regular potting soil with perlite or coarse sand – aim for about a 50/50 blend.
- Small Pots or Seedling Trays: Clean pots are a must to prevent disease.
- Rooting Hormone (Optional but Recommended): This isn’t strictly necessary, but it can give your cuttings a significant boost in rooting.
- Trowel or Spoon: For gently filling pots with soil.
- Watering Can or Spray Bottle: For gentle watering.
- A Bright, Indirect Light Location: Not intense, direct sun.
Bringing New Life: Propagation Methods
Selenicereus grandiflorus is most commonly propagated by stem cuttings. It’s straightforward, and with the right approach, you’ll see results.
Stem Cuttings:
- Select Your Stem: Choose a healthy, mature stem from your mother plant. Look for a segment that’s at least 6-8 inches long. A stem that’s already started to woody at the base is often a good candidate.
- Make the Cut: Using your clean, sharp pruners or knife, make a clean cut at the base of your chosen stem.
- Let it Callus: This is a critical step! Leave the cut end of the stem exposed to the air for 2-7 days, depending on humidity. You want a dry, callus-like layer to form over the cut. This prevents rot when you plant it. It will look and feel dry and sealed.
- Apply Rooting Hormone (Optional): Once callused, you can dip the cut end into rooting hormone powder or gel. Tap off any excess.
- Planting: Fill your small pots with your well-draining mix. Make a small hole in the center of the soil with your finger or a pencil.
- Insert the Cutting: Gently insert the callused end of the stem cutting into the hole. Push it down about 1-2 inches.
- Firm the Soil: Firm the soil gently around the cutting to ensure good contact.
- Water Sparingly: Water the soil very lightly. You don’t want it soggy. A light misting can also be good.
- Find a Spot: Place the pot in a spot that receives bright, indirect light. Avoid direct sunlight, which can scorch the young cutting. A warm location is best.
Water Propagation (Less Common, but Possible):
While stem cuttings are usually planted directly, some people have success with water propagation.
- Follow steps 1-3 above for selecting and cutting your stem.
- Place in Water: Place the callused cutting in a clean jar or vase with about an inch or two of clean water.
- Ensure Proper Contact: Make sure only the callused end is submerged and that no leaves are touching the water. Leaves in water will rot.
- Location: Place the jar in bright, indirect light.
- Change Water: Change the water every few days to keep it fresh.
- Monitor: You should start to see roots forming within a few weeks. Once the roots are about an inch long, you can then pot them up into your well-draining soil mix following the planting instructions for stem cuttings.
The “Secret Sauce”: My Tried-and-True Pro Tips
Over the years, I’ve learned a few tricks that really make a difference:
- Bottom Heat is Your Friend: Trust me on this one. Placing your pots on a seedling heat mat can dramatically speed up root formation. These plants love warmth when they’re trying to establish. It’s like a cozy blanket for their roots!
- Don’t Overwater! I Cannot Stress This Enough. Rot is the number one enemy of cactus cuttings. Wait until the soil is dry to the touch before watering again. When you do water, water thoroughly but ensure it drains freely.
- Patience is a Virtue (Especially with Queens): Some cuttings will root in a few weeks, others might take a couple of months. Don’t give up too soon! Gently tugging on a cutting (very gently!) can sometimes give you a sense of resistance, indicating roots have formed.
Nurturing the New Arrivals: Aftercare & Troubleshooting
Once you see signs of new growth – tiny leaves or a noticeable increase in firmness – you know roots are developing!
- Continue Bright, Indirect Light: Keep them in that same gentle light.
- Watering: Once roots are established, you can start watering a bit more regularly, but always let the soil dry out between waterings. If you’re unsure, err on the side of too dry.
- Avoid Stress: Don’t repot immediately once they’ve rooted. Let them settle in.
What if they go wrong?
The most common issue is rot. If your cutting starts to turn mushy, black, or smells off, it’s likely rotted. This is usually due to too much moisture. If you catch it early, you can try cutting off the rotted section, letting the healthy part callus again, and replanting. Sometimes, your cutting just doesn’t take. That’s part of gardening! Don’t be discouraged.
Go Forth and Grow!
So there you have it! Propagating Selenicereus grandiflorus is a journey, and like all good journeys, it requires a bit of planning and a lot of patience. Embrace the process, enjoy the quiet moments tending to your new little plants, and before you know it, you’ll have your very own Queen of the Night blooming under the stars. Happy gardening!
Resource: