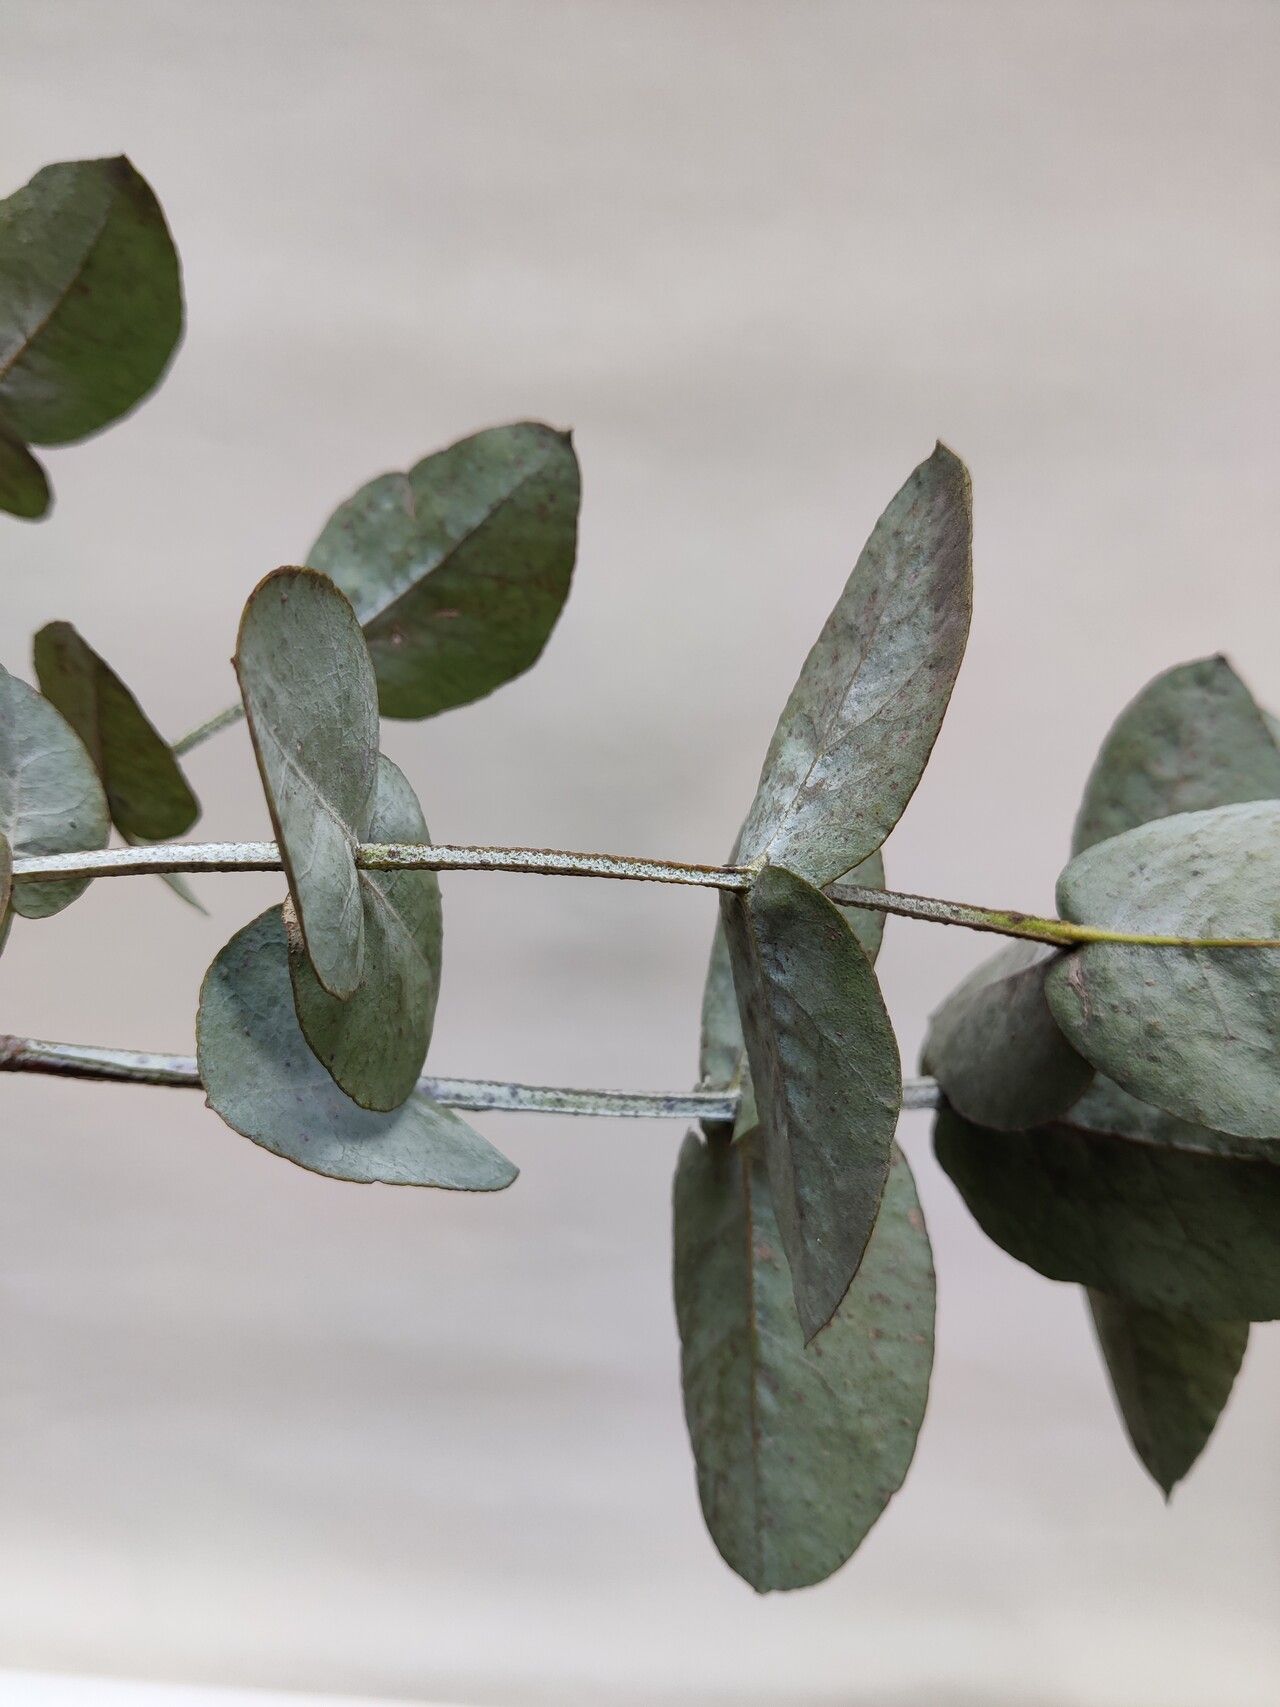
Oh, Eucalyptus cordata! That lovely heart-leafed fellow. I always have a soft spot for anything with such distinctive foliage, and cordata does not disappoint. Those rounded, silvery-blue leaves are just gorgeous, aren’t they? And the way they mature into a more lance-shaped leaf adds to its charm. Propagating it yourself? That’s a truly rewarding endeavor. You get to nurture new life from a specimen you admire, and frankly, grow your eucalyptus collection without breaking the bank! Now, as for beginners, I’d say Eucalyptus cordata falls into the slightly more challenging, but absolutely doable category. It’s not as plug-and-play as some of the hardier species, but with a little attention, you’ll be golden.
The Best Time to Start
When I’m aiming for the highest success rate with my eucalyptus cuttings, I always lean towards late spring and early summer. This is when the plant is actively growing, pushing out new, soft shoots. These are the easiest to root. You want to look for semi-hardwood cuttings – they’re not as floppy as brand new growth, but not as woody as established stems. Think of them as being in that perfect “bendable but not brittle” stage.
Supplies You’ll Need
Here’s what I usually gather before I get started:
- Sharp, clean pruning shears or a sharp knife: Sterilize them with rubbing alcohol between cuts! This is crucial.
- Rooting hormone: A powder or gel works wonders. It really encourages those roots to form.
- Well-draining potting mix: I prefer a mix of equal parts perlite, coarse sand, and peat moss or coco coir. Eucalyptus hates soggy feet.
- Small pots or trays with drainage holes: Whatever you have that lets excess water escape.
- Plastic bags or a clear plastic propagator lid: To create a humid environment for the cuttings.
- Enthusiasm and a touch of patience!
Propagation Methods
For Eucalyptus cordata, stem cuttings are generally my go-to method, and it’s quite effective. Water propagation can work, but I find it trickier to get those delicate roots to transition to soil without a shock. Division isn’t really applicable for this particular eucalyptus.
Stem Cuttings:
- Select your source: Find a healthy, vigorous Eucalyptus cordata plant. Look for those semi-hardwood stems I mentioned. Aim for cuttings that are about 4-6 inches long.
- Take the cutting: Using your sterilized shears, make a clean cut just below a leaf node (where a leaf attaches to the stem). This is where the magic of root formation happens. Remove any flower buds if present.
- Prepare the cutting: Gently strip off the lower leaves from the bottom 2-3 inches of the stem. If the remaining leaves are very large, you can even cut them in half crosswise. This reduces water loss through transpiration.
- Apply rooting hormone: Dip the cut end of the stem into your rooting hormone, tapping off any excess.
- Plant the cutting: Fill your pots or trays with your well-draining mix. Make a small hole with a pencil or your finger, and insert the cutting so that the lowest leaf nodes are nestled in the soil. Gently firm the soil around the base.
- Create humidity: Water the soil lightly. Then, cover the pot with a clear plastic bag, securing it around the rim with a rubber band, or place the pots inside a propagator with a lid. This creates a mini-greenhouse effect.
- Provide light and warmth: Place your cuttings in a bright spot, but out of direct, harsh sunlight. A bit of gentle bottom heat (using a propagation mat) can significantly speed up rooting, but it’s not strictly essential. Keep the soil consistently moist but not waterlogged.
The “Secret Sauce” (Pro Tips)
Here are a few things I’ve learned over the years that often make a big difference:
- Don’t let those remaining leaves touch the water in the propagator: If you’re using a bag, try to prop it up a bit so the leaves don’t sit in any condensation. Wet leaves can lead to fungal issues and rot.
- Gentle bottom heat is your best friend: While not a dealbreaker, providing warmth from below really stimulates root development. If you can get your hands on a propagation mat, it’s worth it for trickier cuttings like eucalyptus.
- Mist sparingly, don’t soak: You want humidity, but you don’t want the cutting itself to be constantly drenched. A light misting every few days if the humidity seems to be dropping is usually enough.
Aftercare & Troubleshooting
Once your cuttings have been in their humid environment for about 4-6 weeks (or sometimes longer – patience is key!), you can gently tug on them. If you feel resistance, that’s a good sign roots have formed. You can also look for tiny roots peeking out of the drainage holes. At this point, gradually acclimate your new plants to normal humidity by opening the propagator lid or the plastic bag a little more each day over a week. Continue to keep the soil lightly moist.
The most common issue you’ll face is rot. If a cutting turns black and mushy, it’s usually a sign of too much moisture and not enough air circulation. Don’t be discouraged if a few don’t make it; it’s part of the learning process! Discard any rotting cuttings immediately to prevent spreading the problem.
A Encouraging Closing
Propagating Eucalyptus cordata might take a little extra care, but the satisfaction of seeing those tiny roots unfurl and knowing you nurtured them yourself is immense. Be patient with your little green charges, observe them closely, and celebrate each success, no matter how small. Happy propagating!
Resource:
https://identify.plantnet.org/k-world-flora/species/Eucalyptus%20cordata%20Labill./data