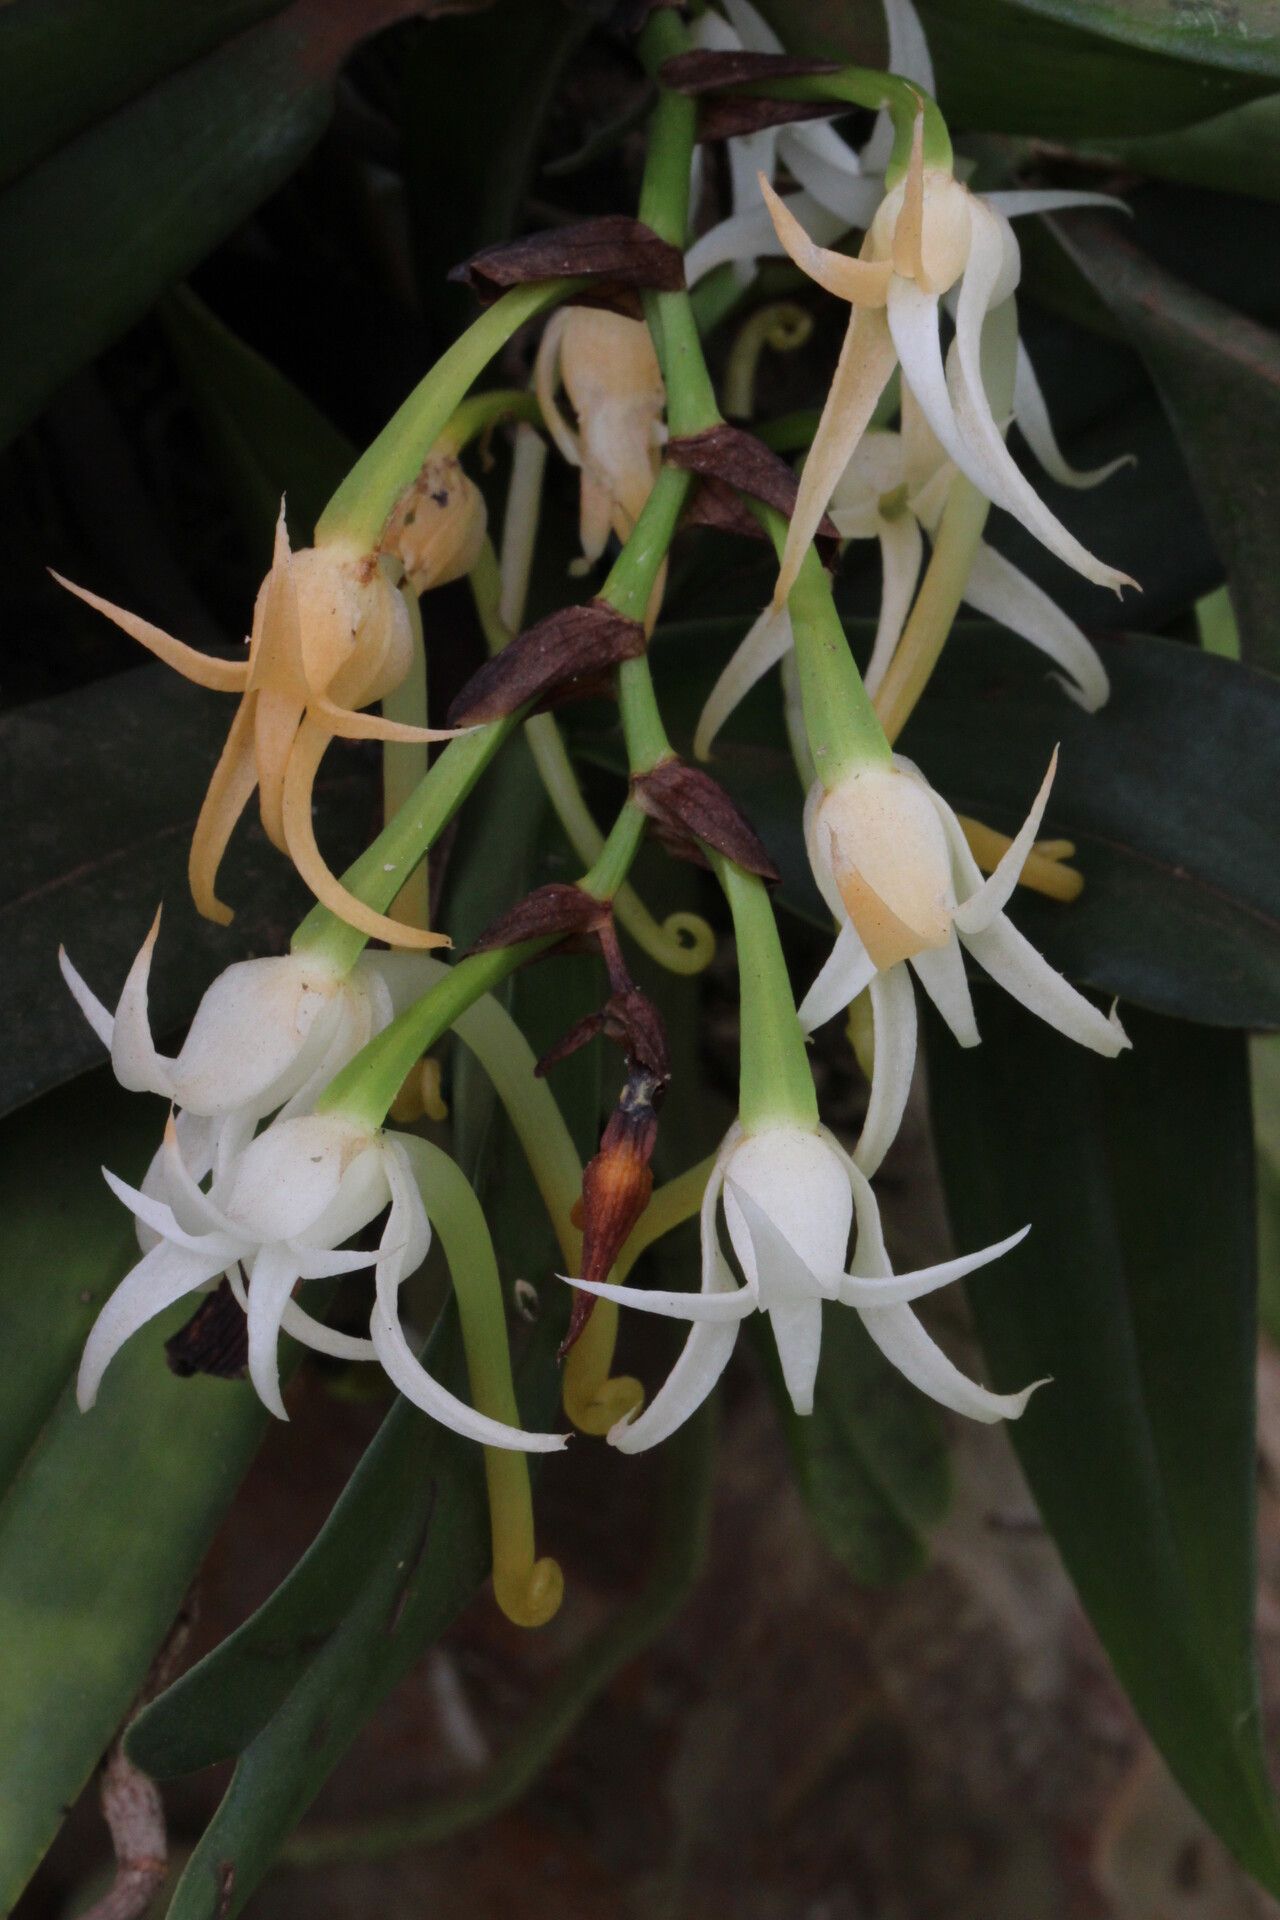
Hello fellow plant lovers! Today, we’re diving into the wonderful world of propagating Cyrtorchis hamata. If you haven’t met this beauty yet, imagine delicate, star-shaped white flowers that often carry a lovely fragrance, especially at night. They have a wonderfully graceful, cascading growth habit. Propagating them yourself is an incredibly rewarding experience. You get more of these beauties, and there’s a special kind of magic in nurturing a tiny cutting into a flourishing plant. While Cyrtorchis hamata isn’t the absolute easiest orchid to propagate for a complete beginner, it’s definitely achievable with a little care and the right approach.
The Best Time to Start
For Cyrtorchis hamata, the sweet spot for propagation is during its active growing season. This typically falls in the spring and early summer. You’ll see new root growth and leaf development, which are signs the plant has the energy to dedicate to developing new roots on cuttings. Starting when the plant is robust and ready to grow will give your cuttings the best chance of success.
Supplies You’ll Need
To get our propagation party started, gather these essentials:
- Sharp, sterile pruning shears or a clean knife: For making precise cuts. Sterilize them with rubbing alcohol between cuts to prevent disease.
- Potting medium: A well-draining orchid mix is best. You can create your own by blending orchid bark, perlite, and sphagnum moss.
- Small pots or seedling trays: With good drainage is key.
- Rooting hormone (optional but recommended): A powdered or liquid rooting hormone can give your cuttings a little boost.
- Clear plastic bags or a propagation dome: To create a humid environment.
- Trowel or small scoop: For handling your potting mix.
- Watering can with a fine rose: For gentle watering.
Propagation Methods
The most common and successful way to propagate Cyrtorchis hamata is by stem cuttings (keikis). Often, these orchids will naturally produce little baby plants, called keikis, at the nodes or base of the mature plant.
Here’s how to work with them:
- Identify a healthy keiki: Look for a keiki that has at least two or three leaves and developing roots. The roots are the most crucial part here. If it doesn’t have any roots yet, it’s best to wait.
- Prepare your tools: Make sure your shears or knife are clean and sterile.
- Make the cut: Carefully cut the keiki away from the mother plant. Try to get a small piece of the mother plant’s stem attached to the keiki, along with its roots. If the keiki is directly attached to a node without much stem, just cut as close to the mother plant as possible, ensuring you get those roots.
- Apply fungicide (optional): Some growers like to dip the cut end in a light rooting hormone or a fungicide powder to help prevent rot, especially if the keiki looks a bit tender.
- Pot it up: Gently plant the keiki in its prepared pot with the orchid mix. Ensure the roots are covered and the base of the keiki is firmly anchored but not buried too deep. The leaves should be above the medium.
- Create humidity: Water the mix gently. Then, cover the pot with a clear plastic bag or place it under a propagation dome. This is essential to keep the humidity high while the keiki establishes itself. Open the bag for a few minutes each day for air circulation.
The “Secret Sauce” (Pro Tips)
Here are a few tricks I’ve picked up over the years that really seem to make a difference:
- Don’t let the leaves touch the water (if using water propagation): While I primarily recommend potting mix for Cyrtorchis hamata, if you were to try a water method for a very rooty keiki, ensure the leaves never sit in the water. This is a fast track to rot.
- Bottom heat is your friend: I find that placing the potted keikis on a heated propagation mat set to a gentle warmth (around 70-75°F or 21-24°C) significantly speeds up root development and overall success. It mimics the warmth of the tropics.
- Patience with the stem: If your keiki doesn’t have roots yet, don’t rush it. Sometimes the stem itself needs time to develop aerial roots before you even attempt to detach it. Let nature take its course, and only detach when you see those little brown nubs forming.
Aftercare & Troubleshooting
Once your keiki is potted and situated in its humid environment, water it when the potting mix is starting to approach dryness, but don’t let it go completely bone dry. Overwatering is the enemy.
Watch for signs of success: you’ll start to see new leaf growth or the roots will actively extend further into the pot. This can take several weeks, or even a few months.
Common issues to look out for include:
- Rot: If the leaves or stem turn mushy and black, it’s likely rot. This usually happens from too much moisture and poor air circulation. If you see early signs, you can try carefully trimming away the rotted parts with sterile tools and repotting in fresh, dry mix, increasing air circulation.
- Wilting: If the leaves start to droop and look limp, it could be a sign of dehydration or that the cutting simply hasn’t established roots yet and is using up its stored energy. Ensure the humidity is high and check for any signs of rot.
Keep Growing!
Propagating Cyrtorchis hamata is a journey, not a race. Be patient, observe your cuttings closely, and celebrate every little sign of progress. Soon enough, you’ll have new plants to admire, gift, or simply enjoy. Happy growing!
Resource:
https://identify.plantnet.org/k-world-flora/species/Cyrtorchis%20hamata%20(Rolfe)%20Schltr./data