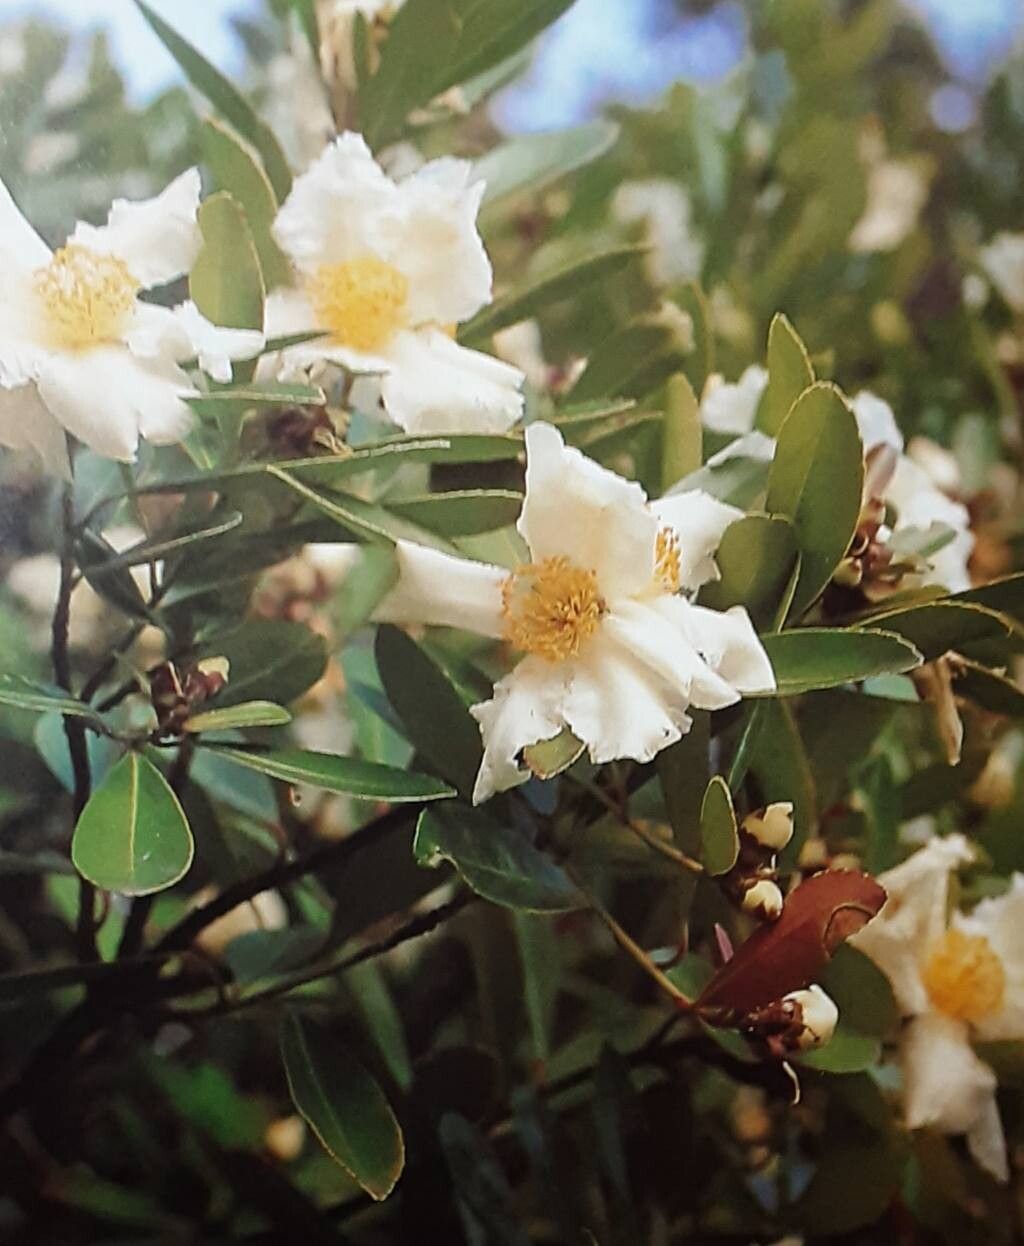
Ah, the Polyspora axillaris. What a glorious plant! If you’ve ever seen one in full bloom, those delicate, showy flowers cascading down its branches, you know it’s a sight to behold. It’s also known as the Pincushion Flower, and for good reason – those blossoms really do look like tiny, colorful cushions sprinkled across the bush. I’ve been growing these beauties for years, and I can tell you, bringing a new one into the world from a cutting is a deeply satisfying experience. It’s not the easiest plant to propagate, I’ll be honest, but with a little care and patience, it’s absolutely achievable, even for those of you who are just starting to get your hands dirty.
The Best Time to Start
For the highest success rate with Polyspora axillaris, aim for late spring to early summer. This is when the plant is actively growing and has plenty of vigor. You want to take cuttings from new, softwood growth that is just starting to mature a bit – think of it as being semi-hardwood. It should be pliable but not so soft that it wilts instantly. Avoid taking cuttings from old, woody stems or from brand new, floppy growth.
Supplies You’ll Need
Gathering your supplies beforehand makes the whole process smoother. Here’s a list of what I find essential:
- Sharp, sterile pruning shears or a craft knife: Cleanliness is key to preventing disease.
- Rooting hormone (optional but recommended): A powder or liquid to give your cuttings a boost.
- A well-draining potting mix: I like a blend of equal parts peat moss or coco coir and perlite or coarse sand. This ensures good aeration and prevents waterlogging.
- Small pots or seed trays: Clean and with drainage holes.
- A clear plastic bag or propagation dome: To create a humid environment.
- Water: For misting and occasional watering.
- Plant labels: To keep track of what you’ve planted and when.
Propagation Methods
Let’s get down to the nitty-gritty. For Polyspora axillaris, stem cuttings are generally the most reliable method.
Stem Cuttings
- Select your parent plant: Choose a healthy, vigorous Polyspora axillaris in its active growth phase.
- Take your cuttings: Using your sterile shears, cut stems that are about 4-6 inches long. Make your cut just below a leaf node (where a leaf attaches to the stem). Ideally, these will be semi-hardwood cuttings.
- Prepare the cuttings: Gently remove the lower leaves from the bottom inch or two of the stem. If the cutting has very large leaves, you can cut them in half horizontally to reduce water loss. Leave 2-3 leaves at the top.
- Apply rooting hormone (if using): Dip the cut end of the stem into your rooting hormone, tapping off any excess.
- Pot up your cuttings: Fill your clean pots with your prepared potting mix. Make a hole in the center with your finger or a pencil. Insert the cutting into the hole, ensuring the leaf nodes are below the soil surface. Gently firm the soil around the stem.
- Water gently: Water the soil thoroughly but carefully, so you don’t dislodge the cuttings.
- Create humidity: Cover the pots with a clear plastic bag, securing it with a rubber band or placing them under a propagation dome. This traps moisture and keeps the cuttings from drying out. Place the pots in a bright spot, but out of direct sunlight.
The “Secret Sauce” (Pro Tips)
Here are a few things I’ve learned over the years that can make a big difference:
- The “Wiggle Test” for readiness: Don’t disturb your cuttings too much, but when you think they might be rooted (after several weeks), gently tug on a cutting. If you feel resistance, it’s a good sign roots are forming.
- Bottom heat is your friend: If you have a heated propagation mat, placing your pots on it can significantly speed up root development. The gentle warmth encourages root growth from below.
- Don’t let those leaves touch the water (if you’re dabbling in water propagation): While some plants are happy in water, Polyspora axillaris can be prone to rot if its leaves sit in the water. If you do try water propagation, ensure only the stem is submerged. I still lean towards soil, though!
Aftercare & Troubleshooting
Once your cuttings have developed a good root system (you’ll see roots poking out of the drainage holes or feel that resistance from the wiggle test), it’s time to treat them like young plants.
- Gradually acclimate them: Before removing the plastic bag completely, start by opening it for a few hours each day. This helps the new plant adjust to lower humidity.
- Water carefully: Keep the soil consistently moist but not waterlogged. It’s better to underwater slightly than to overwater, especially in the early stages.
- Continue in bright, indirect light: Avoid direct sun, which can scorch tender new growth.
- Watch for rot: The most common problem is root rot, which often shows as mushy, black stems at the soil line, or yellowing and dropping leaves. This is usually a sign of overwatering and poor drainage. If you see this, you may need to start again with fresh cuttings and ensure your soil mix is airy.
- Patience is paramount: Rooting can take anywhere from 6 weeks to several months. Don’t give up too soon!
A Encouraging Closing
Growing plants from cuttings is a bit like magic, isn’t it? It’s a journey of observation, gentle care, and a whole lot of faith in nature’s processes. Be patient with your Polyspora axillaris cuttings. Celebrate each tiny sign of progress, and learn from any setbacks. Before you know it, you’ll have new bushes to share or to fill your own garden with that wonderful floral display. Happy propagating!
Resource: