Oh, hello there! Come on in, grab a mug of something warm. Today, we’re going to talk about one of my absolute favorite late-summer bloomers: Eutrochium fistulosum, or as many of us gardeners affectionately call it, Hollow Joe-Pye Weed.
Why You’ll Love Growing More Hollow Joe-Pye Weed
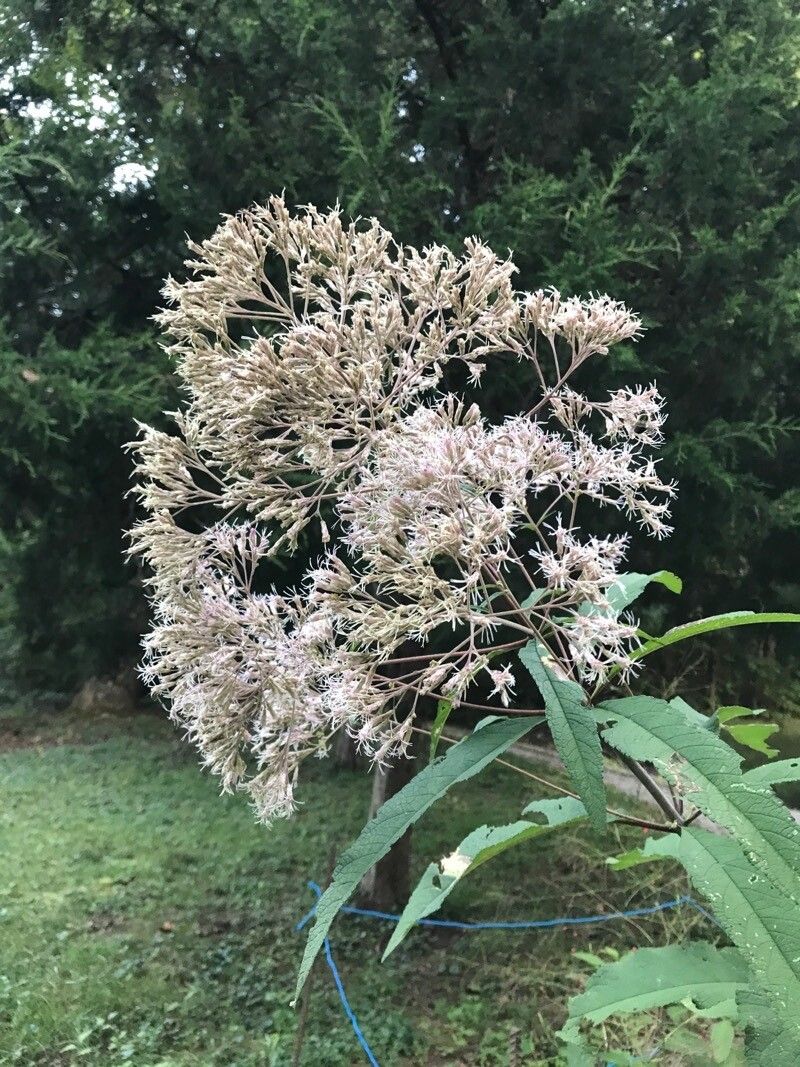
This magnificent plant is a true showstopper. Its tall, stately stems topped with fluffy, fragrant clusters of pinkish-purple flowers are just irresistible to bees, butterflies, and all sorts of beneficial insects. It brings a wonderful sense of the wild to even the most manicured garden. Plus, its hollow stems are a neat design feature. Propagating it is not only incredibly rewarding – creating more of this beauty for free! – but I’d say it’s a pretty forgiving plant, even for those of you just starting your propagation journey.
When to Get Your Hands Dirty
For Eutrochium fistulosum, the early to mid-summer is truly your golden window. We’re talking June and July, when the plant is actively growing but before it starts thinking about putting all its energy into those gorgeous blooms. Taking stem cuttings at this stage means you’re working with young, vigorous material that’s primed to root.
Your Propagation Toolkit
Here’s what you’ll want to have ready:
- Sharp Pruning Shears or a Knife: Clean cuts are crucial!
- Rooting Hormone (Optional but Recommended): A little dip here can really speed things up.
- Well-Draining Potting Mix: I like a blend of peat moss, perlite, and a bit of compost. Just something that won’t get waterlogged.
- Small Pots or Containers: 4-inch pots are usually perfect.
- Plastic Bags or Humidity Domes: To keep things nice and humid.
- Spray Bottle: For a gentle mist of water.
Let’s Get Propagating: Stem Cuttings!
This is my go-to method for Hollow Joe-Pye Weed. It’s efficient and gives you plenty of new plants.
- Select Your Stems: Head out to your healthy, established plant in early to mid-summer. Look for young, non-flowering stems. You want them to be about 4-6 inches long.
- Make the Cut: Using your clean shears, make a clean cut just below a leaf node. A leaf node is where a leaf attaches to the stem. This is where those magical rooting hormones are concentrated.
- Prepare Your Cuttings: Gently remove the lower leaves from your cutting, leaving just 2-3 leaves at the top. If those top leaves are quite large, you can even cut them in half horizontally to reduce water loss.
- Dip in Hormone (If Using): If you’re using rooting hormone, dip the cut end of the stem into the powder. Tap off any excess.
- Pot Them Up: Fill your small pots with your prepared potting mix. Make a small hole in the center of the soil with your finger or a pencil.
- Insert the Cuttings: Place the prepared cutting into the hole, making sure the leaf nodes are buried in the soil. Gently firm the soil around the stem.
- Water Gently: Give the pots a good, gentle watering. You want the soil to be moist, but not soggy.
- Create a Humid Environment: This is key! Place a clear plastic bag over the pot, securing it loosely around the rim, or use a humidity dome. This creates a mini-greenhouse effect.
- Find a Cozy Spot: Place your pots in a spot that receives bright, indirect light. Avoid direct sun, which can scorch the delicate cuttings.
My “Secret Sauce” Tips for Extra Success
As you get into the rhythm of things, you’ll discover your own little tricks, but here are a couple of things I always do:
- Don’t Let Those Leaves Touch the Water! If you happen to be trying water propagation (which I sometimes do for Joe-Pye, though stem cuttings are usually more reliable), make sure none of the leaves are submerged. Submerged foliage will just rot and stunt root development. Always trim them off if they’re likely to dip.
- Bottom Heat is Your Friend: If you have a seedling heat mat, pop your pots on that. Just a little gentle warmth from below can significantly encourage root formation. It mimics what happens deeper in the soil during the growing season.
Aftercare and When Things Go Wrong
Once your cuttings have developed a healthy root system – you’ll know when you can gently tug on a cutting and feel resistance, or when you see new leaf growth – it’s time to transplant them into slightly larger pots. Continue to keep them well-watered and in bright, indirect light.
Now, what if things don’t look so great? The most common culprit is rot. If you see stems turning mushy and black, it’s usually a sign of overwatering and poor drainage. Make sure your soil is indeed draining well and that you’re not keeping things too consistently sodden. Sometimes, the cutting just wasn’t viable, and that’s okay! Don’t let it discourage you.
Happy Propagating!
There you have it! Propagating Eutrochium fistulosum is a wonderfully satisfying endeavor. Be patient with your little cuttings. Some will root faster than others. Enjoy the process, and soon you’ll have a collection of these majestic beauties to share with friends or plant throughout your own garden. Happy gardening!
Resource: