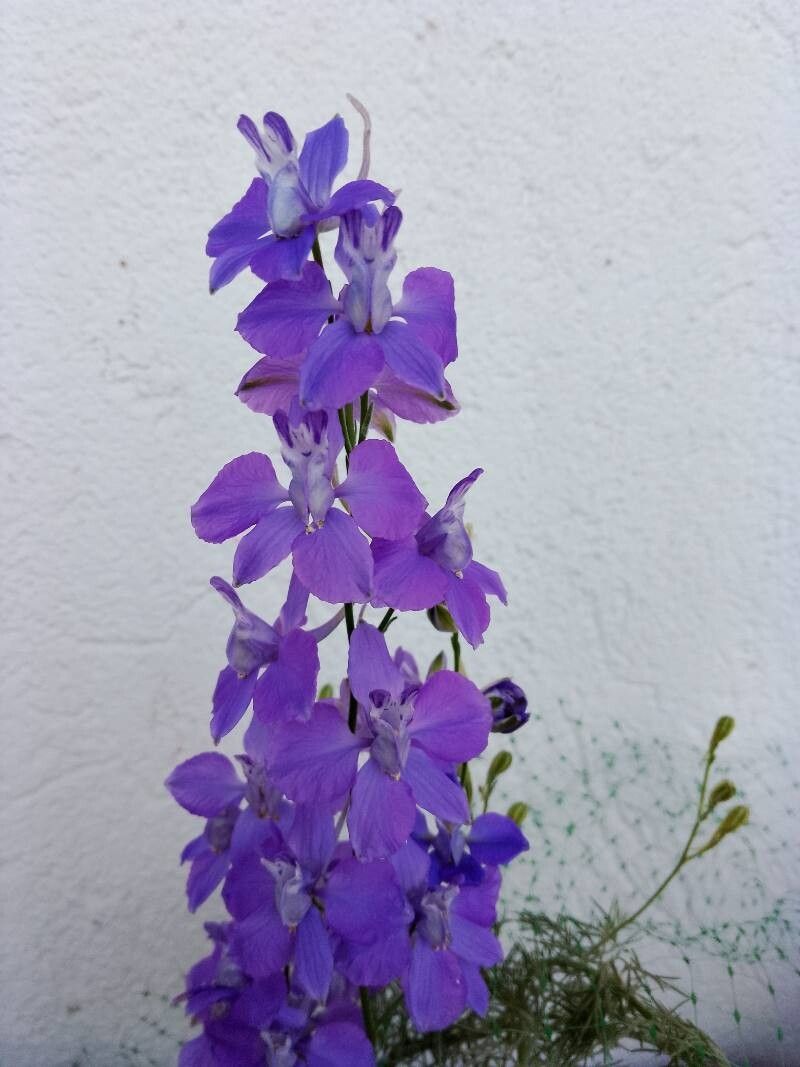
Oh, Delphinium halteratum! If you’ve ever seen these beauties gracing a garden, you know their allure. Those tall spires of vibrant color are just a showstopper, aren’t they? And the joy of creating more of them yourself? Pure garden magic! Now, I won’t lie to you – Delphinium halteratum can be a tad finicky, especially when it comes to propagation. It’s not always the most straightforward for absolute beginners, but with a little patience and the right approach, you can absolutely do it. It’s definitely a rewarding challenge!
The Best Time to Start
When thinking about propagating Delphinium halteratum, timing is everything. I’ve found the sweet spot is late spring or early summer. This is when the plant is actively growing after its initial spring burst, and you can often find nice, healthy young shoots that haven’t yet flowered. Starting them too early, when things are still waking up, can be slow. Too late in the season, and they might not have enough time to establish before the cooler weather sets in.
Supplies You’ll Need
Before we get our hands dirty, let’s gather our tools:
- Sharp, clean pruning shears or a sharp knife: For taking clean cuts.
- Rooting hormone (optional but highly recommended): Especially for Delphiniums. Look for one with a fungicide.
- Small pots or seed trays: Clean ones are a must!
- A good quality potting mix: I like a blend that’s well-draining. A mix of peat moss, perlite, and compost works wonderfully. For Delphiniums, I often use a mix that’s a bit lighter, leaning more towards perlite and coco coir.
- A watering can with a fine rose: To water gently without disturbing your cuttings.
- A clear plastic bag or propagator lid: To create a humid environment.
- Perlite or grit: For improved drainage in the bottom of pots.
- Optional: Bottom heat mat: This can make a big difference!
Propagation Methods
For Delphinium halteratum, I primarily rely on two methods: stem cuttings and division.
Stem Cuttings: Capturing New Growth
This is where you’ll have the most fun!
- Take Your Cuttings: In late spring or early summer, look for healthy, non-flowering shoots that are about 4-6 inches long. Use your clean shears to make a cut just below a leaf node. A leaf node is where a leaf attaches to the stem. This is where the magic happens for root formation.
- Prepare the Cuttings: Gently remove the lower leaves from your cuttings, leaving just a few at the top. If your cuttings are very large, you can even snip off half of the remaining leaves to reduce water loss.
- Apply Rooting Hormone: Dip the cut end of each stem into your rooting hormone powder. Tap off any excess. This step truly boosts your success rate with these often-stubborn plants.
- Potting Up: Fill your clean pots or trays with your well-draining potting mix. Make a small hole in the center of the mix with your finger or a pencil.
- Plant the Cuttings: Insert the prepared cuttings into the holes, making sure the reserved leaves are not buried. Press the soil gently around the stems to secure them.
- Water and Cover: Water the pots gently. Then, place them in a clear plastic bag or cover them with a propagator lid to maintain high humidity. Ensure the leaves don’t touch the plastic.
Division: Spreading Established Clumps
If you have an established Delphinium, division is a fantastic way to get more plants and also rejuvenate your existing one.
- Timing is Key: The best time for division is typically in early spring as new growth is just emerging, or in early autumn after flowering has finished.
- Excavate Carefully: Gently dig up the entire clump. I find it easiest to work with the soil still clinging to the roots.
- Separate the Roots: You can do this by hand, gently teasing the root ball apart. For tougher clumps, you might need a sharp spade or even a soil knife to cut through. Aim to create sections that have both lots of healthy roots and a few strong shoots or eyes.
- Replant Immediately: Get your divided sections replanted into well-prepared soil as soon as possible. Space them out appropriately, giving them room to grow. Water them in well.
The “Secret Sauce” (Pro Tips)
Here are a few things I’ve learned over the years that really make a difference:
- Bottom Heat is Your Best Friend: For stem cuttings, placing your pots on a gentle bottom heat mat will significantly speed up root formation. They love that warmth from below!
- Don’t Drown Your Cuttings: While humidity is key, ensure your pots have excellent drainage. Waterlogged soil is the fastest way to a rot disaster. If you’re using a propagator, I like to open it up for a few minutes each day to allow for some air circulation.
- Patience is a Virtue (and a Gardener’s Superpower): Delphinium halteratum roots can take their sweet time. Don’t be discouraged if you don’t see progress immediately. Keep them in that humid, bright spot, and roots will develop.
Aftercare & Troubleshooting
Once you see roots emerging from the drainage holes or notice new growth on your cuttings, it’s time for a little more fuss.
- Transition Slowly: Gradually expose your new plants to less humid conditions by opening the propagator lid or plastic bag a little more each day over a week.
- Water Wisely: Continue to keep the soil consistently moist but not soggy. Water from the bottom if possible, allowing the plant to soak up what it needs.
- Feed Gently: Once you’ve transplanted them into their own small pots, you can begin with a diluted liquid feed once every few weeks.
Now, let’s talk about what can go wrong. The most common culprit is rot. If your cuttings turn black and mushy, or if the leaves wilt and droop despite adequate watering (which is usually a sign of root rot), it’s a tough situation. This usually stems from too much moisture and not enough air circulation. If you’re dividing, a weak or dying clump often indicates issues with the original plant or poor division technique, where sections might have been damaged. Don’t be afraid to compost those failed attempts and learn from them!
So there you have it! Propagating Delphinium halteratum might take a bit of practice, but the reward of seeing those stunning blooms multiplied in your own garden is absolutely worth it. Be patient with yourself and your plants, and most importantly, enjoy the journey. Happy gardening!
Resource:
https://identify.plantnet.org/k-world-flora/species/Delphinium%20halteratum%20Sm./data