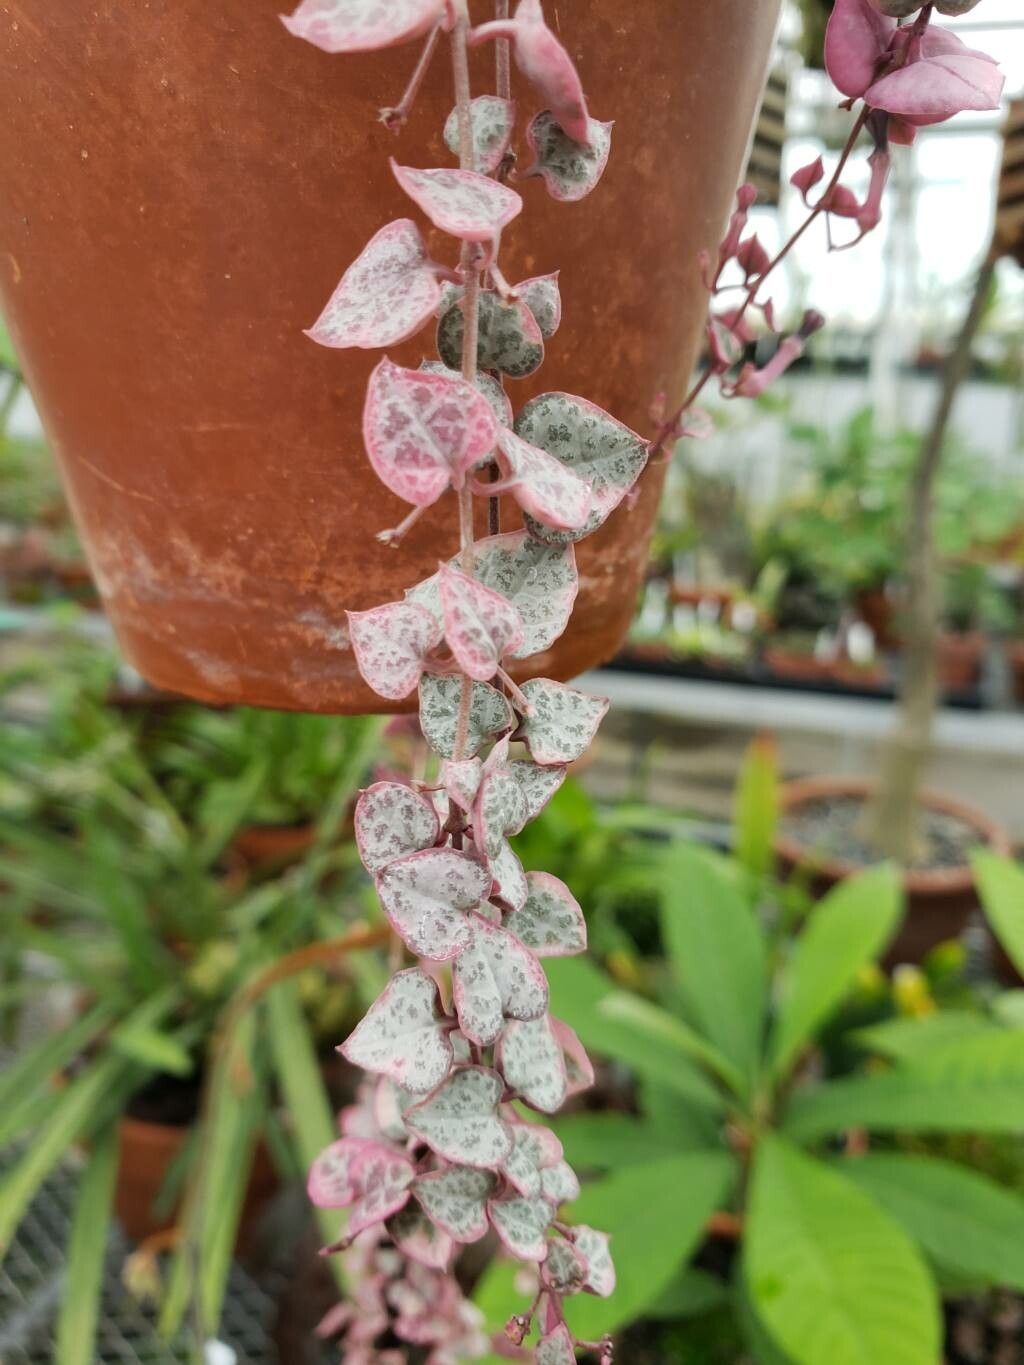
Hello, fellow plant lovers! Today, we’re diving into the wonderful world of Ceropegia woodii, often called String of Hearts. This trailing beauty, with its charming heart-shaped leaves strung along delicate vines, is a real showstopper. And the best part? It’s surprisingly easy to multiply! Sharing these beauties with friends or simply filling your home with more of them is incredibly rewarding. If you’re new to plant propagation, this is a fantastic place to start. You’ll likely find it quite forgiving.
The Best Time to Start
Honestly, Ceropegia woodii is pretty adaptable. However, you’ll see the quickest results if you propagate during its active growing season, which is generally spring and summer. This is when the plant has the most energy to put into developing new roots. You can propagate year-round, but patience might be your best friend during the cooler, darker months.
Supplies You’ll Need
Here’s what you’ll want to have on hand for our propagation adventure:
- Sharp, clean pruning shears or scissors: A clean cut is crucial to prevent disease.
- Well-draining potting mix: I like a blend of cactus/succulent mix with added perlite or pumice for extra drainage.
- Small pots or propagation trays: Terracotta pots are great because they allow the soil to dry out.
- Rooting hormone (optional but helpful): This can give your cuttings a nice boost.
- Watering can or spray bottle: For gentle watering.
- Clear plastic bag or humidity dome (optional): To create a mini-greenhouse environment.
Propagation Methods
Let’s get our hands dirty! There are a couple of excellent ways to make more String of Hearts.
Stem Cuttings
This is by far the most common and effective method.
- Select a healthy vine: Look for a vine that is at least a few inches long and has several leaves on it.
- Make a clean cut: Using your sharp shears, cut the vine just below a node. A node is where a leaf attaches to the stem. This is where the magic will happen and roots will emerge. Aim for cuttings that are at least 2-3 inches long.
- Remove lower leaves (if any): Gently strip off any leaves that are very close to your cutting point. This will expose the nodes for better rooting and prevent leaves from sitting in the soil and rotting.
- Let them callous (optional but recommended): Place your cuttings on a dry surface, away from direct sunlight, for a day or two. This allows the cut end to dry and form a protective callus, which helps prevent rot.
- Plant your cuttings: You have two main options here:
- In soil: Dip the calloused end of your cutting into rooting hormone (if using), then gently insert it into your well-draining potting mix. Make sure at least one node is buried in the soil. You can plant several cuttings in one pot, giving them a little space.
- In water: You can also root these in water. Place the cut end of your vines in a jar or glass of water. Crucially, make sure none of the leaves are submerged in the water. Roots will start to form in a week or two.
Leaf Propagation
Yes, you can even propagate from just a single leaf!
- Gently detach a leaf: Carefully twist or cut a healthy leaf from the stem, ensuring you include a small bit of the stem attached to the leaf base.
- Let it callous: Similar to cuttings, let the end dry for a day or two.
- Plant or place in water:
- In soil: Press the calloused end of the leaf slightly into the surface of your well-draining potting mix. You won’t bury the whole leaf.
- In water: Place the leaf in a container of water, again, ensuring the leaf itself stays dry. You’ll eventually see a tiny root emerge from the stem end, followed by a miniature heart-shaped leaf. This method is slower, and not every leaf will be successful, but it’s a fun experiment.
The “Secret Sauce” (Pro Tips)
Here are a couple of things I’ve learned over the years that make a difference:
- Don’t overwater your soil cuttings: This is the number one killer of succulent cuttings. Water your newly planted cuttings only when the soil feels dry to the touch. It’s better to underwater slightly than to overwater. A light misting can help keep the humidity up initially.
- Bottom heat is your friend: For cuttings planted in soil, placing them on a heat mat designed for seedlings can significantly speed up root development, especially if your home is on the cooler side. It mimics that warm, spring soil.
Aftercare & Troubleshooting
Once you see new growth or roots emerging from your cuttings (about 2-4 weeks for stem cuttings in soil, a bit longer for water or leaf cuttings), it’s time to treat them like small Ceropegias.
- Watering: Continue to water when the soil is dry. As they grow, you can gradually introduce them to more light, but avoid direct, harsh sun initially.
- Transplanting: For water-rooted cuttings, gently transplant them into a pot of well-draining soil once the roots are about an inch long. It’s a shock to go from water to soil, so keep the soil slightly more moist than usual for the first week or so.
- Troubleshooting:
- Rot: If your cuttings turn mushy and black, it’s rot. This is almost always due to overwatering or not letting them callous. Unfortunately, rotten cuttings rarely recover.
- No roots: If you see no action after several weeks, don’t despair! Some cuttings are just slower. Ensure they are in a warm spot and getting adequate light. If they look shriveled, it might mean they’ve dried out too much – try a light misting.
A Little Patience Goes a Long Way
Propagating Ceropegia woodii is a joyful way to connect with your plants. Be patient, observe your cuttings, and don’t be afraid to experiment. Even if a few don’t make it, the ones that do will be a testament to your green thumb. Happy propagating!
Resource:
https://identify.plantnet.org/k-world-flora/species/Ceropegia%20woodii%20Schltr./data