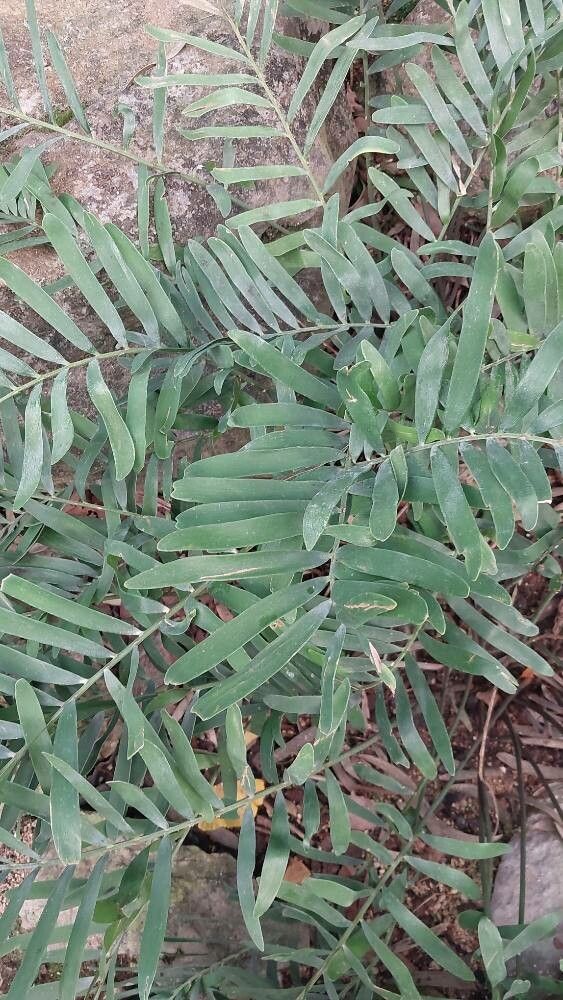
Oh, the Zamia integrifolia! Isn’t it just a marvel? Some folks call them Florida Coonties, and I’ve always had a soft spot for these tough, ancient-looking beauties. With their crisp, evergreen fronds, they bring a touch of the prehistoric to any garden or living space. Propagating them is a wonderfully rewarding way to share that magic. Now, a quick note for the newbies: while not exceptionally difficult, Zamias are a bit more patient than your average houseplant, so a little understanding and steady hand go a long way.
The Best Time to Start
My personal favorite time to tackle Zamia propagation is in the spring or early summer. This is when the plant is actively growing, putting out new shoots and energy. You’re essentially working with a plant that’s already primed and ready to impress with its vitality. Waiting for that natural burst of growth makes a big difference in success rates, trust me.
Supplies You’ll Need
Gathering your tools before you start makes the whole process so much smoother. Here’s what I always have on hand:
- Sharp, clean pruning shears or a very sharp knife. A clean cut is crucial, both for the parent plant and the new cutting.
- Well-draining potting mix. I usually use a blend of roughly 50% peat moss, 25% perlite, and 25% orchid bark. This mimics their natural sandy, gritty habitat.
- Small pots with drainage holes. Terracotta pots are great because they allow the soil to breathe.
- Rooting hormone powder (optional but helpful). This can give your cuttings a little nudge.
- A spray bottle filled with water. For keeping things humid.
- A clear plastic bag or dome. To create a mini-greenhouse effect.
- Gloves. Some plants can be a little irritating to skin, and it’s always good practice.
- A small trowel or dibber. For making holes in the soil.
Propagation Methods
Zamia integrifolia can be propagated primarily through two excellent methods: division and stem cuttings.
Division (Best for Established Plants)
If you have a mature Zamia, you’ll often notice it has started to form offsets, or “pups,” at its base. This is your golden ticket!
- Gently remove the parent plant from its pot. If it’s in the ground, carefully dig around it, trying to preserve as much of the root system as possible.
- Examine the base of the plant. Look for smaller plantlets that have sprouted from the main stem or root system.
- Using your sharp knife or shears, carefully separate a pup from the parent. Make sure the pup has at least a few healthy roots attached to it. If it’s a clean separation, that’s ideal.
- Allow the cut surface to callus over. This is a crucial step to prevent rot. Place the separated pup in a dry, shaded spot for a day or two until the cut end looks dry and sealed.
- Pot up the pup. Plant it in your well-draining potting mix, burying the callused end just enough for it to stand upright. Water lightly.
- Place in a bright, indirect light spot. Keep the soil consistently moist but not soggy.
Stem Cuttings (More of a Challenge, but Rewarding)
This method is a bit more advanced, as Zamias can be slow to root from stem cuttings, but it’s doable!
- Take your cutting. Look for a healthy, mature stem that has several leaves. Using your clean shears, cut a piece about 4-6 inches long. Try to get it from the base of the plant.
- Remove the lower leaves. Strip off the leaves from the bottom half of the cutting. This will be the part going into the soil.
- Apply rooting hormone (optional). Dip the cut end of the stem into rooting hormone powder, tapping off any excess.
- Plant the cutting. Make a hole in your well-draining potting mix with your trowel or dibber. Insert the cut end of the stem into the hole. Firm the soil gently around it.
- Create a humid environment. Water the soil lightly. Then, cover the pot with a clear plastic bag or place it inside a larger clear container to create a ‘greenhouse’ effect.
- Place in bright, indirect light. Keep the planting medium consistently moist but not waterlogged.
The “Secret Sauce” (Pro Tips)
Here are a few little tricks I’ve learned over the years that really boost my success with these beauties:
- Don’t rush the callus. Seriously, this is the number one reason cuttings rot. Give that cut surface enough time to dry and form a protective layer. Patience here prevents a lot of heartache later.
- Bottom heat is your friend. If you’re doing stem cuttings, placing the pot on a gentle seedling heat mat can make a world of difference. It encourages root development from below without overheating the foliage, which Zamias don’t appreciate.
- Water sparingly at first. For both methods, it’s better to err on the side of slightly too dry than too wet, especially in the initial stages before roots are well-established. They can handle a bit of dryness much better than soggy soil.
Aftercare & Troubleshooting
Once you see new growth, woohoo! That’s your sign that roots are forming.
- Gradually introduce to normal conditions. If you used a humidity dome or bag, start by opening it for a few hours each day, slowly increasing the time until you can remove it entirely.
- Watering becomes more regular. Once new leaves unfurl, you can start watering more consistently, but always check that the top inch of soil is dry before watering again.
- Watch for rot. The most common sign of trouble is wilting that doesn’t improve with watering, or a mushy, dark stem base. This usually means too much moisture. If you catch it early, you might be able to cut away the rotted parts and try to let the remaining healthy bit callus and re-root. Sometimes, it’s just a loss, and you learn for next time.
- Pests are rare, but keep an eye out. Mealybugs can occasionally be an issue. A gentle wipe with a cotton swab dipped in rubbing alcohol usually does the trick.
A Encouraging Closing
Propagating a Zamia integrifolia is a journey, not a race. Don’t get discouraged if it takes a little time. Each plant is unique, and watching that first new frond unfurl from a cutting or pup you nurtured feels like pure garden magic. Be patient, enjoy the process, and before you know it, you’ll have more of these fantastic plants to admire! Happy growing!
Resource:
https://identify.plantnet.org/k-world-flora/species/Zamia%20integrifolia%20L.f./data