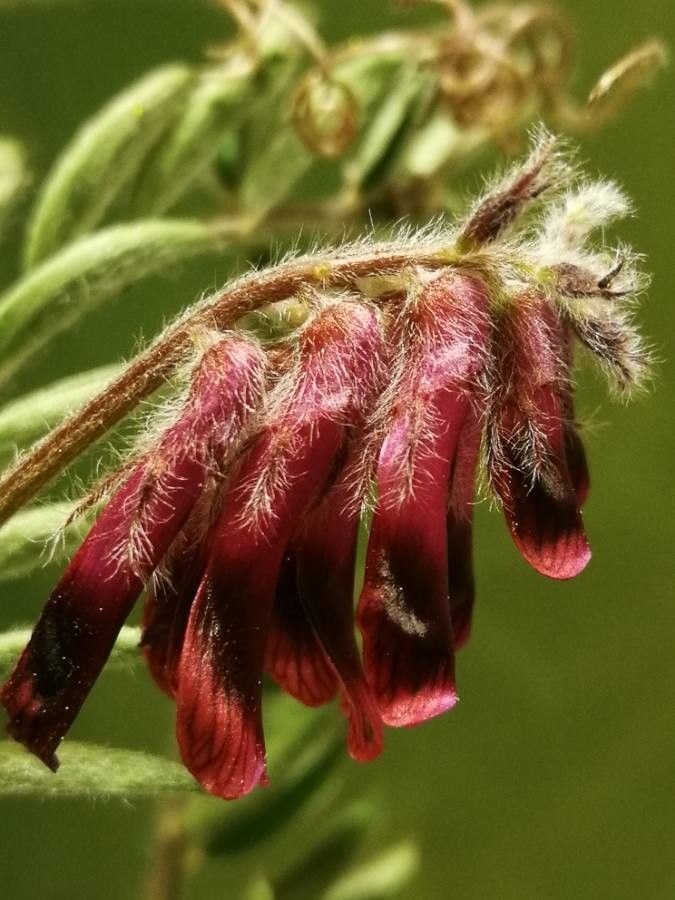
Hello there, fellow garden enthusiasts! Today, we’re diving into the wonderful world of Vicia benghalensis, also known as the Blue Blossom Vetch. If you’ve ever been captivated by its cascades of delicate, purplish-blue flowers, you’re in for a treat! Propagating this beauty is incredibly rewarding, and I’m happy to say, it’s quite beginner-friendly. Seeing those tiny seeds sprout or new cuttings take root feels like a little bit of garden magic, and you get to share that magic by creating more plants for your own garden or to gift to friends.
The Best Time to Start
For Vicia benghalensis, timing is key to giving your new plants the best start. The ideal time to propagate is in the spring, as soon as the danger of frost has passed. This is when the plant is naturally gearing up for growth, and the warmer temperatures and increasing daylight hours are perfect for encouraging roots and new shoots. If you’re working with seeds, sowing them directly outdoors after the last frost is usually the simplest and most successful route. For cuttings, spring offers vigorous new growth that’s most receptive to rooting.
Supplies You’ll Need
Gathering your supplies upfront makes the whole process smoother. Here’s what I usually have on hand:
- Clean, sharp pruning shears or scissors: Essential for making clean cuts on cuttings.
- Sterilized seedling trays or small pots: Prevents the spread of diseases.
- A good quality seed-starting mix or a well-draining potting mix: Vicia benghalensis doesn’t like soggy feet!
- Perlite or vermiculite: For improving drainage and aeration. I often mix these into my potting soil.
- Watering can with a fine rose or spray bottle: For gentle watering.
- Rooting hormone (optional but helpful): Especially valuable if you’re propagating from cuttings.
- Labels and a marker: So you don’t forget what you planted where!
- A warm, bright location: Such as a sunny windowsill or a propagation mat.
Propagation Methods
There are a couple of straightforward ways to get more Vicia benghalensis plants.
1. From Seed (The Easiest Way!)
This is the most common and often the most successful method for Vicia benghalensis.
- Collect Seeds: If you have an existing plant, allow some of the seed pods to mature and dry on the plant. You’ll know they’re ready when they start to shrivel. Gently snap open the pods to reveal the small, hard seeds.
- Soaking (Optional but Recommended): Vicia seeds have a hard coat, and soaking them in warm water for 12-24 hours can help break dormancy and speed up germination. You’ll see the seeds swell slightly if they’ve absorbed water.
- Sowing: Fill your seedling trays or pots with your seed-starting mix. Plant the seeds about 1/2 inch deep. Space them a few inches apart if you’re sowing directly into larger pots, or sow 1-2 seeds per cell in trays.
- Watering: Gently water the soil until it’s moist but not waterlogged.
- Location: Place the trays in a warm spot, receiving bright, indirect light.
- Germination: You should see sprouts emerge within 1-3 weeks.
2. From Stem Cuttings (A Bit More Advanced)
This method works best when the plant is actively growing in spring.
- Take Cuttings: Look for current season’s growth that is halfway between soft and woody. Using your clean pruning shears, take cuttings about 4-6 inches long. Make the cut just below a leaf node (where a leaf attaches to the stem).
- Prepare the Cuttings: Remove the lower leaves from the cutting, leaving just a couple of pairs at the top. This prevents them from rotting in the soil.
- Apply Rooting Hormone: If you’re using rooting hormone, dip the cut end of the stem into the powder or gel. Tap off any excess.
- Potting: Fill small pots or trays with your well-draining potting mix, perhaps with added perlite. Make a small hole in the center of the soil with a pencil or your finger. Insert the cut end of the stem into the hole, ensuring it’s firm.
- Watering: Water gently to settle the soil around the cutting.
- Environment: Cover the pot with a clear plastic bag or dome to create a humid environment. This is crucial for cuttings. Place them in a warm, bright location, out of direct sunlight.
The “Secret Sauce” (Pro Tips)
After years of trial and error, I’ve picked up a few tricks that seem to make all the difference.
- Bottom Heat for Cuttings: If you’re struggling with cuttings, using a propagation mat or placing your pots on top of a radiator (ensure it’s not too hot!) can dramatically increase rooting success. This gentle warmth encourages root development from below while keeping the foliage healthy.
- Don’t Overwater Seedlings: It might sound counterintuitive, but overwatering young seedlings is a common killer. They are delicate and prone to “damping off,” a fungal disease that makes them collapse at the soil line. Let the surface of the soil dry out slightly between waterings. A finger poked into the soil is your best guide.
- Scarify Tough Seeds: For any seeds that seem particularly stubborn and don’t swell after soaking, try gently scarifying them. This just means lightly nicking or rubbing the seed coat with sandpaper or a nail file. Be careful not to damage the embryo inside, just break the hard outer shell a bit.
Aftercare & Troubleshooting
Once your seeds have germinated or your cuttings have rooted, it’s time for a little TLC.
- Once roots appear on cuttings (you might see roots peeking out of drainage holes or feel a gentle tug when you lightly pull), you can remove the plastic cover. Gradually acclimate them to normal humidity. Water consistently, letting the top inch of soil dry out.
- Transplanting Seedlings: When your seedlings have a few sets of true leaves and are large enough to handle, you can carefully transplant them into larger individual pots or into their final garden location. Handle them by their leaves, not their delicate stems.
- Common Signs of Failure: The most frequent issue is rot, which is almost always caused by overwatering or poor drainage. If you see stems turning mushy and black at the base, or seedlings wilting despite moist soil, it’s a sign of too much moisture and likely fungal issues. If your cuttings just shrivel up and die, they might have dried out too quickly or didn’t get enough humidity.
A Little Patience Goes a Long Way
And there you have it! Propagating Vicia benghalensis is a deeply satisfying way to expand your garden. Don’t get discouraged if your first attempt isn’t perfect. Gardening is a journey of learning, and each experience teaches you something new. Be patient with your little green charges, give them the right environment, and celebrate every new sprout and root. Happy propagating, and enjoy those beautiful blue blossoms!
Resource:
https://identify.plantnet.org/k-world-flora/species/Vicia%20benghalensis%20L./data