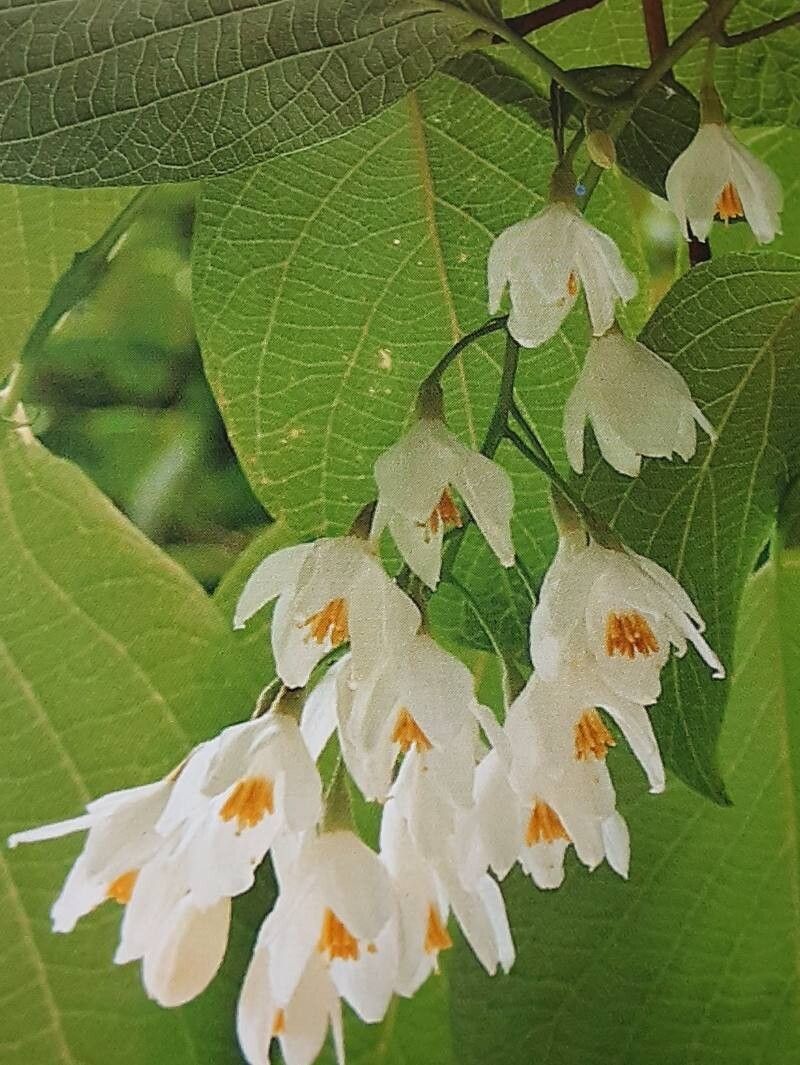
Oh, Styrax obassia! You’ve got great taste. I truly adore this shrub. Its fragrant, bell-shaped white flowers in late spring are simply a delight, and those lovely, large, velvety leaves? Just stunning. It’s like walking through your garden and finding a sweet, scented hug. And the best part? Bringing more of this beauty into your life by propagating it yourself is incredibly satisfying. While it’s not the absolute easiest to get going from cuttings, with a little patience and the right approach, it’s definitely achievable, even for those newer to the propagation game.
The Best Time to Start
My favorite time to begin working with Styrax obassia is in late spring to early summer. This is when the plant is actively growing, and its new, semi-hardwood stems are perfect for taking cuttings. You want shoots that have started to firm up a bit but are still flexible. Trying too early, when everything is super soft and green, often leads to rot. Too late, and the stems might be too woody and reluctant to root. Aim for that sweet spot of vigorous growth.
Supplies You’ll Need
Here’s what I always have on hand when I’m propagating:
- Sharp Pruning Shears or a Sharp Knife: For clean cuts, which are crucial.
- Rooting Hormone: I prefer a powder or gel, but liquid works too. It really helps give the cuttings a good start.
- A Well-Draining Potting Mix: A blend of equal parts peat moss or coco coir and perlite or coarse sand is my go-to. You want something airy that won’t hold too much moisture.
- Small Pots or Propagation Trays: Clean ones are a must to prevent disease.
- Plastic Bags or a Propagation Dome: To create a humid environment around the cuttings.
- Labeling Sticks and a Permanent Marker: To keep track of what you’ve planted and when.
- A Watering Can with a Fine Rose: For gentle watering.
- Optional: Bottom Heat Mat: This can significantly speed up rooting, especially in cooler conditions.
Propagation Methods
For Styrax obassia, stem cuttings are generally the most successful and accessible method.
Stem Cuttings:
- Gather Your Cuttings: On a cool morning, select healthy, vigorous shoots from your established plant. Look for stems that are about 4-6 inches long and have just started to harden off – they’ll snap with a slight resistance, rather than just bending.
- Prepare the Cuttings: Using your clean shears or knife, remove the lower leaves. If the cutting is particularly long, you can pinch off the top few leaves or even cut them in half to reduce water loss. Leave 2-4 leaves at the top.
- Apply Rooting Hormone: Dip the cut end of each cutting into rooting hormone, tapping off any excess. Make sure the hormone covers about 1-2 inches of the base.
- Plant the Cuttings: Fill your pots or trays with your prepared, slightly moistened potting mix. Use a pencil or your finger to make a hole in the soil. Gently insert the treated end of the cutting into the hole, ensuring the rooting hormone stays in place. Firm the soil gently around the base of the cutting.
- Water Gently: Water the soil thoroughly but gently so it settles around the cuttings.
- Create Humidity: Cover the pots with a plastic bag (supported by stakes so it doesn’t touch the leaves) or place them under a propagation dome. This creates a mini-greenhouse.
- Provide Light and Warmth: Place the pots in a bright spot that doesn’t receive direct, harsh sunlight. If you have a bottom heat mat, place the pots on it. This warmth from below is a real game-changer for rooting.
The “Secret Sauce” (Pro Tips)
Here are a few things I’ve learned over the years that really make a difference:
- You absolutely must keep the leaves from touching the water inside the humidity dome or plastic bag. If they sit in condensation, they’ll quickly rot, and that rot can spread to the cutting itself. Give them a little breathing room!
- Don’t be afraid to be a bit brutal with your cuttings. If a stem has a lot of big leaves, even after removing the lower ones, those remaining large leaves are still going to lose a lot of water. I’ll often cut larger leaves in half horizontally to reduce their surface area. It looks a bit odd, but it drastically improves the cutting’s chances.
- Sterilize everything! I can’t stress this enough. Before you start, and between batches if you’re doing a lot, wipe down your tools, pots, and even your hands. A simple rinse with diluted bleach or rubbing alcohol makes a world of difference in preventing fungal issues.
Aftercare & Troubleshooting
Once your cuttings are potted, check them every day or two. The soil should remain consistently moist but not waterlogged. If the soil surface looks dry, give them a gentle watering. You should start to see signs of rooting in 4-8 weeks, sometimes longer. You’ll know they’re rooting when you give a very gentle tug and feel resistance, or when you see new leaf growth emerging from the top.
The biggest enemy here is rot. If you notice your cuttings turning mushy, black, or developing fuzzy mold, it’s usually a sign of too much moisture combined with poor air circulation. If you see this, remove the affected cutting immediately and try to improve ventilation. Sometimes, the soil mix might be too heavy. If you’re struggling with rot, try a lighter mix next time or ensure your pots have good drainage holes.
A Encouraging Closing
Propagating Styrax obassia is a journey, not a race. Be patient with yourself and your new little plants. Enjoy the process of nurturing them from a simple cutting into a thriving shrub. You’ve got this!
Resource:
https://identify.plantnet.org/k-world-flora/species/Styrax%20obassia%20Siebold%20&%20Zucc./data